What to Do When Your Bread Won’t Rise: Simple Fixes for Perfectly Fluffy Loaves
Struggling with dough that won't rise? Don't worry—there are several simple fixes to help you get that perfect loaf. From ensuring your yeast is fresh to creating the right environment for fermentation, this guide will walk you through the steps to troubleshoot and get your bread rising beautifully every time.

There's nothing more disappointing than spending time preparing dough, only to find that your bread refuses to rise. Whether you're new to bread-making or a seasoned pro, flat, dense loaves can happen for a variety of reasons. Luckily, there are several simple fixes you can try to ensure your bread rises perfectly every time. Here’s how to troubleshoot and save your dough.
1. Check the Freshness of Your Yeast

The most common cause of bread not rising is inactive or expired yeast. Yeast is a living organism that needs to be fresh to work properly. If your yeast is too old, it won't have the power to ferment your dough and cause it to rise.
- Tip: To check if your yeast is still good, activate it by dissolving a small amount in warm water (about 100°F or 37°C) with a pinch of sugar. If the mixture bubbles and foams within 5 to 10 minutes, your yeast is alive and well. If not, it’s time to grab a new package.
- Bonus Tip: Always store your yeast in a cool, dry place, preferably in the refrigerator after opening. Using fresh yeast will make all the difference in your bread’s rise.
2. Make Sure Your Dough Is in the Right Environment
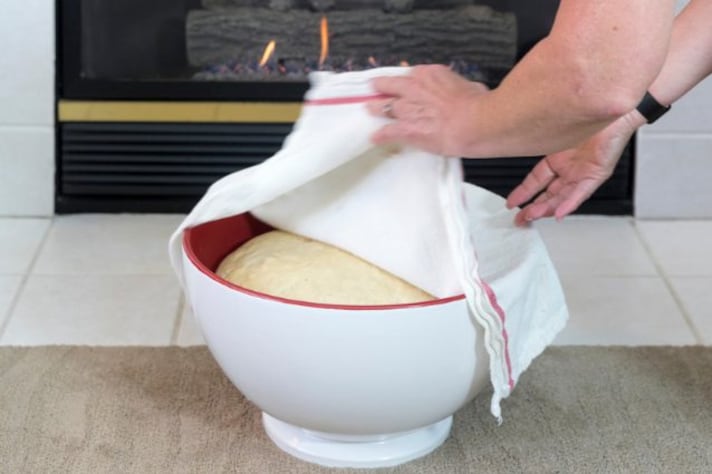
Yeast thrives in a warm, draft-free environment. If your kitchen is too cold, your dough might struggle to rise. The ideal temperature for yeast fermentation is between 75°F and 85°F (24°C to 29°C). If your dough is too cold, it will take much longer to rise—or it might not rise at all.
- Tip: If your kitchen is chilly, try placing the dough in a warm, slightly humid environment. You can set your bowl on top of your oven with the light on, or put it in the microwave with a cup of hot water to create a cozy steam bath. Just make sure the temperature doesn’t get too hot, as yeast can die in temperatures above 120°F (49°C).
- Why It Works: A warm environment activates the yeast, encouraging it to produce carbon dioxide, which causes the dough to rise.
3. Knead the Dough Properly

Kneading your dough develops the gluten network, which is essential for trapping the air produced by the yeast. If you haven’t kneaded your dough long enough, it might not have the elasticity needed to rise properly. On the other hand, over-kneading can result in dense, tough bread.
- Tip: Knead your dough for 8 to 10 minutes until it’s smooth and elastic. If you’re unsure, try the “windowpane test”: Stretch a small piece of dough between your fingers. If it forms a thin, translucent membrane without tearing, it’s ready to rise.
- Why It Works: Proper kneading helps distribute the yeast evenly throughout the dough and strengthens the gluten network, allowing the dough to trap air and rise effectively.
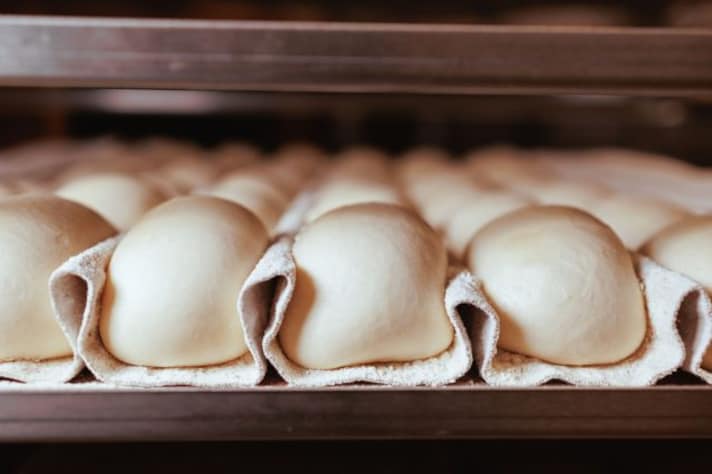
4. Don’t Overwork the Dough During Shaping

If you’ve overworked the dough during the shaping process, you can deflate the air bubbles that were formed during fermentation, preventing the dough from rising properly during the second proof. Gently handling the dough will preserve these bubbles and ensure a lighter loaf.
- Tip: When shaping your dough, handle it gently and don’t push out all the air. Lightly form it into the desired shape, being careful not to deflate the dough entirely.
- Bonus Tip: Allow your shaped dough to rise for the second time (proofing) in a warm place. The dough should double in size during this phase, so give it time to expand before baking.
5. Consider the Flour Type

Sometimes, your dough might not rise as expected due to the type of flour you're using. Different flours absorb water differently, and the protein content can affect the rise. Bread flour, which has higher protein, is best for a good rise, while all-purpose flour can sometimes result in a denser loaf.
- Tip: Use bread flour if possible, as it contains more gluten-forming proteins that support yeast and help your bread rise. If you don’t have bread flour, you can mix all-purpose flour with a bit of vital wheat gluten to improve the rise.
- Why It Works: Higher gluten content helps trap the carbon dioxide produced by the yeast, allowing the dough to rise better and maintain its shape.
6. Give Your Dough Enough Time to Rise
Sometimes, the problem isn’t the ingredients or the technique—it’s simply rushing the process. Yeast works slowly, and your dough needs enough time to rise. If you don’t give it enough time, you’ll end up with a dense, flat loaf.
- Tip: Don’t be afraid to give your dough plenty of time to rise. The first rise (bulk fermentation) can take anywhere from 1 to 2 hours, depending on the temperature and humidity. The second rise (proofing) usually takes 30 minutes to 1 hour.
- Why It Works: Allowing your dough to rise slowly ensures the yeast has enough time to work and creates the air pockets needed for a light, airy loaf.
Conclusion: Baking Perfect Bread Starts with Patience and Attention
When your bread won’t rise, it can feel like a setback, but there’s no need to panic. By checking the freshness of your yeast, creating the right environment for your dough, and using proper kneading and shaping techniques, you can fix the problem and create the perfect loaf. Remember that bread-making is as much about patience as it is about technique, so give yourself the time and space needed for success. With these tips, you’ll be baking fluffy, delicious bread in no time.

;Resize,width=712;)
;Resize,width=712;)
;Resize,width=767;)
