
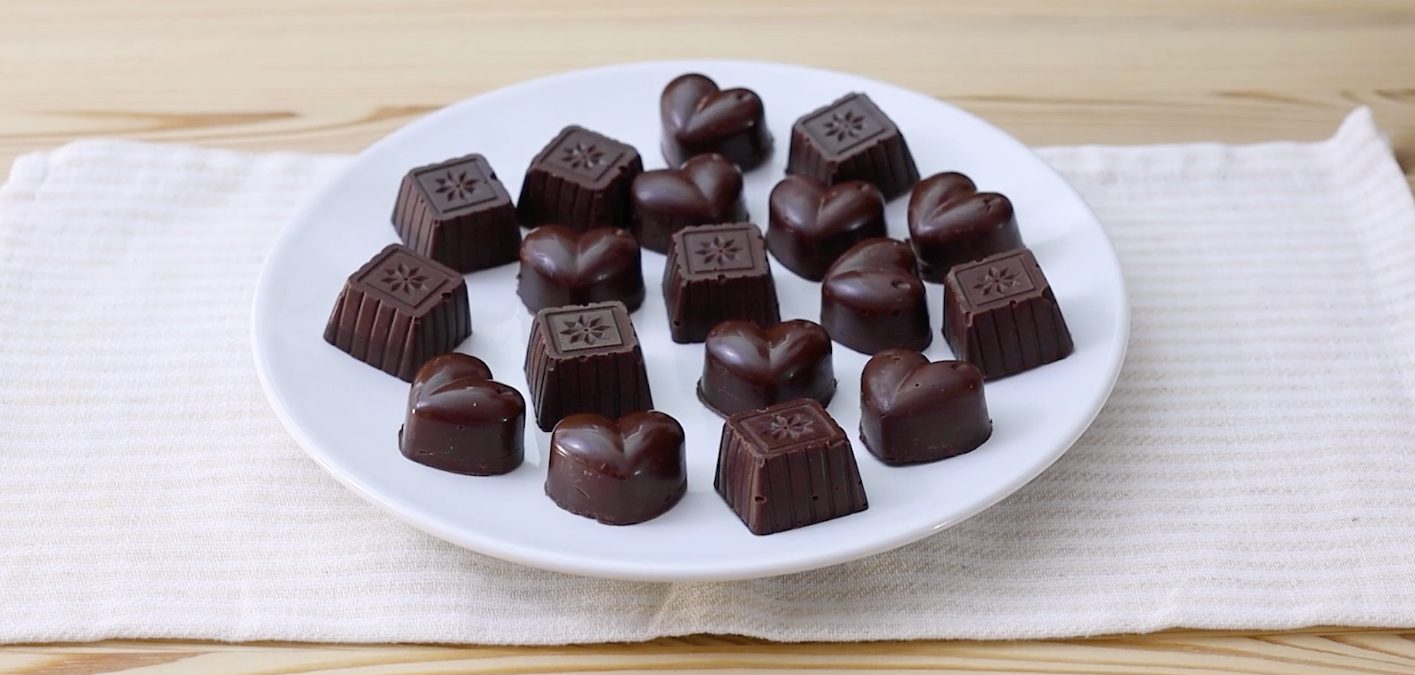
Super Easy 3-Ingredient Homemade Filled Chocolates Recipe
;Resize,width=742;)
If there’s one thing that makes the world go round, it’s Homemade Chocolates. And today, we’ve got the secret to the simplest yet most decadent batch of chocolates you’ll ever make. This recipe provides a smooth, melt-in-your-mouth dark chocolate with crunchy hazelnuts tucked inside.
As for the method? Think melt, mix, and mold, easy peasy right? You won’t need to be a pastry chef to whip these chocolates up. Whether you're craving a sweet treat after dinner, something to impress friends, or just indulging in some me-time, this chocolate recipe will become your go-to favorite.
The Origins of Chocolate and Hazelnuts
Let’s start with chocolate, a true marvel of the culinary world. Chocolate, in various forms, has been around for centuries, dating back to the Mayan and Aztec civilizations. While ancient people used it as a drink (often mixed with spices), it’s evolved into the sweet, creamy bars and truffles we know and love today.
As for hazelnuts, they’ve been a popular nut for centuries, particularly in Europe. Even the ancient Greeks used hazelnuts in medicinal remedies. The delightful nut has long been paired with chocolate, making this combo a classic for good reason. If you’ve ever had Nutella (who hasn’t?), you know how magic happens when these two ingredients meet.
Pro Tips for the Best Homemade Chocolate
- Ensure you use high-quality chocolate, because the richer the chocolate, the better the chocolates will taste.
- Always melt your chocolate gently. Too much heat can cause it to seize up. Stir often, and take your time.
- Softened butter blends better into the chocolate, making your chocolates extra smooth.
- Silicone molds are your best friend here. They’re non-stick and make removing your chocolates a breeze.
- Toast your hazelnuts properly as this adds a fantastic crunch and depth of flavor. Don’t rush this step.
- If you love a salty-sweet combo, sprinkle a pinch of flaky sea salt on top of the chocolates before refrigerating.
- While hazelnuts are a classic, feel free to use other filling, such as almonds or caramel.
What's The Best Chocolate to Use for These?
For the best results, use high-quality dark chocolate with at least 60-70% cocoa content. A good couverture chocolate, which has a higher cocoa butter content, will melt smoothly and create a glossy, snappy texture. Avoid chocolate chips, as they contain stabilizers that prevent proper melting. Opt for chocolate bars or professional baking chocolate for the best consistency and flavor.
How Do I Get the Perfect Shape For My Chocolates?
Make sure you’re using high-quality silicone molds to ensure the best results. Fill each mold evenly and tap it gently on the counter to remove any air bubbles. You’ll get those perfectly formed little chocolate gems.
Can I Make These Chocolates Without Hazelnuts?
Yes, you can! You can swap the hazelnuts for other nuts like almonds or walnuts, or even try dried fruit like cranberries. The possibilities are endless.
How Long do Homemade Chocolates Last?
If stored properly, these chocolates can last for up to two weeks in an airtight container. Just keep them in a cool, dry place to prevent melting.
How Can I Make my Chocolates More Indulgent?
For an extra indulgent treat, try adding a drizzle of caramel or a layer of peanut butter inside the chocolate before sealing it up. It’ll take your homemade chocolates to the next level.
Ingredients
How to Make Homemade Chocolates
;Resize,width=712;)
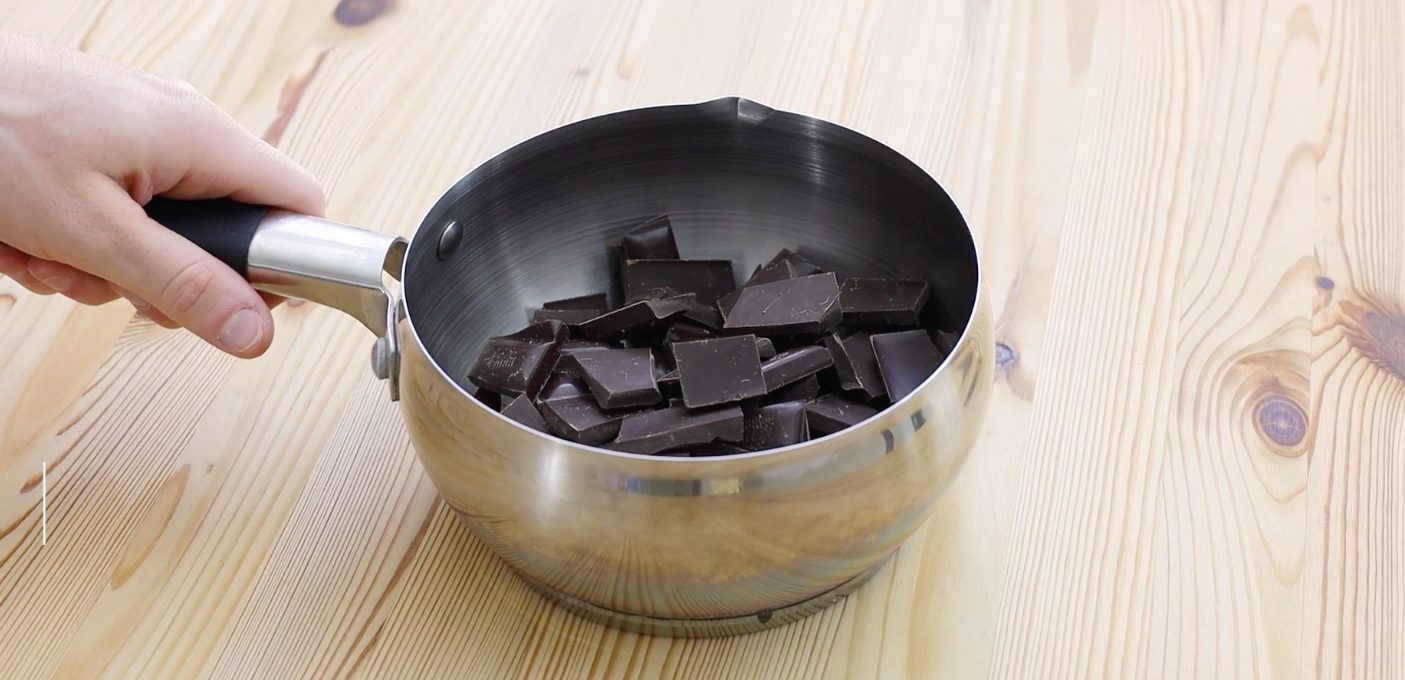
Start by placing your dark chocolate in a saucepan
Start by placing your dark chocolate in a saucepan
;Resize,width=712;)
Place the pan over low heat, stirring it gently with a spoon until it melts completely.
Place the pan over low heat, stirring it gently with a spoon until it melts completely.
;Resize,width=712;)
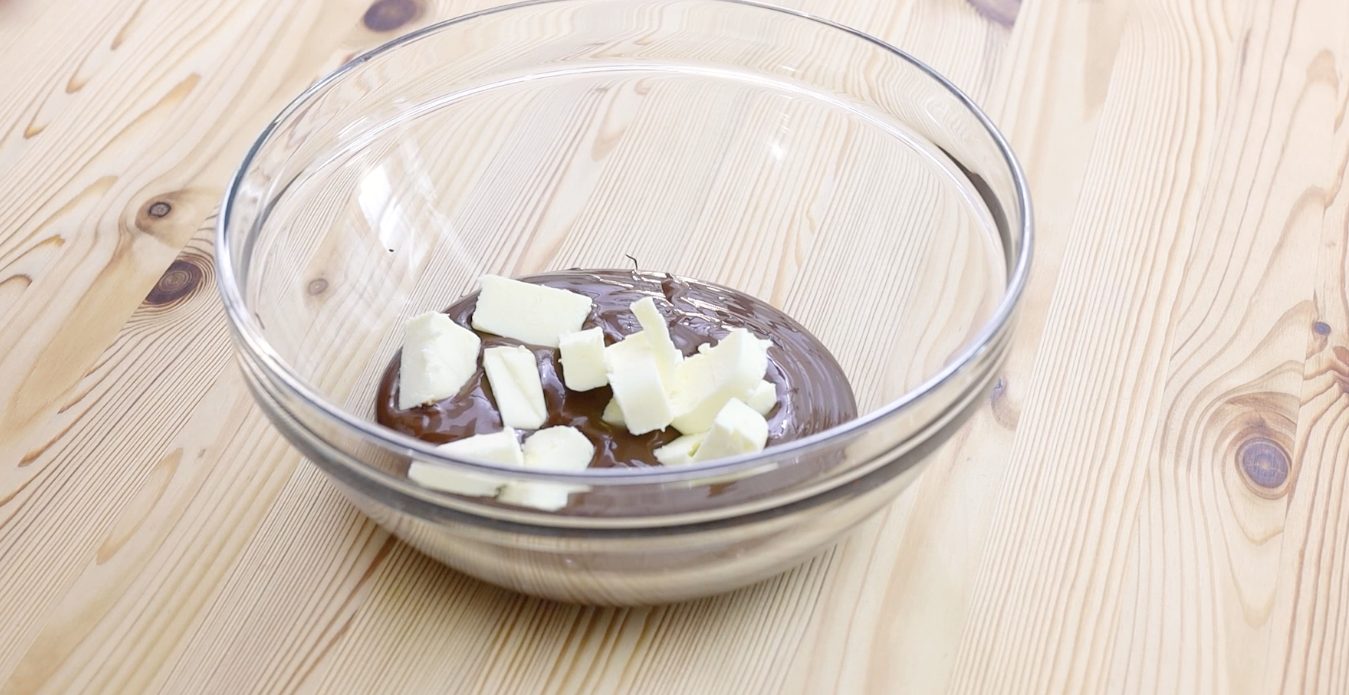
Once the chocolate is fully melted, pour the hot chocolate into a large bowl. Then, add the butter and keep stirring until it blends in and makes a smooth, glossy mixture.
Once the chocolate is fully melted, pour the hot chocolate into a large bowl. Then, add the butter and keep stirring until it blends in and makes a smooth, glossy mixture.
;Resize,width=712;)
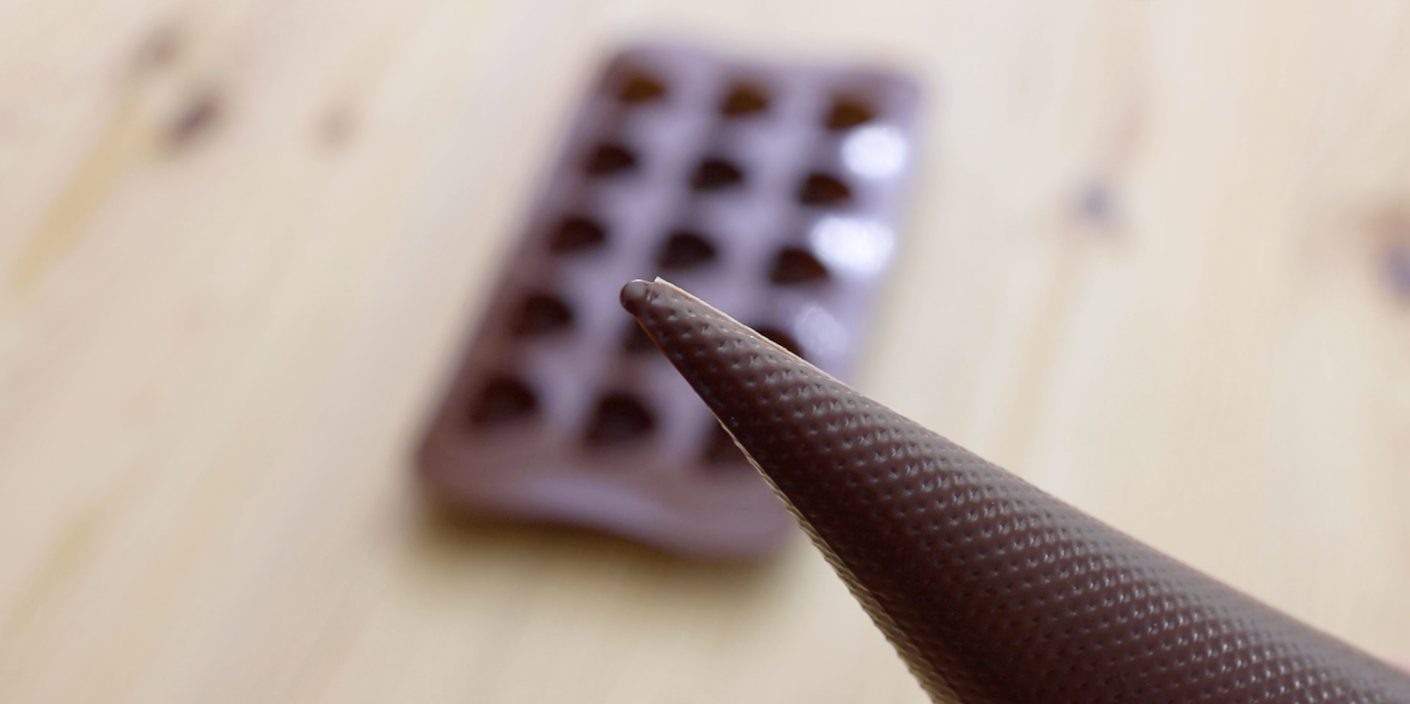
Pour the melted chocolate into a piping bag and cut a small tip off the end of the bag.
Pour the melted chocolate into a piping bag and cut a small tip off the end of the bag.
;Resize,width=712;)
Pipe the chocolate halfway into the silicone molds.
Pipe the chocolate halfway into the silicone molds.
;Resize,width=712;)
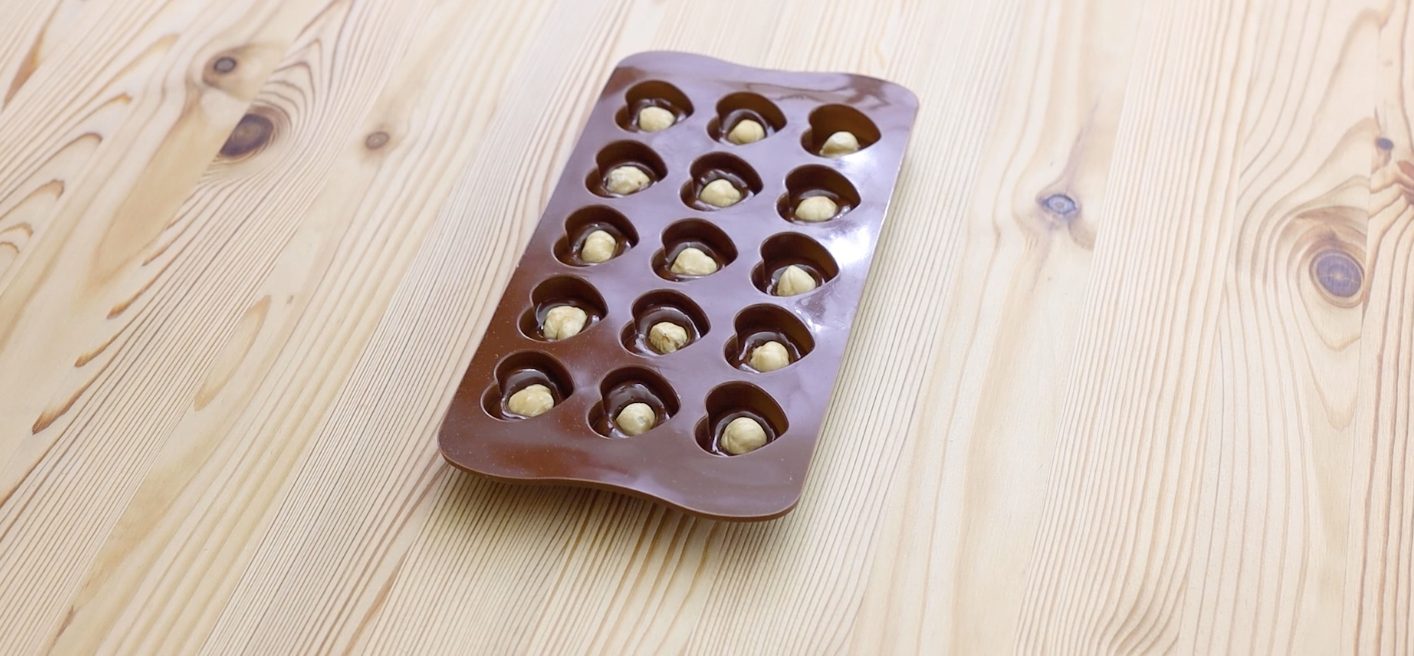
Drop a toasted hazelnut right in the center of each mold.
Drop a toasted hazelnut right in the center of each mold.
;Resize,width=712;)
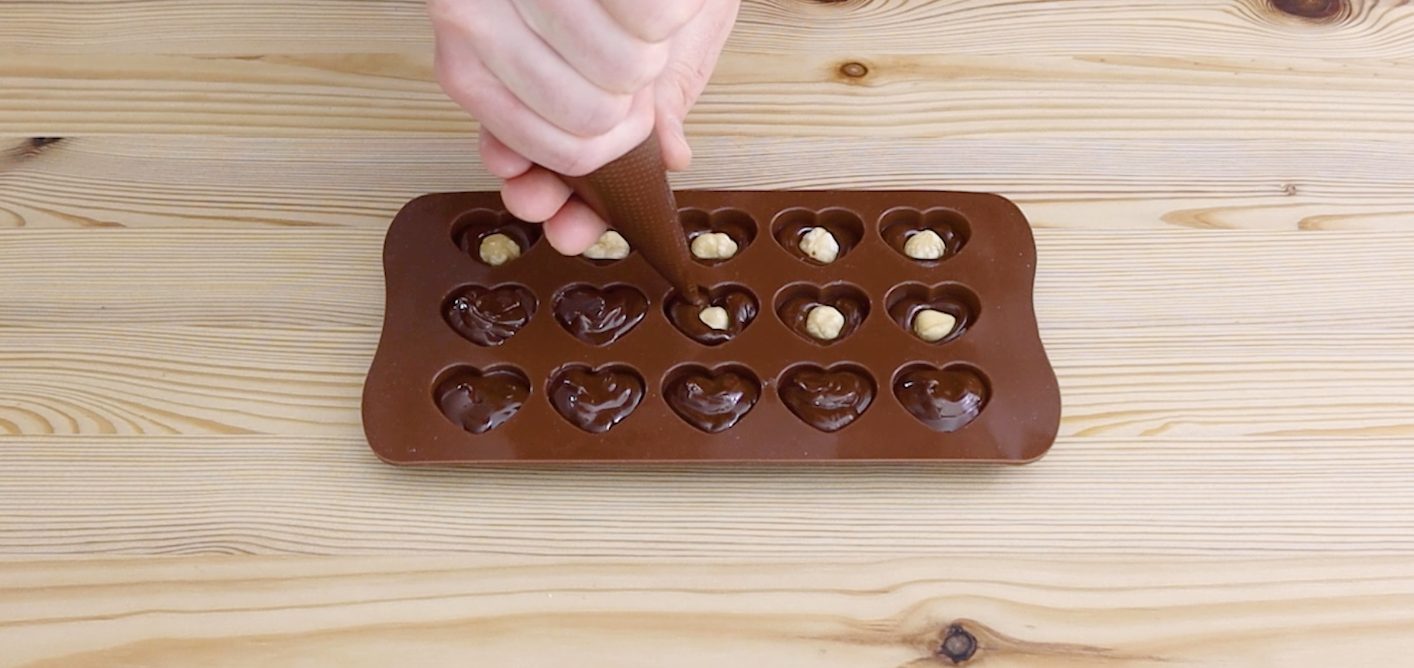
Pipe more chocolate over the hazelnuts to fill the molds to the top.
Pipe more chocolate over the hazelnuts to fill the molds to the top.
;Resize,width=712;)
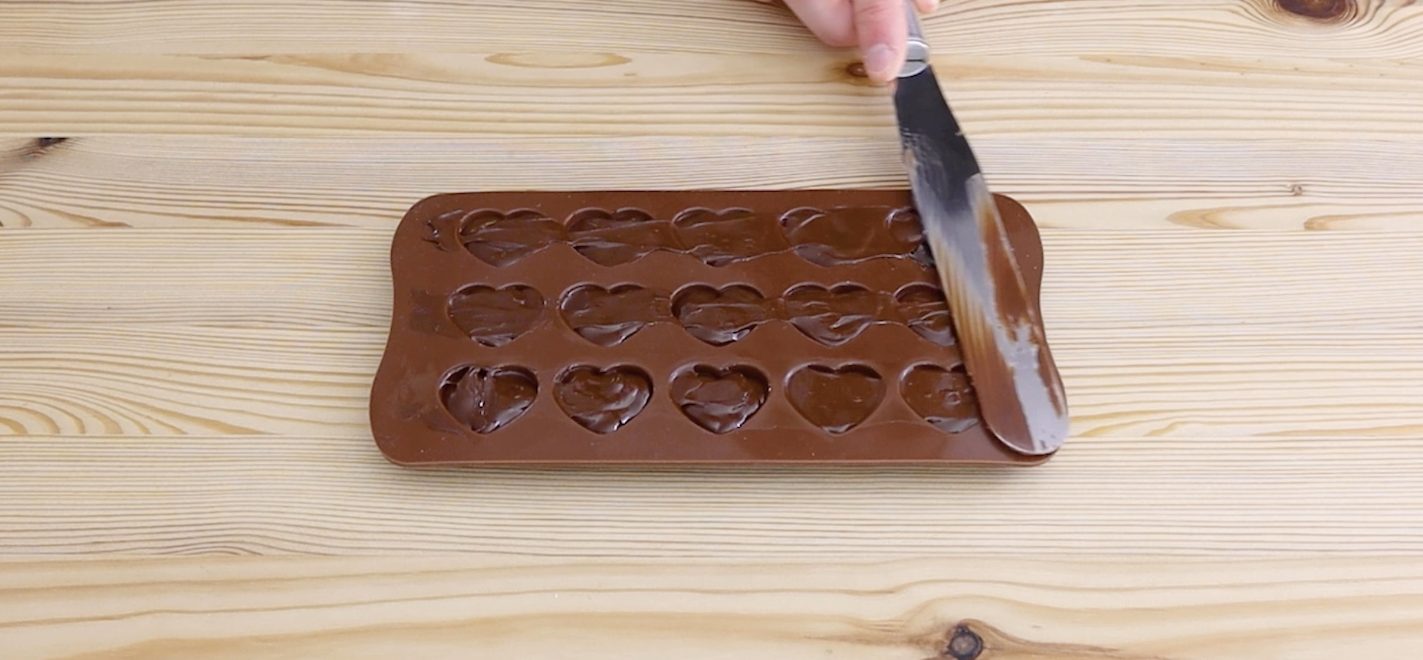
Use a flat spatula to level the chocolate and remove any excess.
Use a flat spatula to level the chocolate and remove any excess.
;Resize,width=712;)
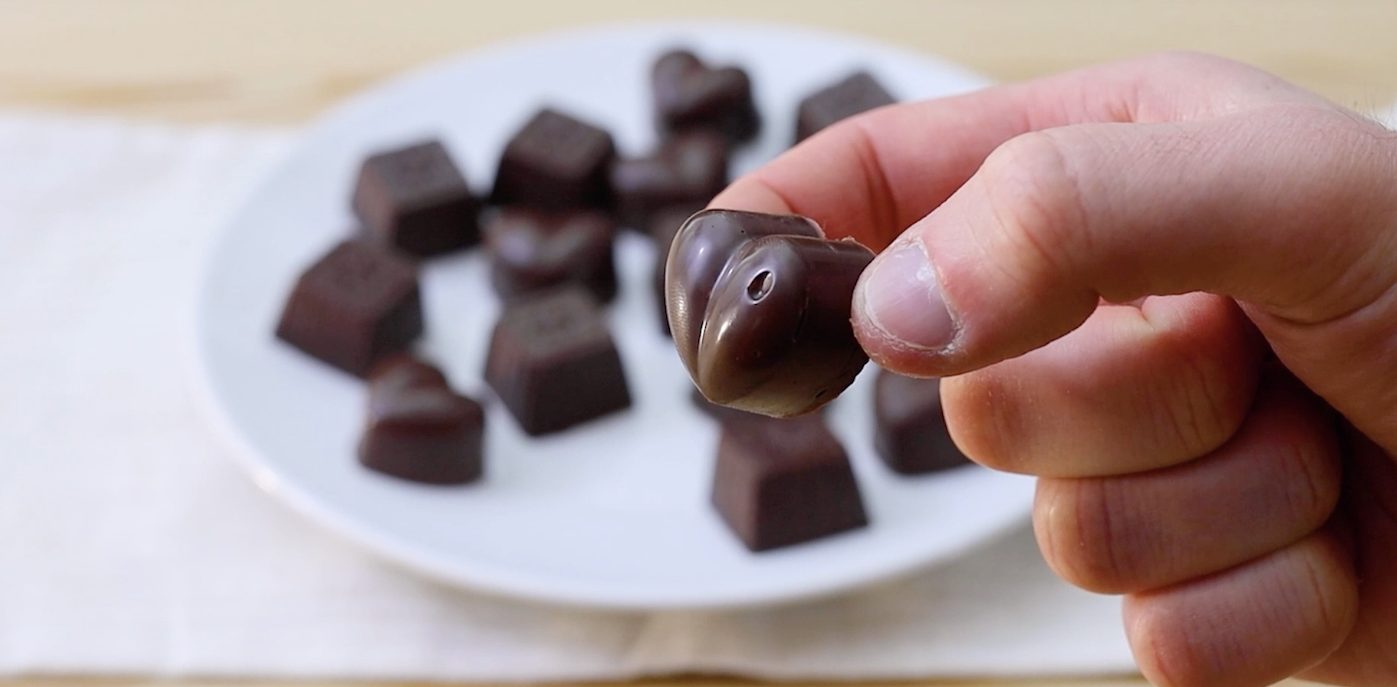
Place the molds in the fridge and let the chocolates set for at least four hours. Once they’re ready, pop them out of the molds and enjoy your homemade chocolates.
Place the molds in the fridge and let the chocolates set for at least four hours. Once they’re ready, pop them out of the molds and enjoy your homemade chocolates.
;Resize,width=712;)


;Resize,width=767;)
