
Burnt Basque Cheesecake: Here’s How to Prepare the Soft and Delicious Cake!
;Resize,width=742;)
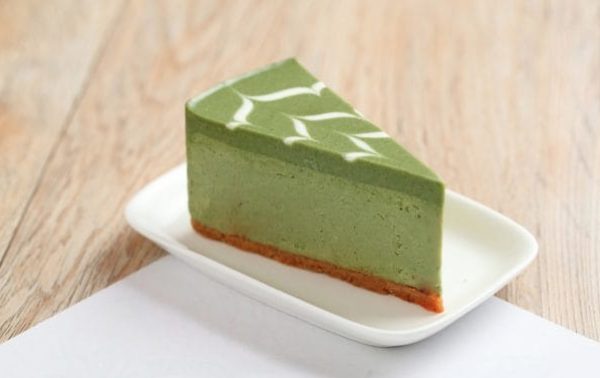
When it comes to desserts that deliver maximum flavor with minimal effort, Burnt Basque Cheesecake takes the crown. Unlike traditional cheesecakes, this one skips the cookie crust and embraces an intentionally burnt, caramelized top with a custard-like center. It’s a dessert that doesn’t need perfection, it thrives on a little imperfection.
With simple ingredients, a simple mixing process, and no fussy water baths required, you’ll be slicing into velvety cake in no time.
What is Basque Cheesecake?
Basque cheesecake hails from the charming city of San Sebastián, Spain, where it was first created at the famous La Viña restaurant. Unlike the traditional American cheesecake, which requires precise baking techniques to avoid cracks, this Spanish dessert embraces a golden top with an almost molten center. The secret? A high oven temperature that gives it its signature look and flavor.
Despite its slightly burnt appearance, the deep caramelization enhances its flavor, adding a subtle sharpness that balances the rich, creamy filling.
Pro Tips for the Best Basque Cheesecake
- Use room temperature ingredients to ensure a smooth, lump-free batter.
- Line the pan well. Overlapping parchment paper prevents leaks and makes it easy to lift the cheesecake out.
- High heat is Key. The high baking temperature gives the cheesecake its signature burnt top.
- While you can eat it warm, chilling your cake for a few hours enhances its flavor and texture.
- Don’t worry about cracks in your cake. This cheesecake is meant to have an imperfect, rustic look.
What's The Difference Between San Sebastian And Regular Cheesecake?
San Sebastian cheesecake is baked at a high temperature, which creates a deeply caramelized, "burnt" top and a soft, custard-like center. It does not have a crust and is intentionally rustic and cracked. In contrast, regular cheesecake (like New York-style) is typically baked at a lower temperature, resulting in a smooth, dense, and creamy texture with a more uniform appearance. Regular cheesecakes also often have a cookie or graham cracker crust, while San Sebastian cheesecake is baked directly in the pan without one.
Why is This Cheesecake so Popular in Istanbul?
San Sebastian cheesecake has become hugely popular in Istanbul due to its rich, creamy texture and caramelized flavor, which perfectly aligns with Turkish dessert preferences. Turkey has a deep love for smooth, indulgent sweets like Kazandibi and Güllaç, making this cheesecake a natural favorite. Additionally, Istanbul’s café culture thrives on aesthetic and Instagram-worthy desserts, and the cheesecake’s rustic, burnt look makes it highly shareable. Many trendy cafés and bakeries have embraced it, often serving it with Turkish tea or coffee, further cementing its place in Istanbul’s dessert scene.
Can I Freeze Basque Cheesecake?
Yes! Basque cheesecake freezes beautifully. Wrap it tightly in plastic wrap and store it in an airtight container for up to two months. When ready to enjoy, thaw it in the refrigerator overnight before serving.
Why is Basque Cheesecake Burnt on Top?
The high oven temperature caramelizes part of the cake, creating a deep, almost burnt flavor that adds complexity. Unlike traditional cheesecakes, the goal here is to achieve a slightly charred top.
Why Didn't My Cheesecake Get The Burnt Top?
If your San Sebastian cheesecake didn’t develop its signature burnt top, it’s likely due to a low baking temperature or not enough baking time. The cheesecake needs to be baked at a high temperature (200-210°C / 390-410°F) to properly caramelize the surface. If your oven runs cool, try increasing the temperature slightly or placing the cheesecake on a higher rack. Additionally, using dark-colored baking pans can help absorb more heat and enhance browning.
Why is My Cheesecake so Runny?
If your San Sebastian cheesecake is too runny, it’s likely due to underbaking or not letting it cool properly. The cheesecake should have a slightly jiggly center when removed from the oven, but if it’s too liquid, it may need more time to bake. Another reason could be using low-fat cream cheese, which affects the texture. Also, skipping the chilling step (at least 4-6 hours in the fridge) can prevent it from setting properly.
Can I Add Any Flavoring to This Cheesecake?
Yes, you can add flavorings to San Sebastian cheesecake while keeping its creamy texture intact. Popular options include vanilla extract, citrus zest (lemon or orange), cinnamon, or even a splash of liqueur like rum or Grand Marnier. For a richer twist, you can mix in espresso powder, melted chocolate, or caramel. However, avoid adding too much liquid, as it can affect the texture—stick to concentrated flavors for the best results!
Can I Make This Cheesecake Without Flour?
Absolutely! Some versions of Basque cheesecake omit flour entirely, resulting in an even silkier texture. If you prefer a firmer consistency, keep the flour in the recipe.
Do I Need a Water Bath for This Cheesecake?
Nope! One of the best things about Basque cheesecake is that it doesn’t require a water bath. The high heat does all the magic, eliminating the need for steam.
What Type of Pan Should I Use?
A springform pan is ideal for easy removal. Make sure to line it well with parchment paper to prevent sticking and leaking.
Can I Make Individual Portions Instead of One Large Cheesecake?
Yes! You can divide the batter into smaller ramekins and adjust the baking time accordingly. Keep an eye on them, as they will bake faster than a full-sized cake.
What Can I Serve with Basque Cheesecake?
While you can enjoy this cake on its own, you can serve it with fresh berries, a drizzle of honey, or a dollop of whipped cream.
How Do I Know When It’s Done?
The center should still be slightly jiggly when you remove it from the oven. As it cools, it will firm up while maintaining a creamy texture.
How to Store San Sebastian Cheesecake
To store, keep it covered in the refrigerator for up to 3-4 days. Use plastic wrap or an airtight container to prevent it from drying out or absorbing odors.
Ingredients
How to Make Basque Cheesecake
;Resize,width=712;)
Preheat your oven to 200°C/400°F. Grease an 8-inch springform pan and line it with two overlapping pieces of parchment paper, leaving an overhang on all sides.
Preheat your oven to 200°C/400°F. Grease an 8-inch springform pan and line it with two overlapping pieces of parchment paper, leaving an overhang on all sides.
;Resize,width=712;)
In a large bowl, beat the cream cheese and sugar together with a mixer until smooth and creamy. Add the eggs one at a time, beating well after each addition.
In a large bowl, beat the cream cheese and sugar together with a mixer until smooth and creamy. Add the eggs one at a time, beating well after each addition.
;Resize,width=712;)
Pour in the heavy cream and vanilla extract, then mix until fully combined. Then, lightly sift in the flour and gently stir until incorporated.
Pour in the heavy cream and vanilla extract, then mix until fully combined. Then, lightly sift in the flour and gently stir until incorporated.
;Resize,width=712;)
Transfer the batter into the prepared pan and bake for 40-45 minutes, or until the top is golden.
Transfer the batter into the prepared pan and bake for 40-45 minutes, or until the top is golden.
;Resize,width=712;)
Let the cheesecake cool at room temperature for an hour before transferring it to the fridge to chill for at least another hour. Now, you can freely enjoy your creamy, caramelized Basque cheesecake.
Let the cheesecake cool at room temperature for an hour before transferring it to the fridge to chill for at least another hour. Now, you can freely enjoy your creamy, caramelized Basque cheesecake.


;Resize,width=712;)
;Resize,width=767;)
