When summer arrives, it's the perfect time to enjoy ice cream, whether scooped or in a cone. While store-bought ice cream cones are convenient, they can often be waxy, mushy, and flavorless. What if we told you there's a quick and super easy way to make ice cream cones at home that are always crunchy and super tasty?
What Are Ice Cream Cones?
Ice cream cones are edible containers designed to hold your favorite scoops of ice cream. Traditionally made from a batter that includes flour, sugar, and eggs, they are cooked until crispy. The classic cone, often referred to as a waffle cone, gets its signature texture from being cooked in a waffle iron. The batter spreads out thinly, creating a delicate, crispy vessel perfect for holding ice cream.
How to Make Ice Cream Waffle Cones at Home

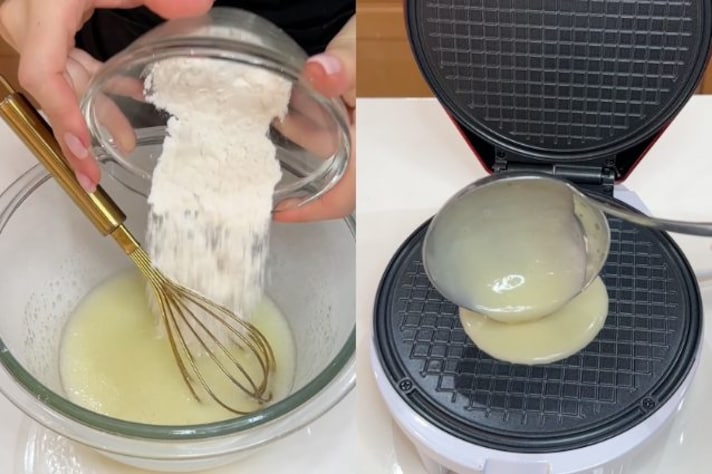
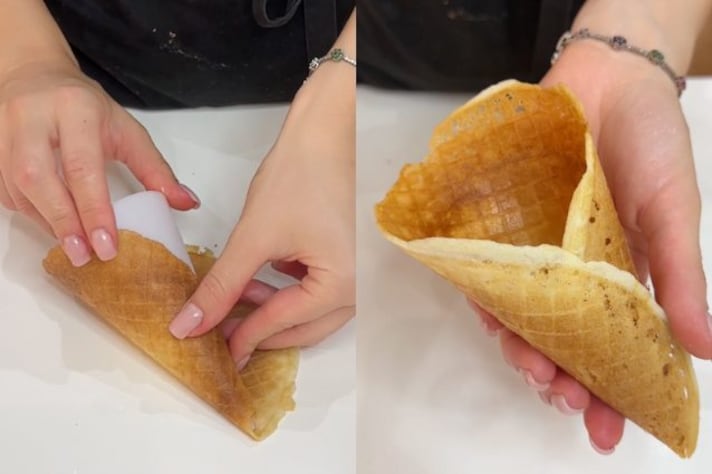
Making ice cream cones at home is surprisingly simple and requires just a few basic ingredients. You'll need 85 grams of icing sugar, 40 grams of "00" flour, 2 egg whites, and 30 grams of melted butter. Start by combining the powdered sugar and egg whites in a container, mixing until well blended. Next, add the melted butter, followed by the flour, ensuring you mix thoroughly to avoid lumps. Pour a portion of the batter into a preheated waffle iron and cook until golden brown. The trick is to shape the cone quickly while it's still pliable, before it hardens. Once shaped, you'll have a delicious, crunchy pod ready to hold your ice cream.

No Waffle Maker? No Problem!
If you don't have a waffle iron, don't fret. You can still make delightful ice cream cones using alternative methods. One option is to use a non-stick skillet. Spread a thin layer of the batter onto the hot skillet, cooking until the edges turn golden and the center is set. Quickly remove and shape it into a cone. Another method involves baking. Spoon the batter onto a baking sheet lined with parchment paper, spreading it into thin circles. Bake until golden brown, then shape immediately after removing from the oven. Both methods require quick hands to shape the cones while they're still flexible.
How to Store the Homemade Cones
Homemade ice cream cones can be stored for later use, ensuring you have a crunchy vessel for your ice cream at any time. Once completely cooled, store them in an airtight container at room temperature for up to a week. If you want to keep them longer, you can freeze the cones. Place them in a freezer-safe container, separating each layer with parchment paper to prevent sticking. When ready to use, let them thaw at room temperature for a few minutes to regain their crispness.

;Resize,width=767;)
