How to Achieve the Perfect Rise for Your Yeast Bread
Achieving the perfect rise for yeast bread can be tricky, but with the right techniques, you can create light, airy loaves every time. From using fresh yeast to properly shaping and baking your dough, this guide covers the essential steps to ensure your bread rises beautifully. Master these tips for a perfect loaf with a soft interior and golden crust.

If you’ve ever baked yeast bread at home, you know that getting the perfect rise can be a bit tricky. Too little rise, and your bread is dense and flat; too much rise, and it can collapse. The key to achieving that ideal, light, airy loaf lies in several important factors, from properly activating the yeast to creating the right environment for rising. Let’s break down how to ensure your yeast bread rises beautifully every time.
1. Use Fresh, Active Yeast
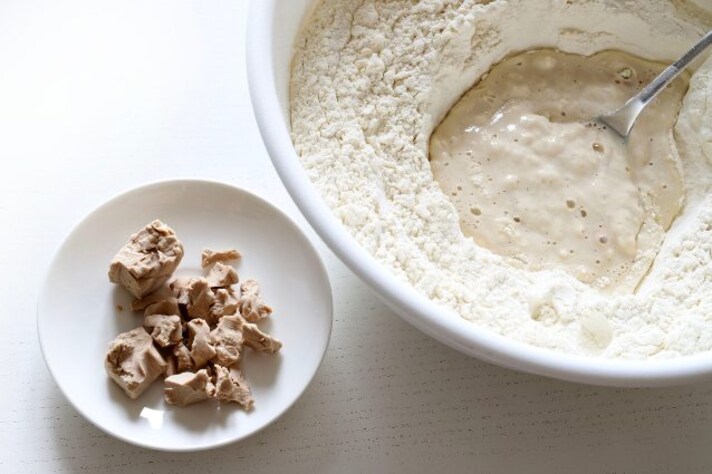
The foundation of every great loaf of yeast bread starts with fresh, active yeast. Old or expired yeast can result in sluggish or non-existent fermentation, leading to flat dough that won’t rise properly.
- Tip: Always check the expiration date on your yeast and store it properly in a cool, dry place. If you’re using active dry yeast, make sure to proof it in warm water with a pinch of sugar before adding it to your dough to ensure it’s still alive.
- Why It Works: Active, fresh yeast will give your dough the boost it needs to rise. Using instant yeast (which doesn't need proofing) is another great option for quick rises.
2. Ensure the Right Temperature for Your Dough
Yeast thrives in a warm environment. Too cold, and your dough will rise too slowly or not at all. Too hot, and the yeast can die, resulting in no rise at all. The ideal temperature for your dough is between 75°F and 85°F (24°C to 29°C).
- Tip: If your kitchen is cold, create a warm, draft-free environment by turning on your oven for a few minutes and then turning it off. Place your dough in the warm oven with the door cracked slightly. Alternatively, you can place the dough on top of a warm stovetop or near a warm window.
- Why It Works: Yeast activates best in a warm, stable environment, allowing it to produce carbon dioxide and causing the dough to rise effectively.
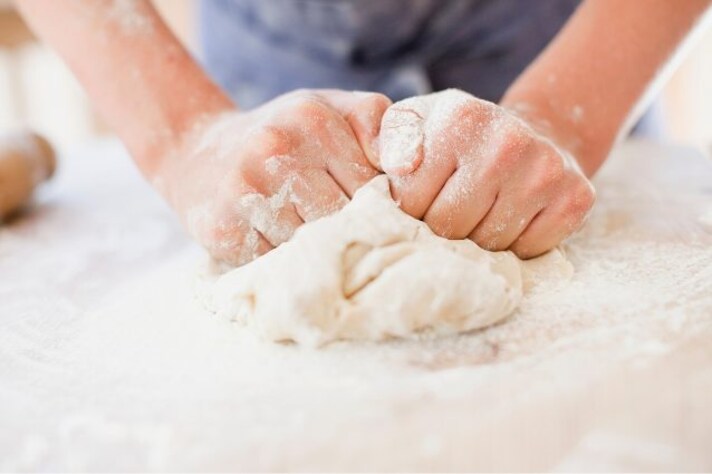
3. Knead the Dough to Develop Gluten
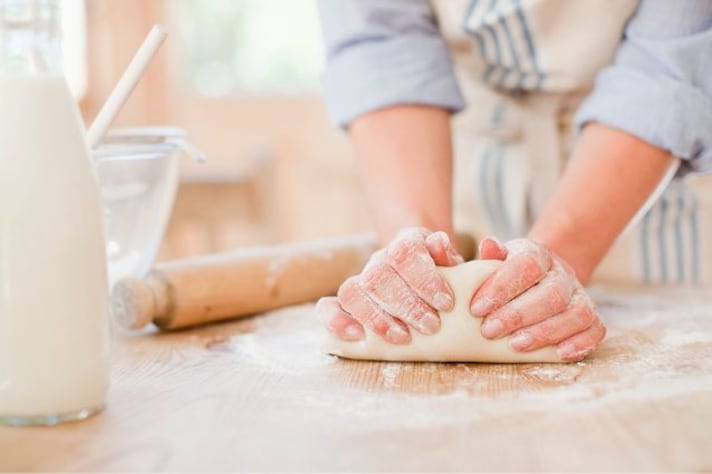
Proper kneading is essential for achieving a perfect rise. Kneading the dough helps develop the gluten network, which traps the gases released by the yeast. This ensures your dough rises evenly and holds its shape as it expands.
- Tip: Knead your dough for 8-10 minutes until it feels smooth and elastic. You can test if it’s ready by performing the “windowpane test”—stretching a small piece of dough between your fingers to see if it forms a thin, translucent membrane without tearing.
- Why It Works: Proper kneading strengthens the dough’s structure, helping it rise effectively by trapping air pockets. Over-kneading or under-kneading can result in a denser loaf.
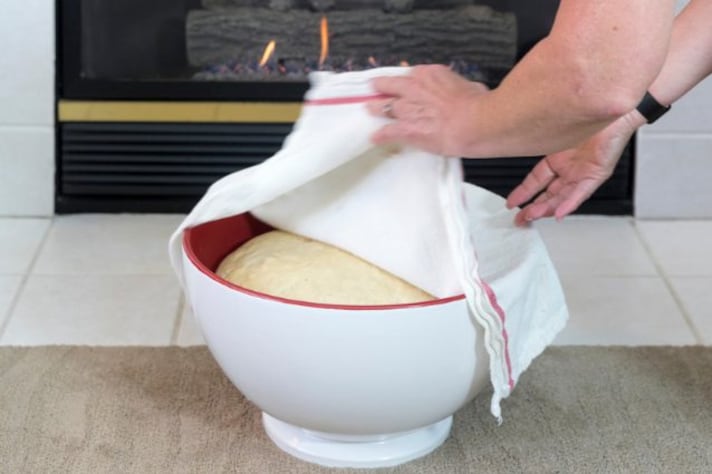
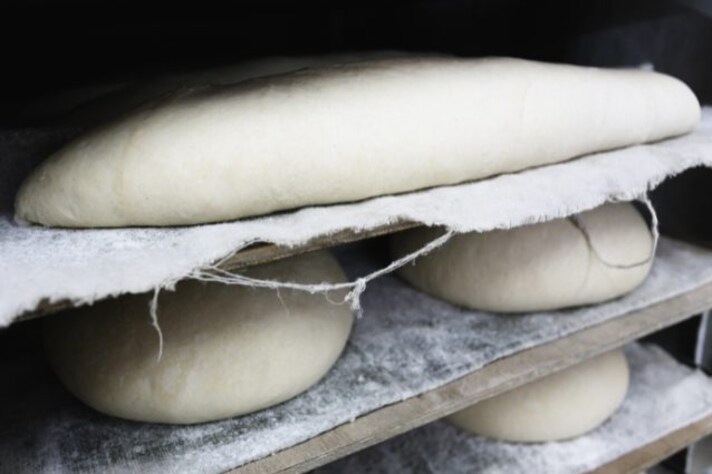
4. Give Your Dough Enough Time to Rise

One of the most crucial steps in getting your dough to rise properly is giving it enough time to rise. Rushing the proofing stage can result in under-proofed dough that doesn’t have time to expand fully. Patience is key!
- Tip: Allow the dough to rise until it doubles in size. This can take anywhere from 1 to 2 hours, depending on the temperature and humidity. If you're working with a recipe that calls for a second rise, make sure to give the dough time to rest after shaping.
- Why It Works: The longer, slower rise allows the yeast to produce more gas and develop better flavor. Don’t rush the process—allow your dough to fully expand for a lighter, airier texture.
5. Don’t Overcrowd Your Dough During Rising
When rising, your dough needs space to expand. If your dough is crowded in a bowl or on a baking tray, it may not rise evenly or at all. Make sure the container or bowl you use is large enough for the dough to expand comfortably.
- Tip: Use a larger bowl for your dough, allowing plenty of room for it to double in size. If you’re proofing multiple loaves, ensure they’re spaced out on the baking sheet so they aren’t competing for space.
- Why It Works: Giving your dough room to rise prevents it from being compressed and ensures that air pockets form evenly throughout, leading to a light, airy loaf.
6. Properly Shape Your Dough for Even Rising
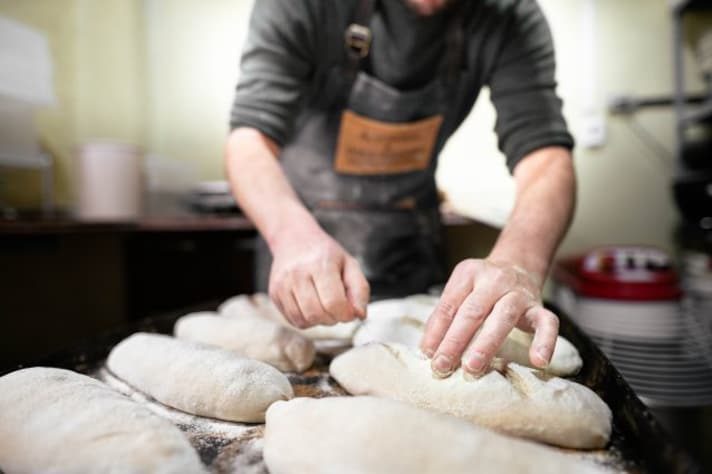
Shaping your dough correctly before the second rise is just as important as the first. A poorly shaped loaf can collapse or bake unevenly. Properly shaping your dough ensures that it rises evenly and has a smooth, professional appearance.
- Tip: After your dough has doubled in size, gently punch it down to release any excess air, then shape it into a loaf or bun by folding the edges in towards the center. Be gentle—don’t deflate the dough too much.
- Why It Works: Shaping the dough evenly helps it rise in a controlled, uniform way. It also ensures that the dough has enough structure to hold its shape as it expands.
7. Use Steam for a Crisp, Perfect Crust
To get the perfect rise and a golden-brown, crispy crust, steam can be a game-changer. When you introduce steam into the oven during the first few minutes of baking, it helps the dough expand before the crust sets.
- Tip: Place a pan of water at the bottom of your oven while preheating, or spritz the dough with water before putting it in the oven. Alternatively, if you're using a Dutch oven, the closed lid will trap moisture naturally.
- Why It Works: Steam prevents the dough from forming a tough crust too early, giving it time to rise fully before the outer layer sets. This results in a light, airy interior and a beautiful, golden crust.
8. Don’t Overbake Your Bread

Finally, overbaking your bread can cause it to dry out and prevent the dough from maintaining its rise. It’s important to check your bread regularly and use a thermometer to ensure it’s done without overcooking.
- Tip: For most breads, an internal temperature of 190°F to 200°F (88°C to 93°C) indicates the bread is fully baked. Use a thermometer to check the center, or tap the bottom of the loaf—if it sounds hollow, it’s ready.
- Why It Works: Overbaking dries out the bread and can cause it to collapse. Monitoring the baking time ensures a soft, airy texture and prevents excess moisture loss.
Conclusion: Rise to the Occasion with the Perfect Yeast Bread
Achieving the perfect rise for your yeast bread requires a combination of patience, proper technique, and the right conditions. By using fresh yeast, kneading your dough properly, giving it enough time to rise, and using the right tools and temperature, you can achieve a light, airy loaf every time. With these tips, you’ll be baking bread like a pro in no time, producing loaves that are both beautiful and delicious.
;Resize,width=712;)

;Resize,width=712;)
;Resize,width=767;)
