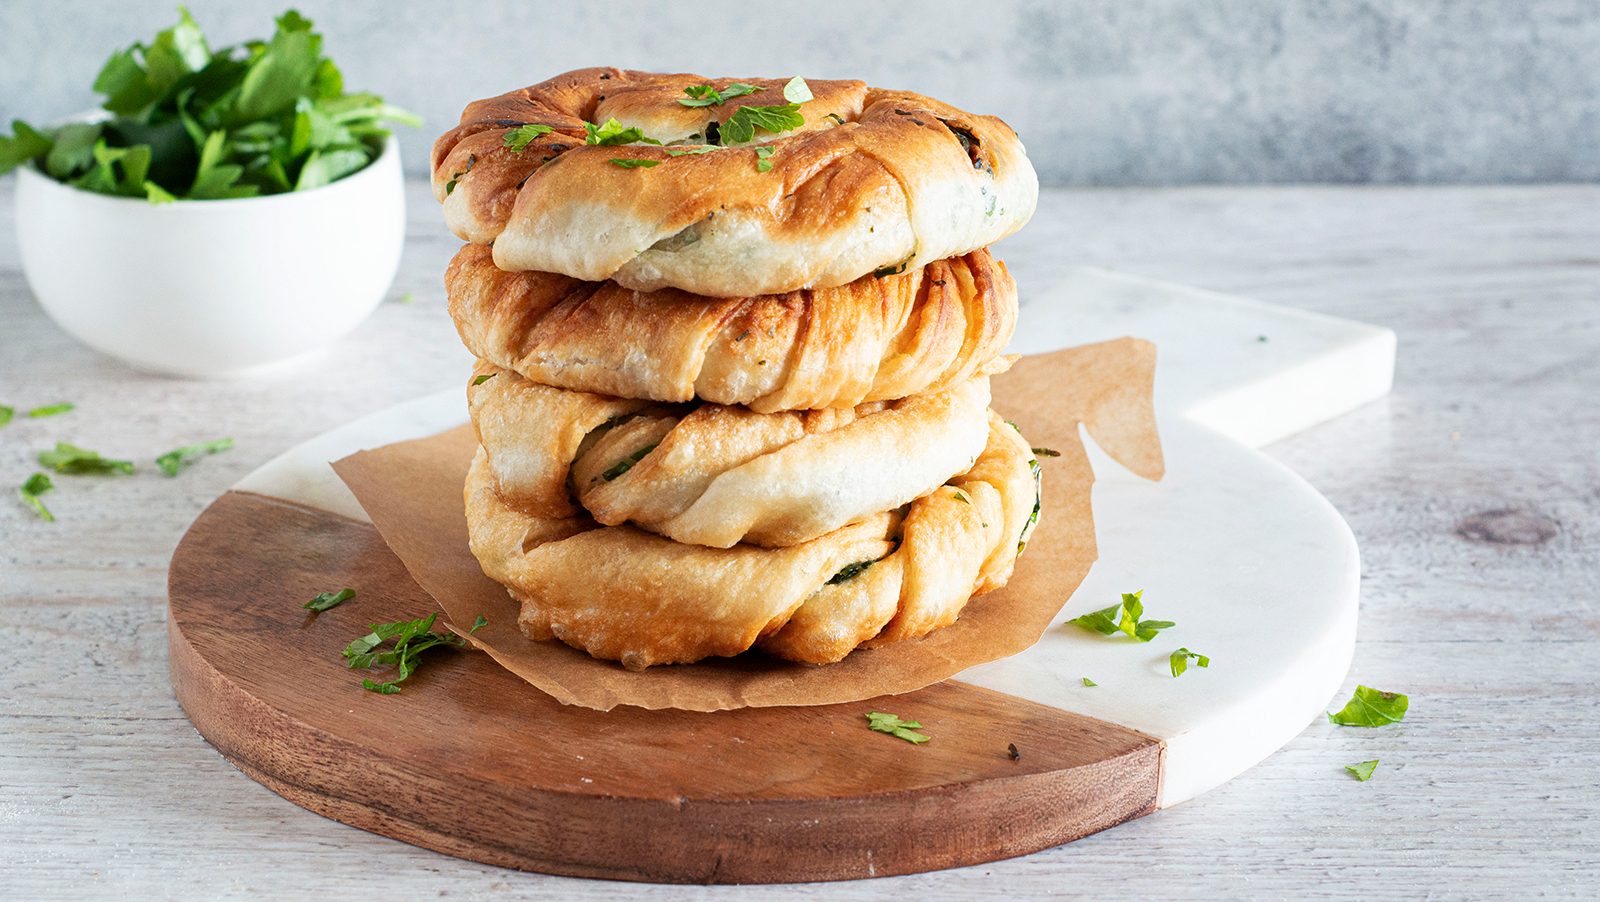
Easy Knotted Herbs Skillet Bread
;Resize,width=742;)
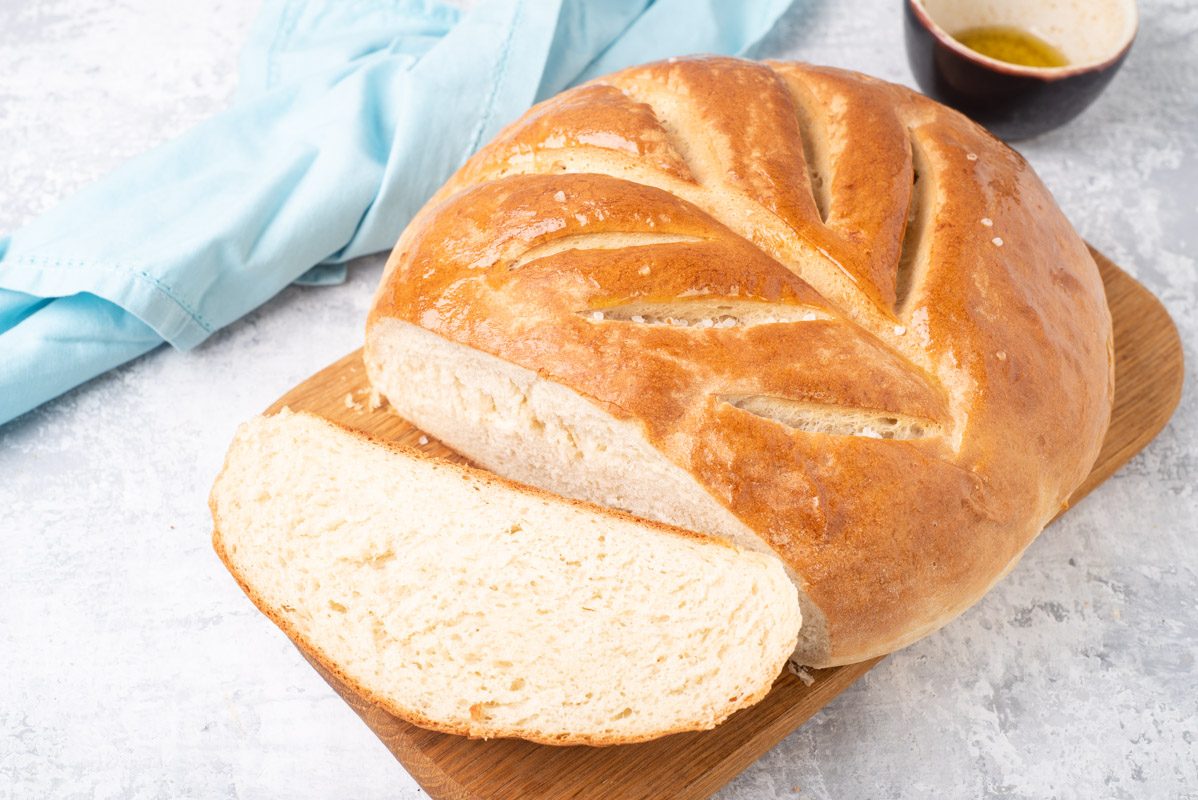
Herbs Skillet Bread is a soft and fragrant leavened product, which can be prepared in a pan in a few minutes and does not require long leavening times. Ideal as an appetizer and to accompany any main dish, soups and vegetable creams, it can be conveniently made in advance and taken with you for a tasty snack or a picnic in the park.
Making it is very simple: just combine the flour, dry brewer's yeast, salt, sugar and water in a bowl, working them until you obtain a compact dough, which must be left to rise in a lightly greased bowl, until it doubles its initial volume. After the necessary time has passed, divide it into 8 portions to be rolled out into thin discs: these are brushed with melted butter and enriched with an aromatic mixture of shallots, parsley and dill.
Giving the characteristic shape to the rolls is the step that requires a pinch of manual skill and precision but, with our suggestions, you will be able to create many cute snails to fry in abundant peanut oil until golden. The result is a sort of fragrant fritters, crunchy on the outside and soft on the inside, already delicious on their own but even better if filled with a layer of cream cheese , a savory mousse or legume hummus.
What is Herbs Skillet Bread?
Skillet bread is a simple, rustic bread traditionally cooked in a heavy-bottomed pan like a cast-iron skillet instead of an oven. This method dates back centuries, originating in cultures where open-fire cooking was common. Early versions were made with basic ingredients like flour, water, and leavening agents, creating a hearty, crusty loaf.
Many regions have their own take on skillet bread—Irish soda bread, Middle Eastern flatbreads, and cornbread from the American South all share similar cooking techniques. Over time, skillet bread spread globally, adapting to local flavors and ingredients, making it a staple in both home kitchens and artisanal bakeries today.
Pro Tips for The Best Herbs Skillet Bread
- Fresh herbs like rosemary, thyme, and basil will give a more vibrant taste than dried ones. If using dried herbs, reduce the quantity slightly as their flavor is more concentrated.
- Even if the recipe doesn’t require it, letting the dough rest for 10–15 minutes before cooking allows the gluten to relax, making the bread softer and more elastic.
- A well-heated cast-iron skillet gives the bread a beautifully crisp crust while keeping the inside soft. If using a non-stick pan, ensure it’s preheated to prevent sticking.
- Knead the dough just until it comes together. Over-kneading can make the bread dense rather than soft and fluffy.
- A low, steady heat ensures even cooking without burning the outside while keeping the inside fully cooked. If the bread is browning too fast, lower the heat and cover the skillet.
- Let the first side develop a nice golden crust before flipping. Flipping too soon can make the bread collapse and lose its airy texture.
- Brushing the bread with olive oil or melted butter right before serving enhances its flavor and keeps it moist. Adding a sprinkle of sea salt or grated cheese on top takes it to the next level!
- Cutting into the bread immediately can make it lose moisture. Let it cool for 5–10 minutes for the best texture.
What Other Herbs Can I Use for This Skillet Bread?
You can customize the recipe as you like, using the herbs that you like most or that you have available in the pantry, such as rosemary, sage, basil and so on, so as to make the bread basket even richer. Furthermore, you can vary the shape as you prefer, opting for loaves, donuts, crescents … let yourself be inspired by your instinct and your creativity.
What Is The Best Pan to Use for This Bread?
The best skillet for making herb skillet bread is a cast-iron skillet because it retains heat well, ensuring even cooking and a perfectly crisp crust. A well-seasoned cast-iron pan also prevents sticking and enhances the flavor over time. If you don’t have cast iron, a heavy-bottomed non-stick or stainless steel skillet can work, but it may not give the same deep, golden crust.
What Can I Serve This Bread With?
Herb skillet bread pairs well with soups, stews, and salads, making it a perfect side for hearty meals. It’s delicious with cheese and charcuterie boards, dipped in olive oil and balsamic vinegar, or spread with butter, pesto, or garlic aioli. You can also use it for sandwiches, bruschetta, or as a base for open-faced toasts with toppings like tomatoes, avocado, or smoked salmon.
Can I Make the Dough Ahead of Time?
Yes, the dough for herb skillet bread can be made ahead of time! You can prepare it and store it in the fridge for up to 24 hours, covered tightly to prevent drying out. Let it come to room temperature before cooking for the best texture. For longer storage, freeze the dough for up to 2 months, then thaw overnight in the fridge before using.
Does This Skillet Bread Freeze Well?
It does! It can be frozen for up to 1 month in special freezer bags.
How to Store Herbs Skillet Bread
Herb bread can be stored at room temperature, tightly closed in a food paper bag, for up to 2 days.
Ingredients
How to Make Herbs Skillet Bread
;Resize,width=712;)
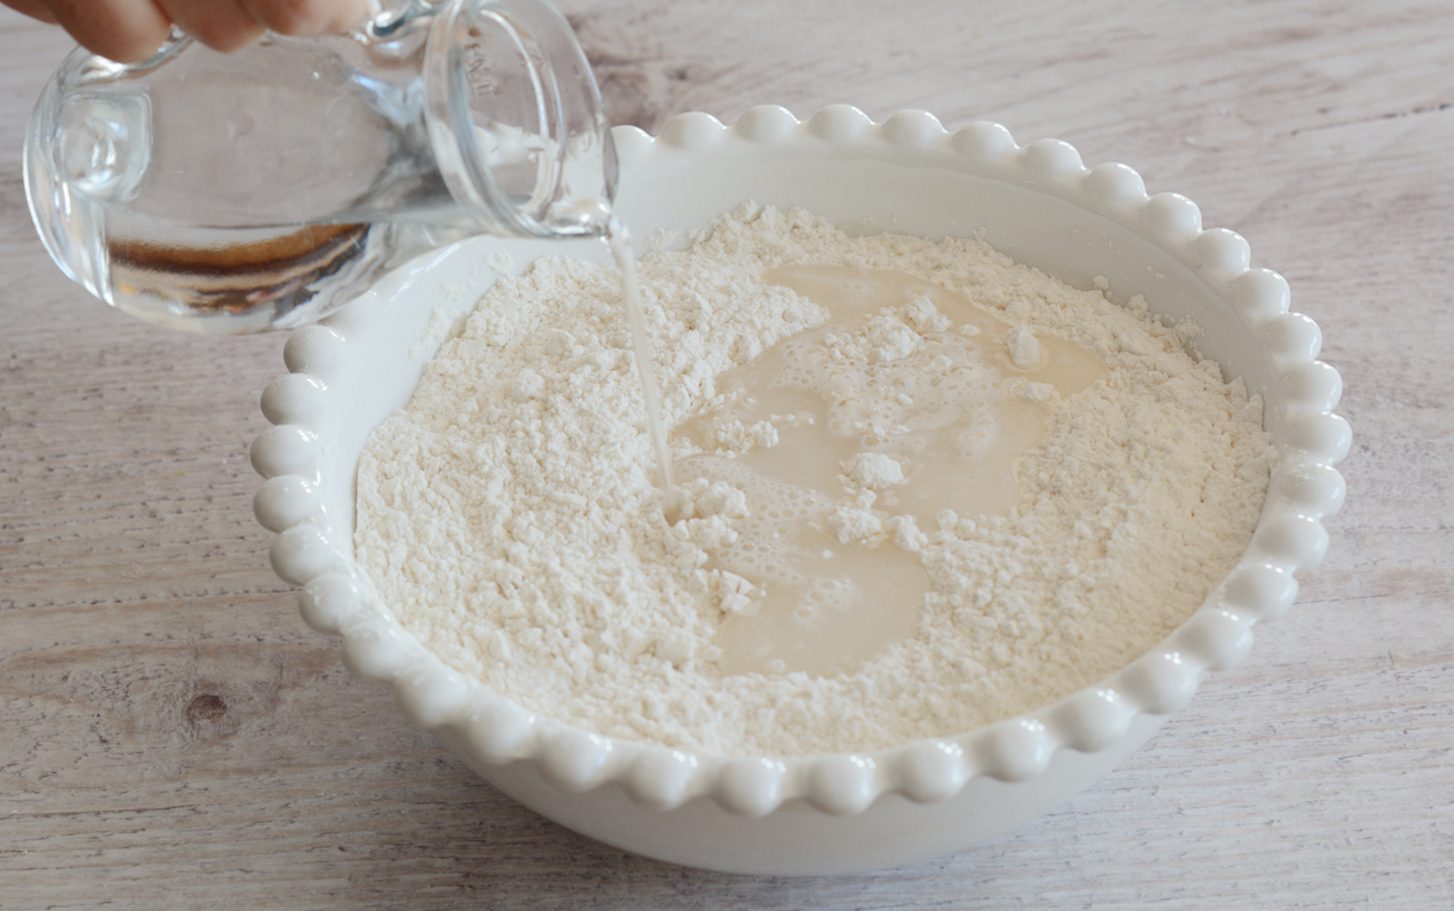
Collect the flour, sugar, dry yeast and salt in a bowl, then pour in the water.
Collect the flour, sugar, dry yeast and salt in a bowl, then pour in the water.
;Resize,width=712;)
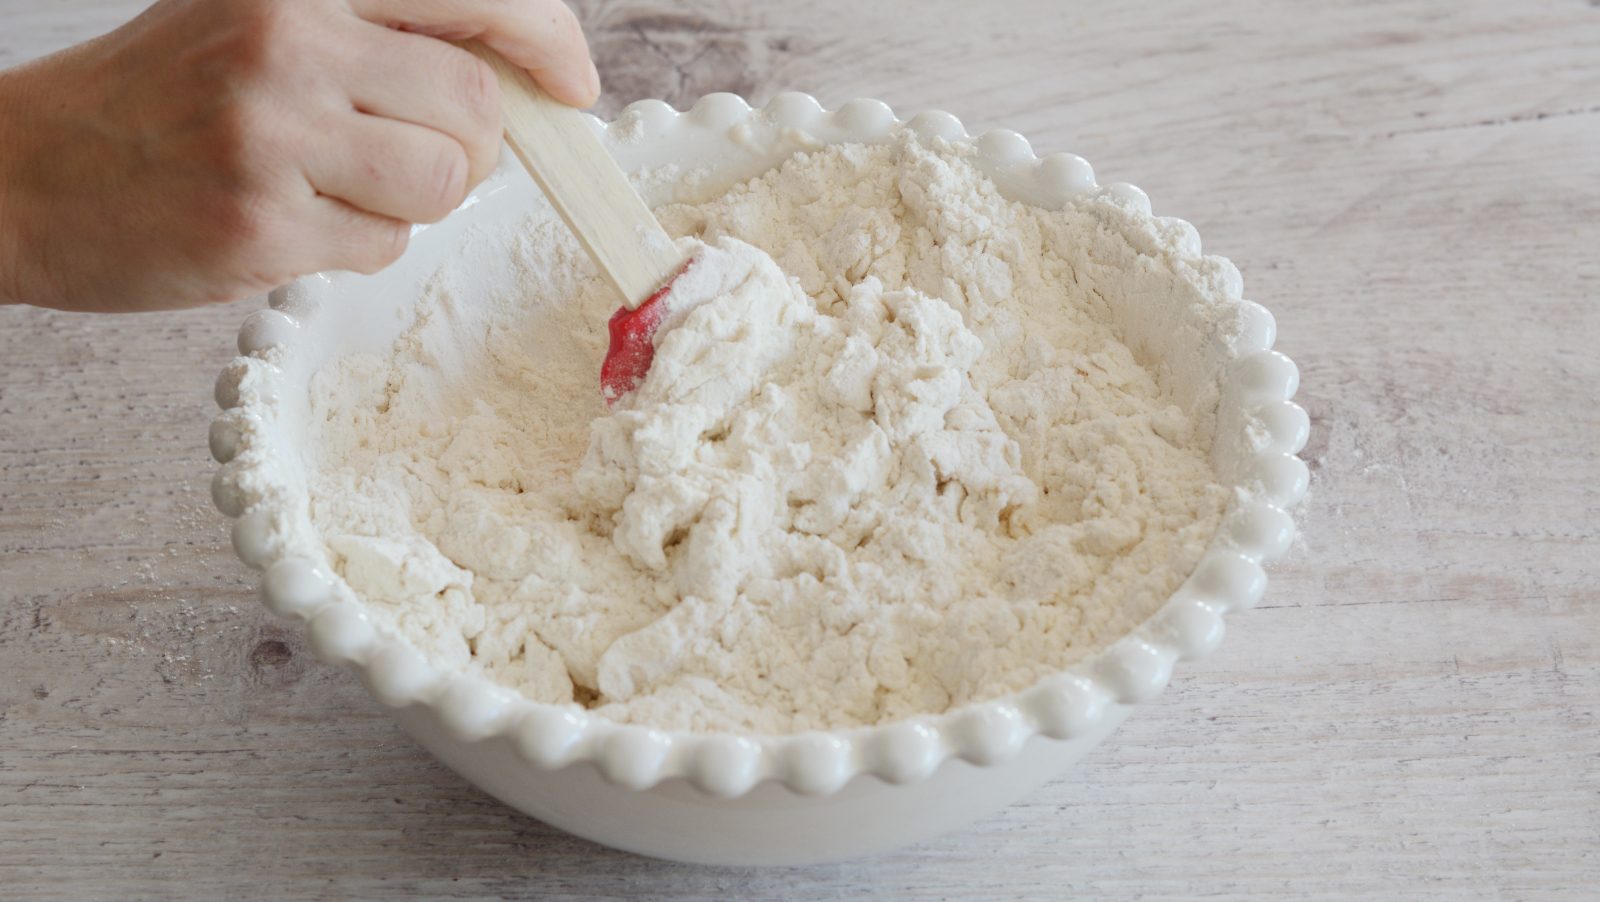
Incorporate all the ingredients well with a spatula.
Incorporate all the ingredients well with a spatula.
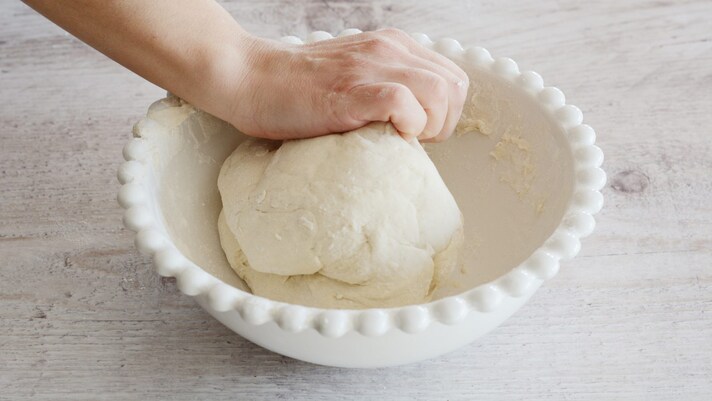
As soon as the mixture has reached a compact consistency, work it with your hands, until you obtain a soft and elastic dough.
As soon as the mixture has reached a compact consistency, work it with your hands, until you obtain a soft and elastic dough.
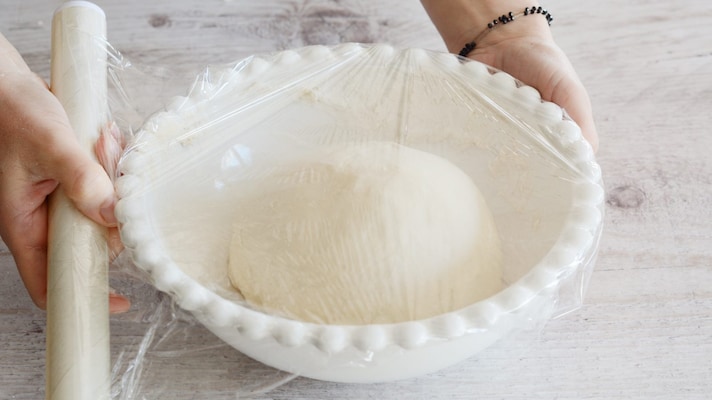
Grease the bowl with a drop of oil, then cover it with a sheet of cling film and let the dough rest in a warm, draft-free place for about 2 hours.
Grease the bowl with a drop of oil, then cover it with a sheet of cling film and let the dough rest in a warm, draft-free place for about 2 hours.
;Resize,width=712;)
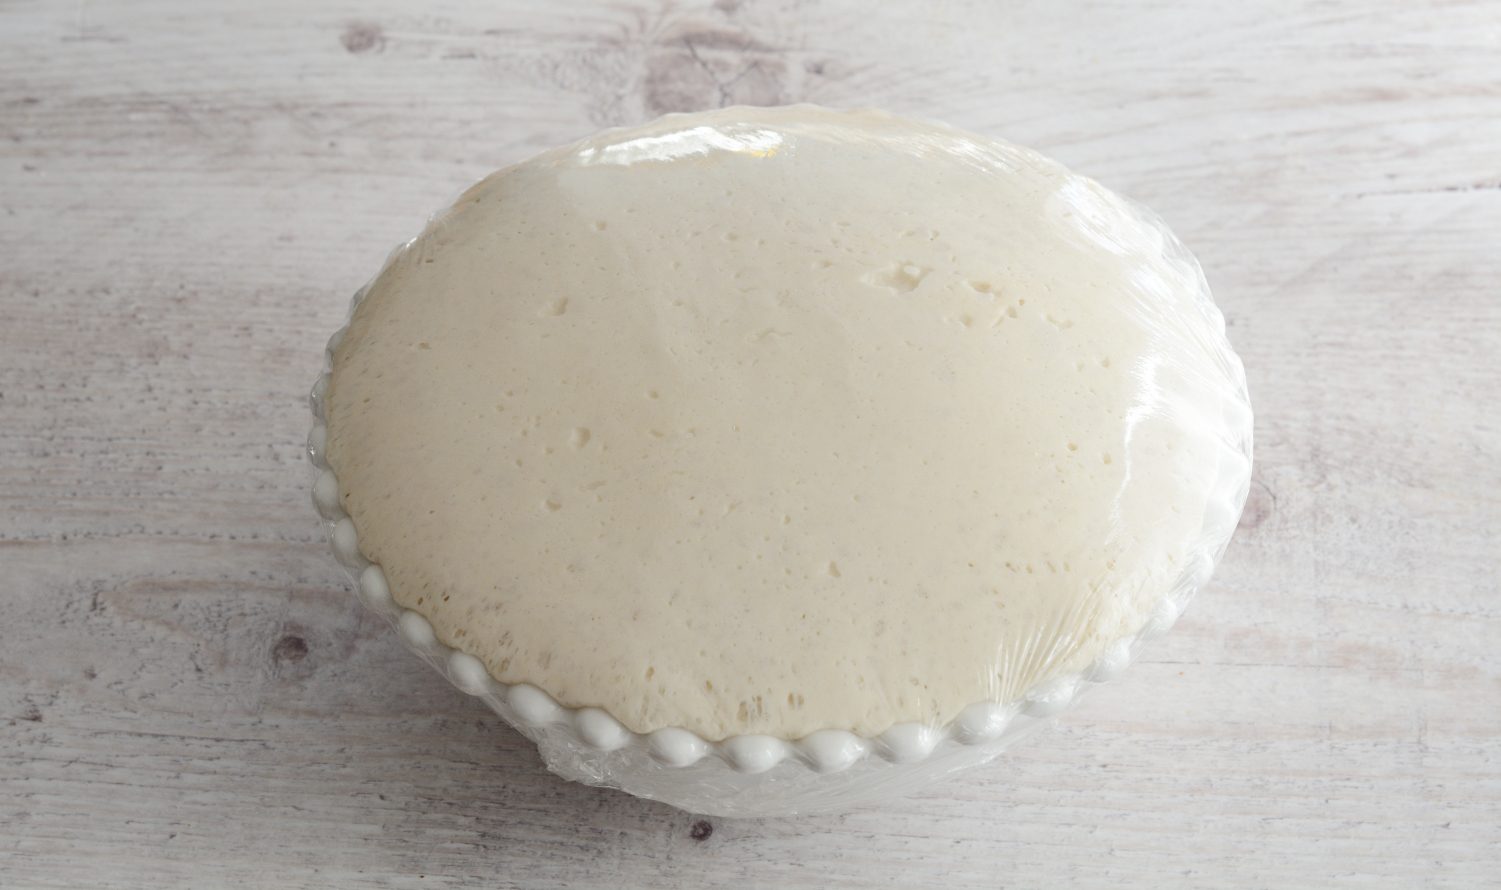
After the necessary time has passed, the dough will have doubled in size compared to its initial volume.
After the necessary time has passed, the dough will have doubled in size compared to its initial volume.
;Resize,width=712;)
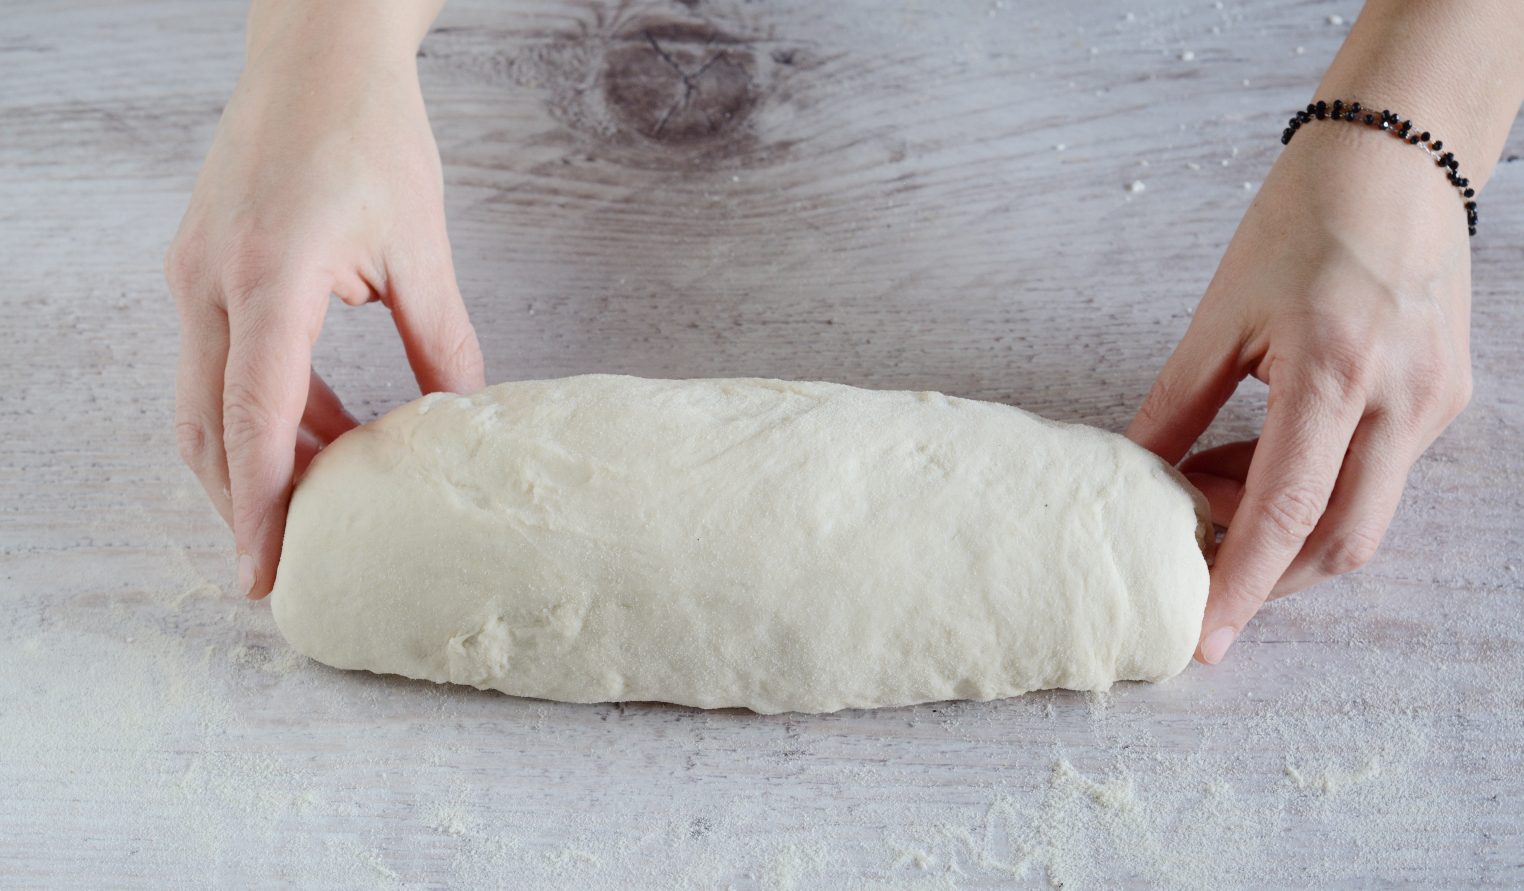
Deflate it with the palm of your hand, transfer it onto a lightly floured pastry board and shape it into a loaf.
Deflate it with the palm of your hand, transfer it onto a lightly floured pastry board and shape it into a loaf.
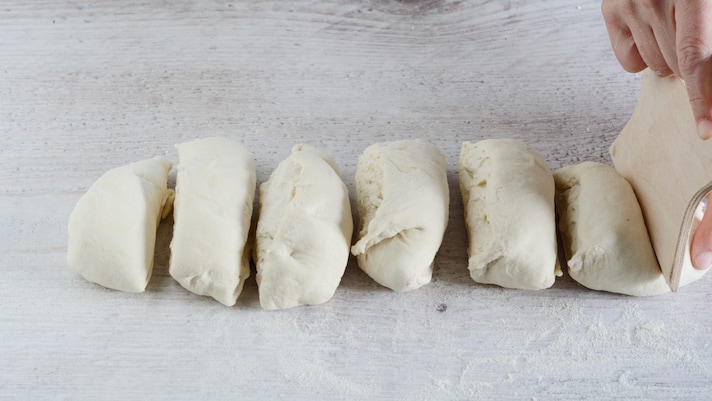
Divide the loaf into 8 portions of the same weight.
Divide the loaf into 8 portions of the same weight.
;Resize,width=712;)
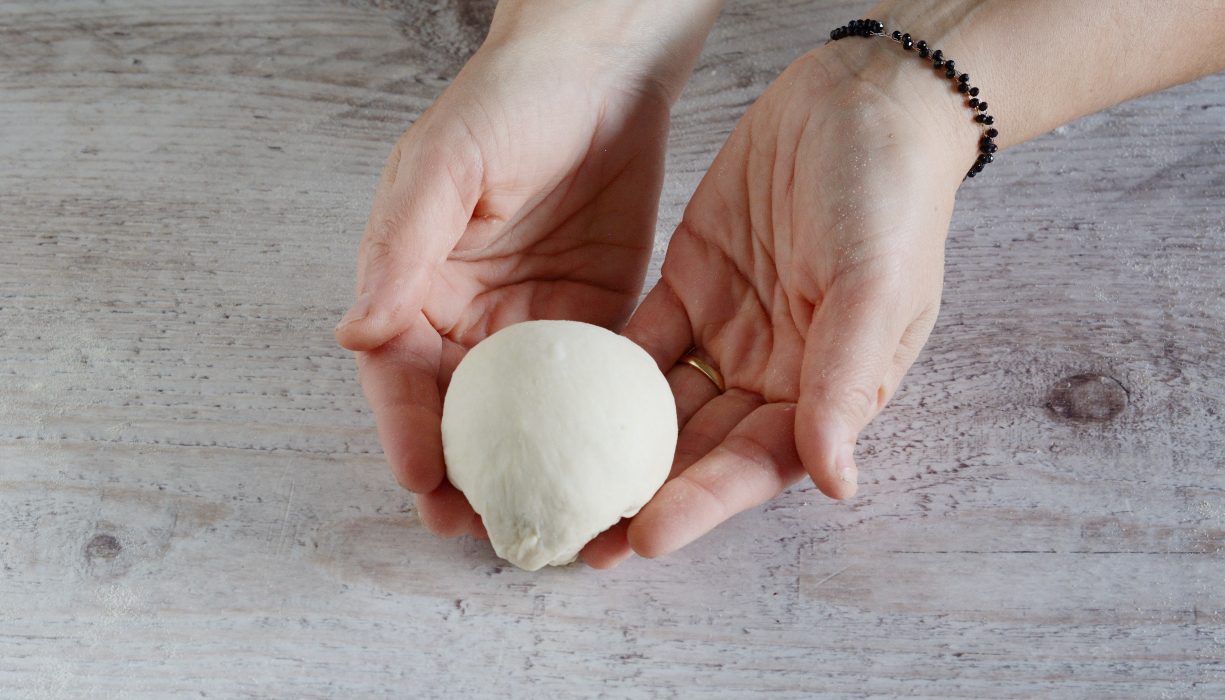
Roll each piece of dough with the palm of your hands until you create a smooth, round ball.
Roll each piece of dough with the palm of your hands until you create a smooth, round ball.
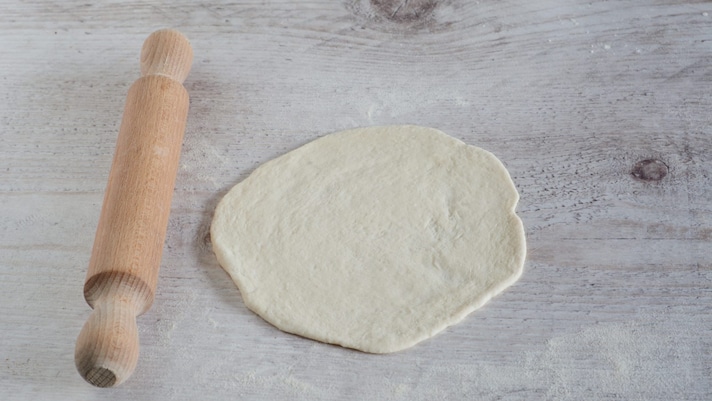
At this point, roll it out with a rolling pin until you get a very thin sheet; proceed in the same way with the other balls.
At this point, roll it out with a rolling pin until you get a very thin sheet; proceed in the same way with the other balls.
;Resize,width=712;)
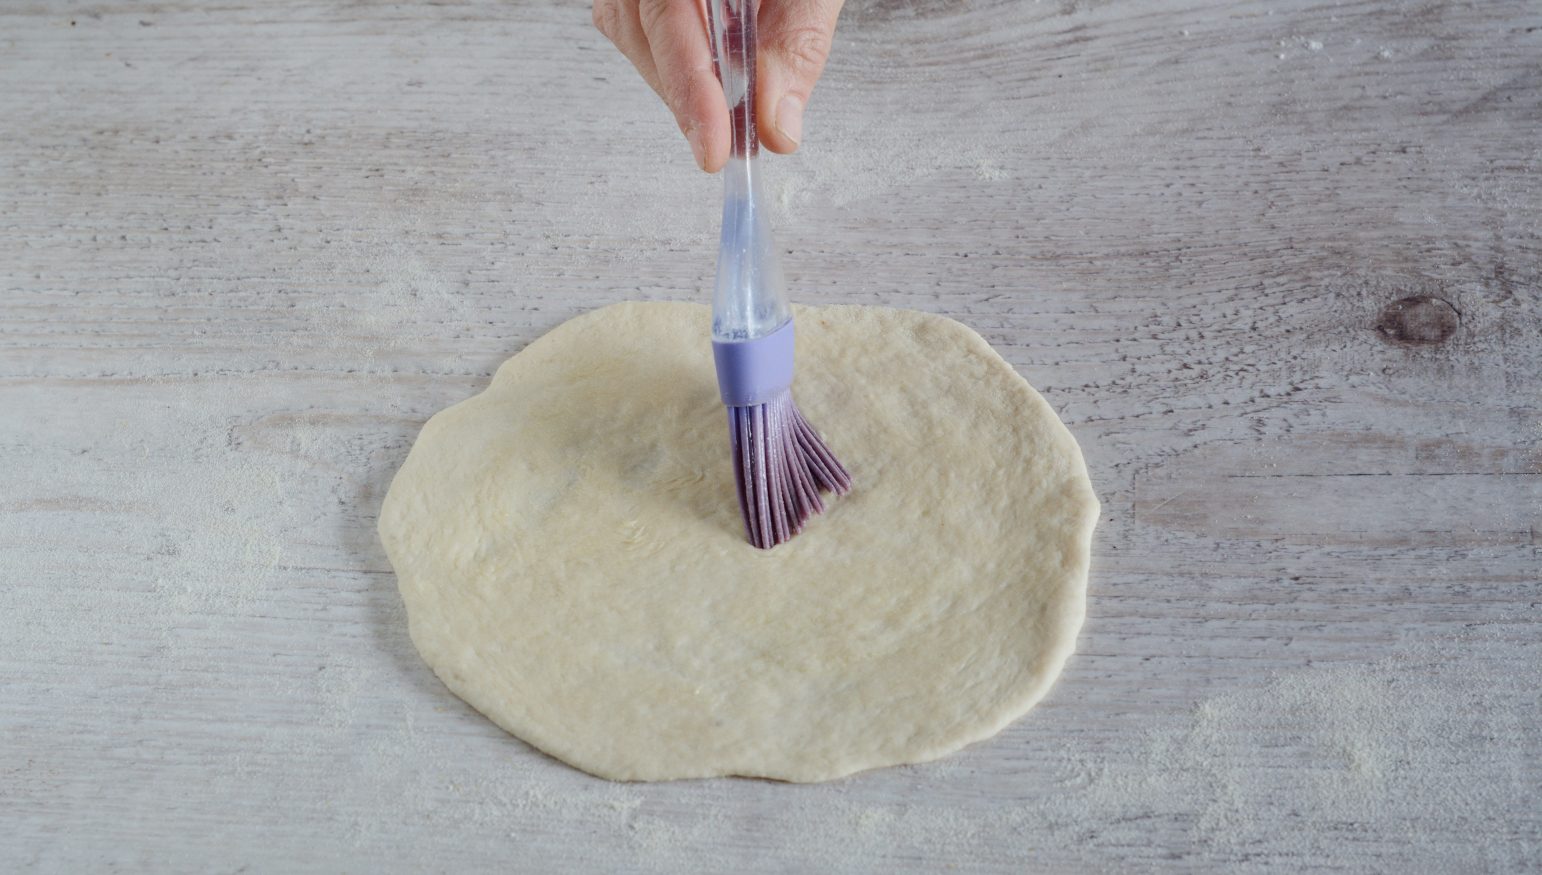
Brush each sheet of pastry with melted butter.
Brush each sheet of pastry with melted butter.
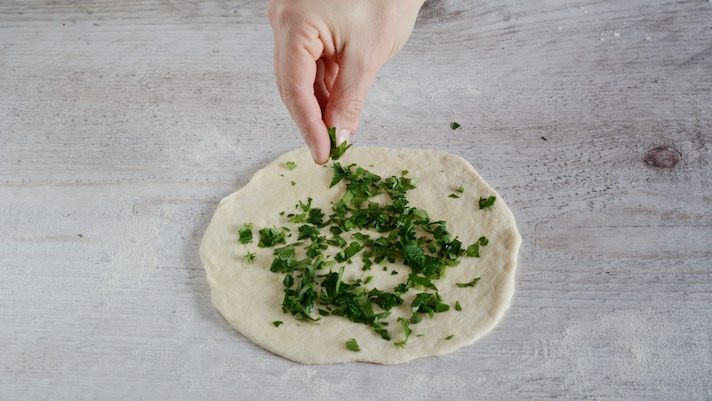
Chop the shallot, parsley and dill, then spread them over the surface.
Chop the shallot, parsley and dill, then spread them over the surface.
;Resize,width=712;)
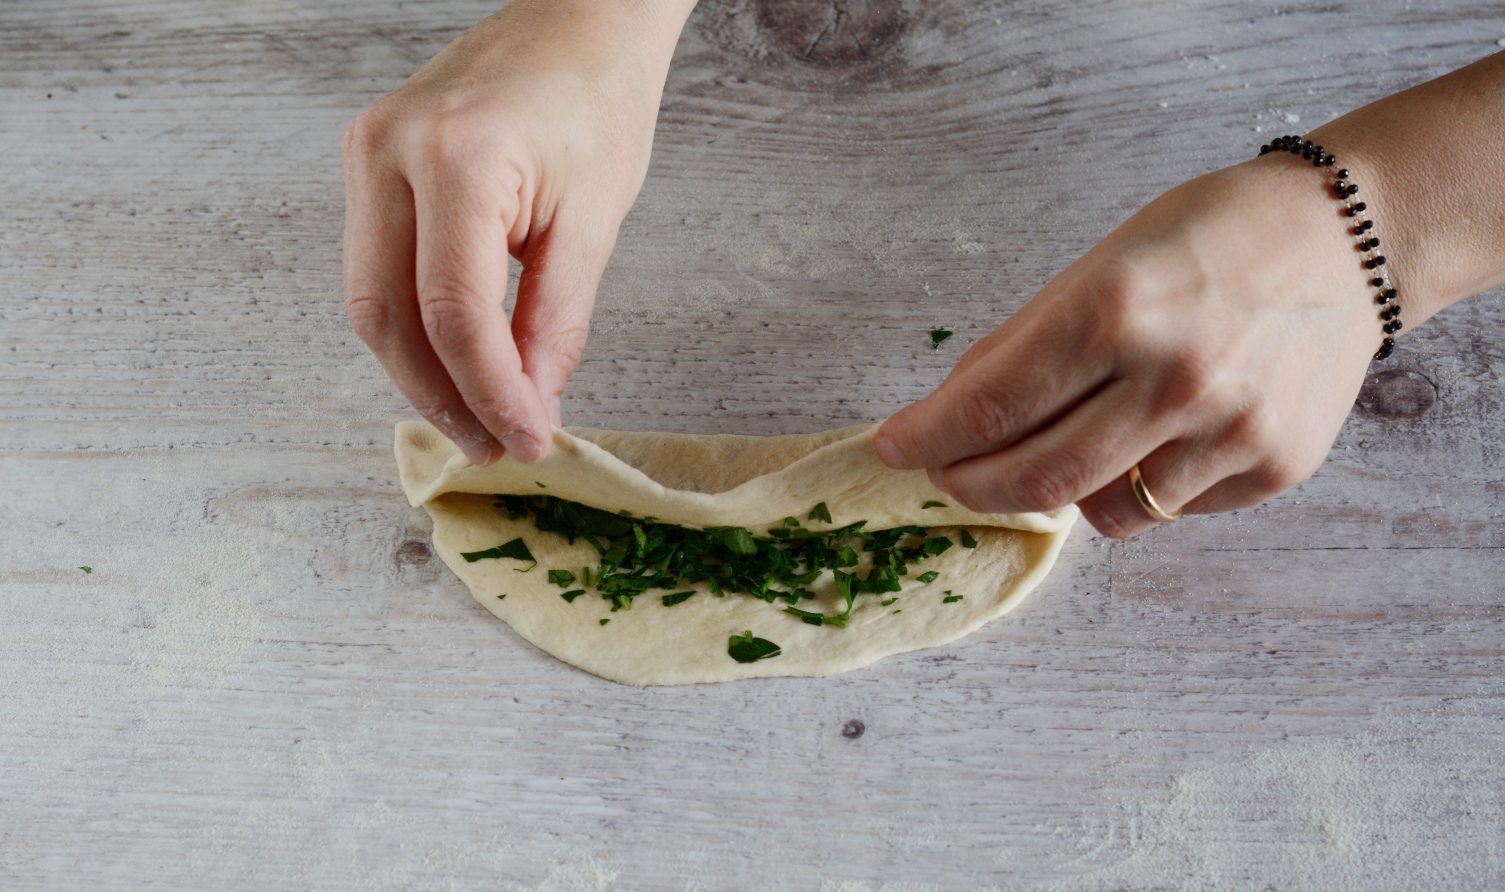
Fold the dough into a crescent shape.
Fold the dough into a crescent shape.
;Resize,width=712;)
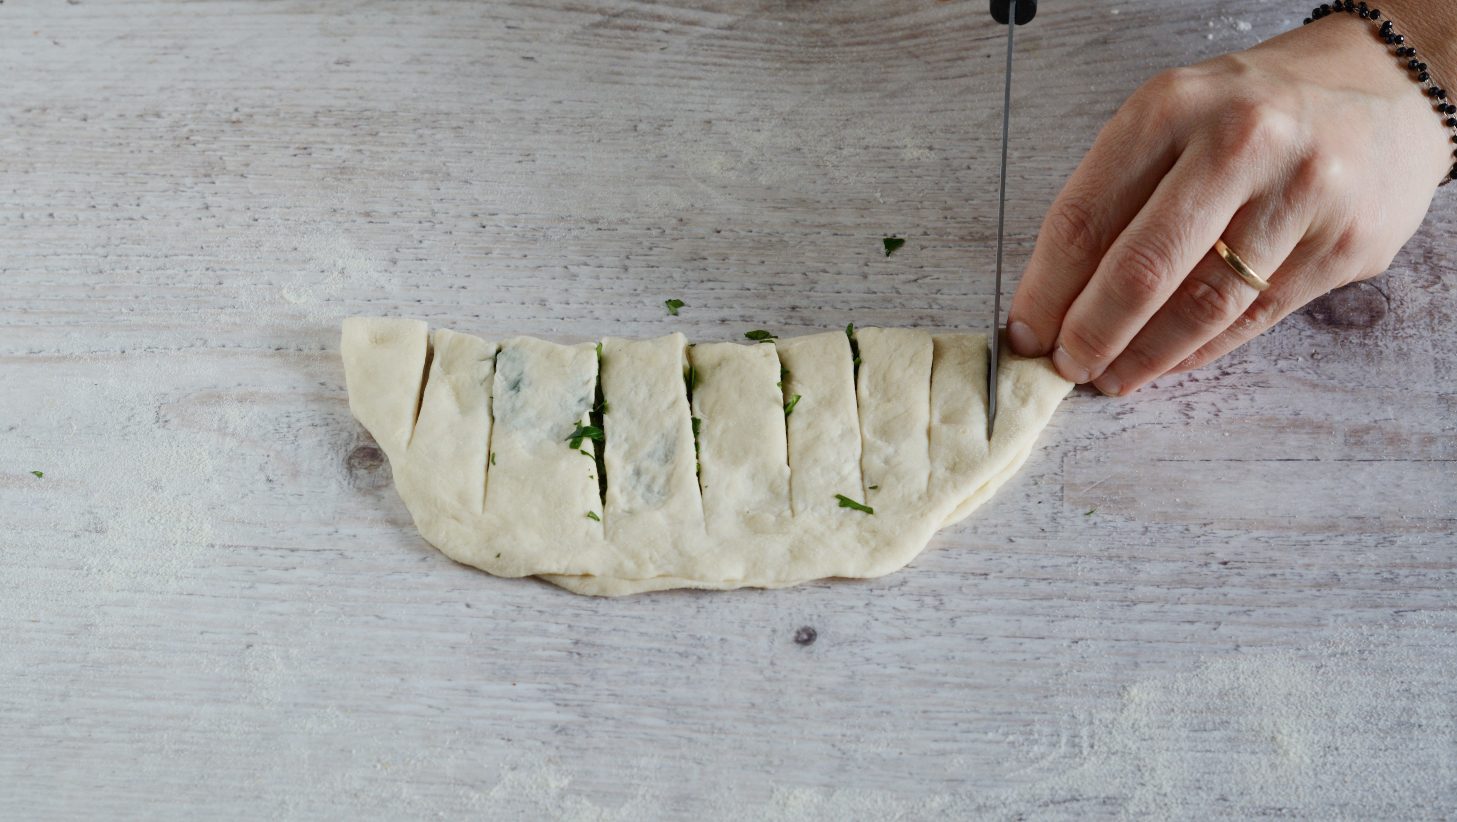
Cut the folded part, being careful not to cut the other side too.
Cut the folded part, being careful not to cut the other side too.
;Resize,width=712;)
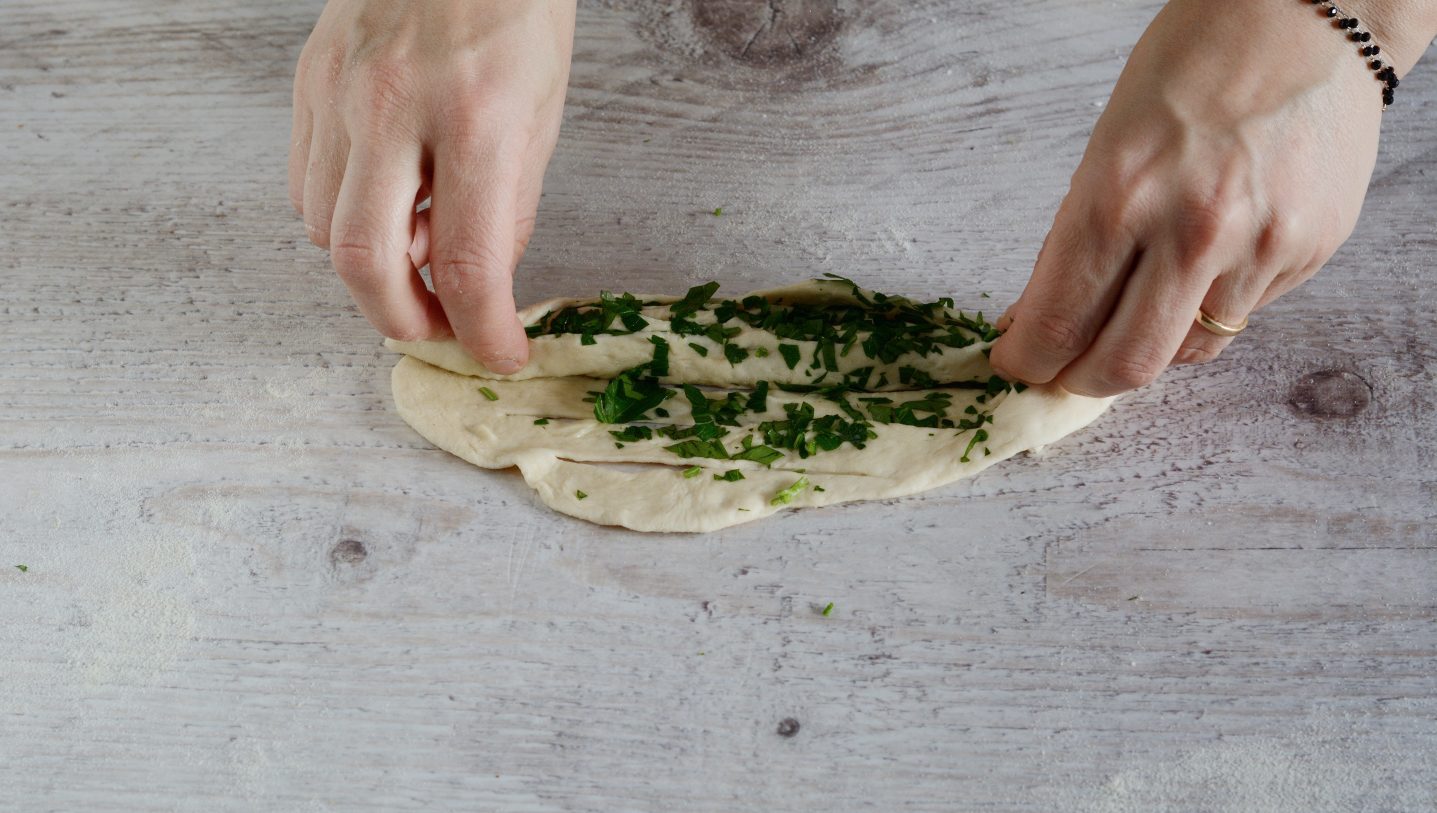
Open the puff pastry disc again and begin to roll it up sideways delicately, making sure that the incisions open slightly.
Open the puff pastry disc again and begin to roll it up sideways delicately, making sure that the incisions open slightly.
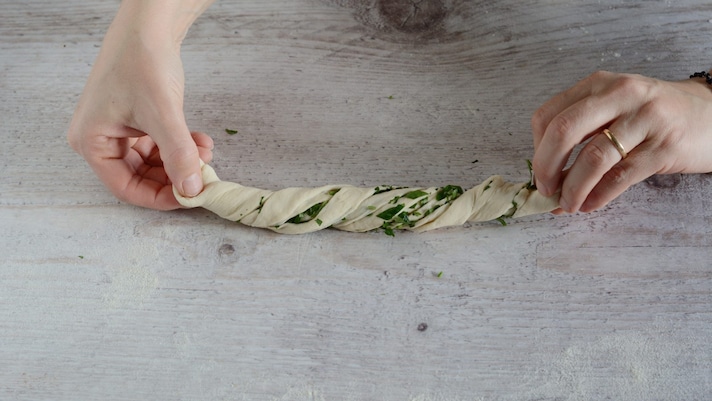
At this point, grab the two ends and twist them in opposite directions, so as to obtain a twisted loaf.
At this point, grab the two ends and twist them in opposite directions, so as to obtain a twisted loaf.
;Resize,width=712;)
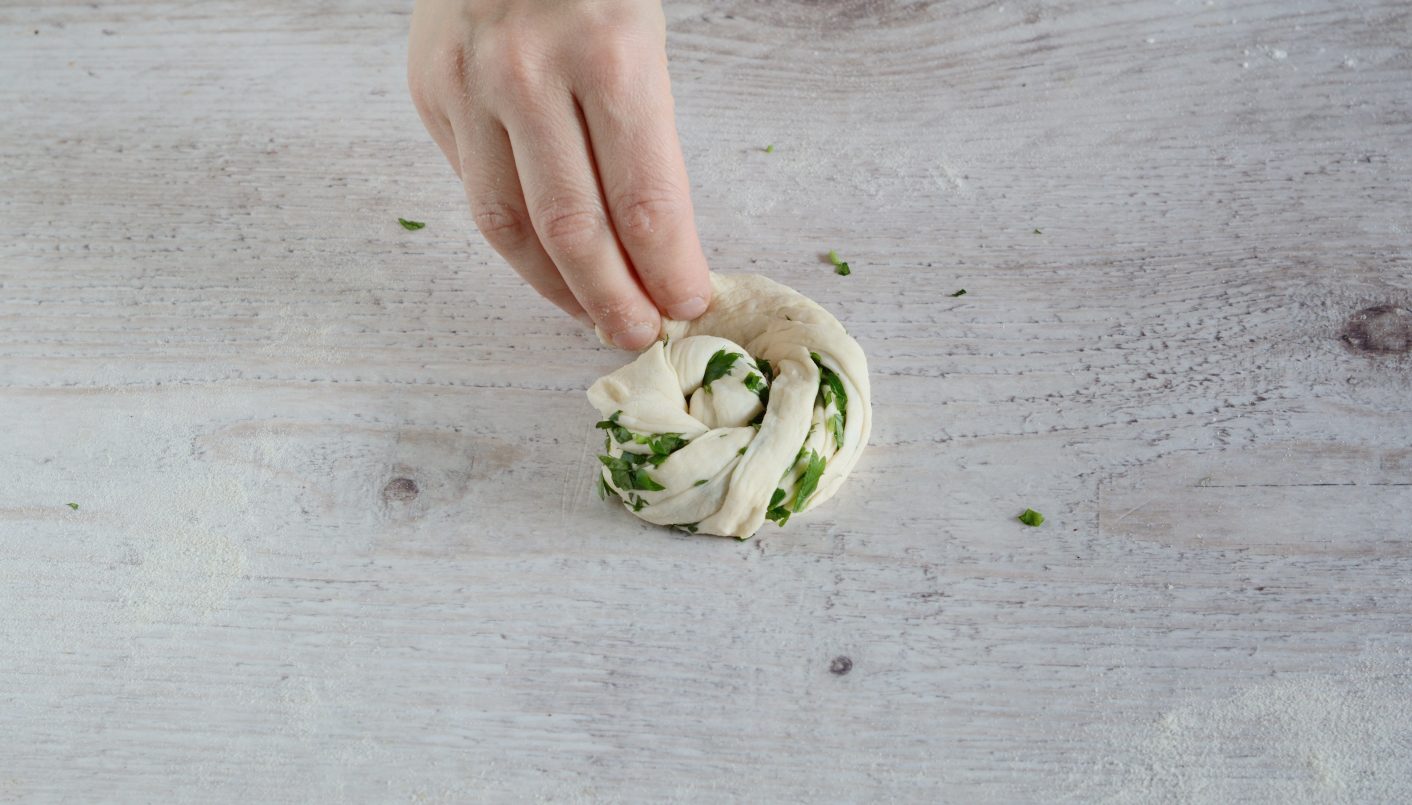
Roll the loaf onto itself, forming a sort of snail shape.
Roll the loaf onto itself, forming a sort of snail shape.

Finally, flatten it with the palm of your hand and set it aside. Proceed in the same way until you finish the dough.
Finally, flatten it with the palm of your hand and set it aside. Proceed in the same way until you finish the dough.
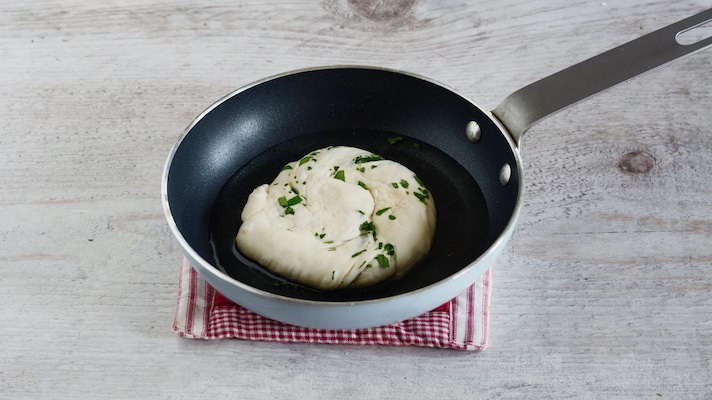
Heat the seed oil in a small pan and fry one roll at a time.
Heat the seed oil in a small pan and fry one roll at a time.
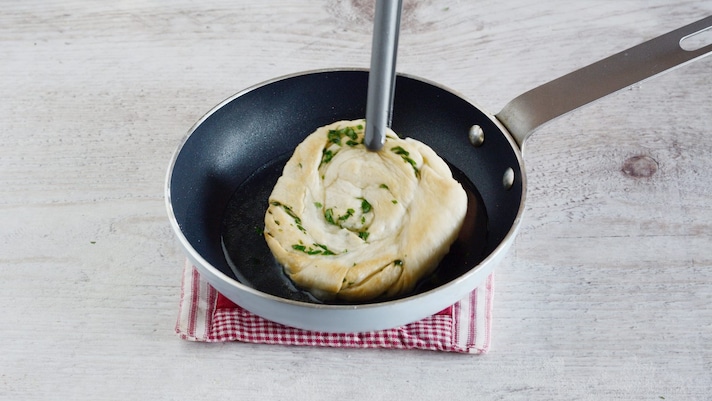
Turn it often, cooking it on both sides, until golden brown.
Turn it often, cooking it on both sides, until golden brown.
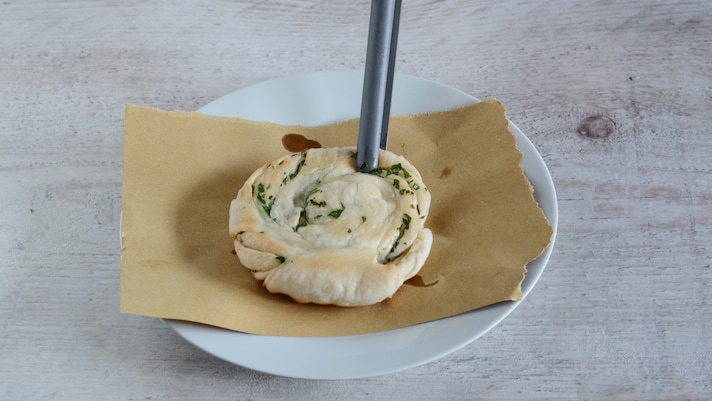
Once ready, let it dry on a sheet of absorbent paper for fried food.
Once ready, let it dry on a sheet of absorbent paper for fried food.
;Resize,width=712;)
Enjoy!
Enjoy!
;Resize,width=712;)
;Resize,width=712;)

;Resize,width=767;)
