
Chicken and Vegetables Foil Packets: the Simple Recipe for a Tasty Dinner!

Cooking in foil is typical of many fish preparations: particularly suitable for maintaining the softness of the meat even when cooking in the oven, it allows you to enjoy tender and juicy main courses. This is why we at Cookist have thought of a foil recipe that no longer features a fish as the protagonist, but one of the meats most loved by adults and children: chicken legs. Our Chicken and Vegetables Foil Packets are cooked in the oven with seasonal vegetables which, browning directly in the meat juices, give a side dish with a unique flavor.
The recipe is prepared very quickly, it cooks for a long time in the oven without the risk of the dish burning. It will be sufficient to wrap chicken legs and vegetables together in a well-sealed aluminum foil, in order to keep the inside moist and not to dry out the meat. Just take care to insert a sheet of baking paper between the thighs and the foil: it is always best to avoid cooking food in direct contact with the foil.
Is It Okay to Cook Chicken in Foil Packets?
Yes, it's generally okay to wrap chicken in aluminum foil when cooking. Wrapping chicken in foil can be beneficial for several reasons. Foil helps keep the chicken moist by trapping the steam that emits from the chicken as it cooks. This method is especially useful for baking or roasting in the oven, as it prevents the chicken from drying out. Foil can help heat distribute more evenly around the chicken, reducing the risk of undercooked or overcooked spots. You can add herbs, spices, or liquids (like lemon juice or broth) inside the foil, enhancing the flavors by allowing the chicken to marinate and cook simultaneously. Using aluminum foil can significantly simplify cleanup, as it prevents juices and marinades from spilling onto the oven tray or grill.
However, there are a few considerations to keep in mind. Cooking acidic foods (like tomatoes or citrus) in aluminum foil can cause more aluminum than usual to leach into the food. While the amounts are generally small and not harmful to most people, those who wish to minimize their aluminum intake might want to limit the use of foil with acidic ingredients. At very high temperatures, there can be a higher risk of the foil breaking down. If you're cooking at temperatures above 450°F (232°C), keep an eye on the foil to ensure it remains intact.
What are The Best Vegetables to Add to This Recipe?
Selecting seasonal vegetables for your chicken foil packets not only maximizes flavor but also ensures you're enjoying produce at its peak freshness. In the spring, consider adding asparagus, peas, and leeks, which are tender and complement the light flavors of chicken. Summer offers a bounty perfect for these packets, including zucchini, bell peppers, and cherry tomatoes, adding a burst of color and sweetness. For autumn, root vegetables like sweet potatoes, parsnips, and Brussels sprouts provide a hearty, earthy depth that pairs wonderfully with chicken as the weather cools. In the winter, switch to robust options like butternut squash, carrots, and turnips, which stand up well to longer cooking times and offer a comforting sweetness. Integrating these seasonal vegetables not only enhances the dish but also brings a delightful variation to your cooking throughout the year.
Can I Cook This Recipe in an Air Fryer Instead of an Oven?
Yes, you can certainly cook chicken and vegetable foil packets in an air fryer instead of an oven, and it can be a great way to achieve a delicious meal with less cooking time. Here’s how you can adapt the recipe for an air fryer. Make sure the foil packets are small enough to fit into your air fryer basket without overcrowding. This ensures even cooking and proper air circulation. You might need to cook in batches depending on the size of your air fryer. Preheat the air fryer to 180°C (350°F), the same temperature as in the oven recipe. Place the packets in the air fryer basket. Air fryers typically cook food faster than conventional ovens because they circulate hot air more efficiently. Start with about 25 to 30 minutes total for cooking the chicken packets. There’s no need to uncover the packets midway as in the oven method. Ensure that the chicken is thoroughly cooked by checking that it’s no longer pink at the bone and the juices run clear. Vegetables should be tender.
Tips and Variations
– Make sure the vegetables are cut into uniform sizes to ensure they cook evenly. This is particularly important for denser vegetables like potatoes and carrots.
– Add fresh herbs like rosemary, thyme, or oregano to the packets before cooking. They infuse the chicken and vegetables with aromatic flavors that complement the spices.
– Ensure that the foil packets are sealed tightly to trap the steam inside. This helps in cooking the chicken and vegetables thoroughly and retains all the flavors.
– The cooking time might vary depending on the size and thickness of the chicken legs and vegetable pieces. Check for doneness by carefully opening a packet and ensuring the chicken is no longer pink at the bone and the juices run clear.
– Let the packets rest for a few minutes after baking and before opening. This allows the juices to redistribute throughout the chicken, making it juicier.
– Swap out or add other vegetables such as sweet potatoes, zucchini, or bell peppers of different colors to introduce new flavors and textures.
– Add slices of lemon or orange inside the packets before cooking to give the chicken a citrusy zing that brightens up the flavors.
– If you like a bit more heat, add chili flakes, cayenne pepper, or a splash of hot sauce to the spice mix.
– Sprinkle some grated parmesan or cheddar cheese over the chicken and vegetables in the last 10 minutes of baking for a cheesy crust.
– For a smoky barbecue flavor, brush the chicken with your favorite BBQ sauce before placing it in the foil, and then again once uncovered for the final 20 minutes.
– Add a spoonful of cream or a dollop of cream cheese to the packet before sealing it to create a rich, creamy sauce as it bakes.
More Chicken Recipes You Will Love
How to Store Chicken and Vegetable Foil Packets
Chicken and Vegetable Foil Packets can be stored in an airtight container in the refrigerator for up to 2 days.
Find out how to prepare them by following our step-by-step recipe and advice.
Ingredients
How to Prepare Chicken and Vegetable Foil Packets
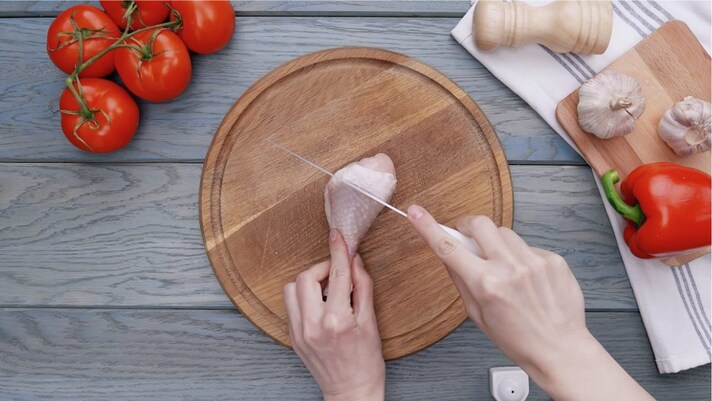
Start with the chicken legs: wash them well and cut the head with a not too deep cut.
Start with the chicken legs: wash them well and cut the head with a not too deep cut.
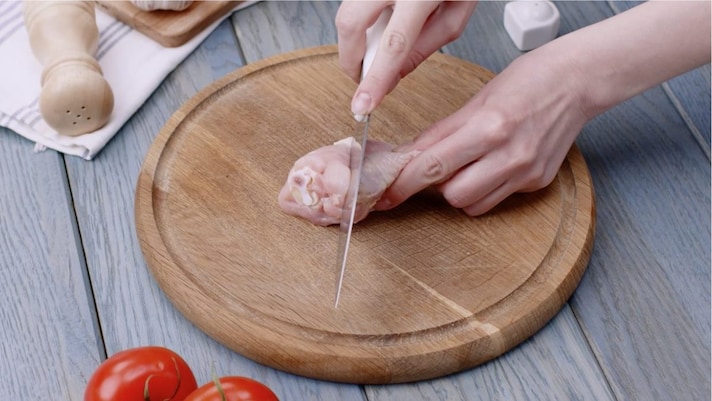
Repeat the operation on the other sides too, until the meat is slightly detached.
Repeat the operation on the other sides too, until the meat is slightly detached.

Now move on to the vegetables: slice the carrot into chunks of about half a centimeter.
Now move on to the vegetables: slice the carrot into chunks of about half a centimeter.
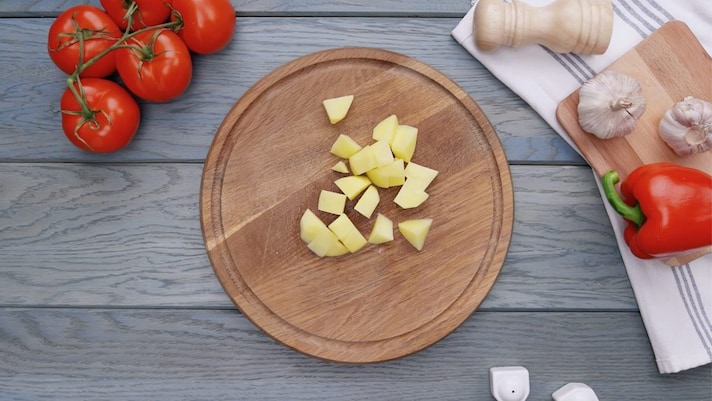
Repeat the operation with the potato, taking care to create homogeneous chunks.
Repeat the operation with the potato, taking care to create homogeneous chunks.
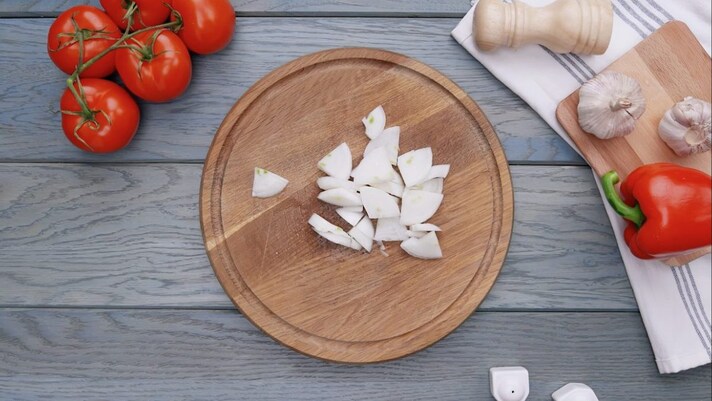
Cut the onion, always making sure to create homogeneous pieces.
Cut the onion, always making sure to create homogeneous pieces.

Was the pepper, remove the internal seeds, and white parts, then cut it into pieces the same size as the carrot and potato.
Was the pepper, remove the internal seeds, and white parts, then cut it into pieces the same size as the carrot and potato.
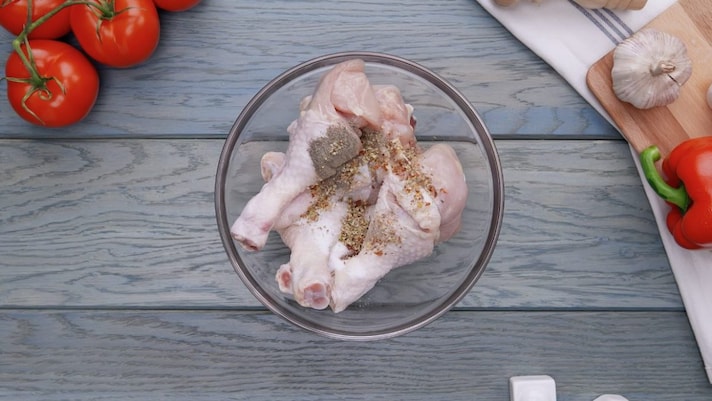
Place the chicken legs in a large bowl and add the spices: a pinch of salt, a pinch of pepper and a pinch of paprika.
Place the chicken legs in a large bowl and add the spices: a pinch of salt, a pinch of pepper and a pinch of paprika.
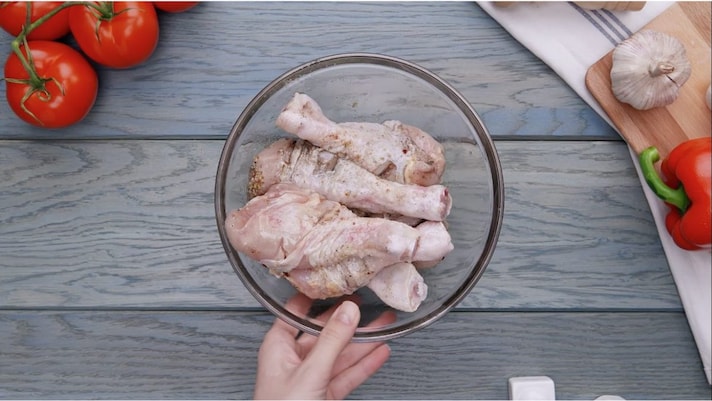
Drizzle with olive oil and mix with your hands to better distribute the seasoning.
Drizzle with olive oil and mix with your hands to better distribute the seasoning.
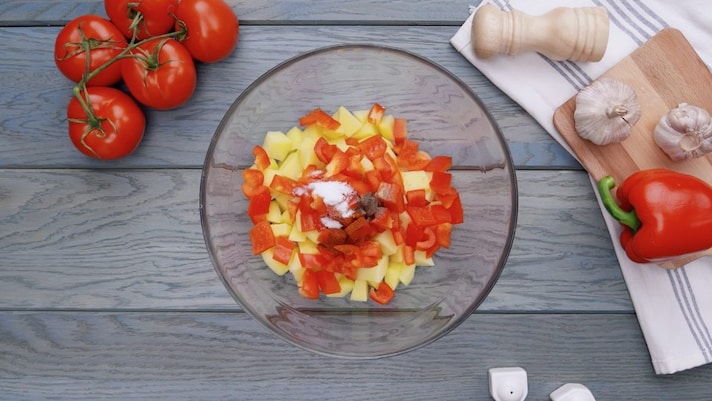
Repeat the same operation with the vegetables, using the rest of the leftover spices, then mix well.
Repeat the same operation with the vegetables, using the rest of the leftover spices, then mix well.
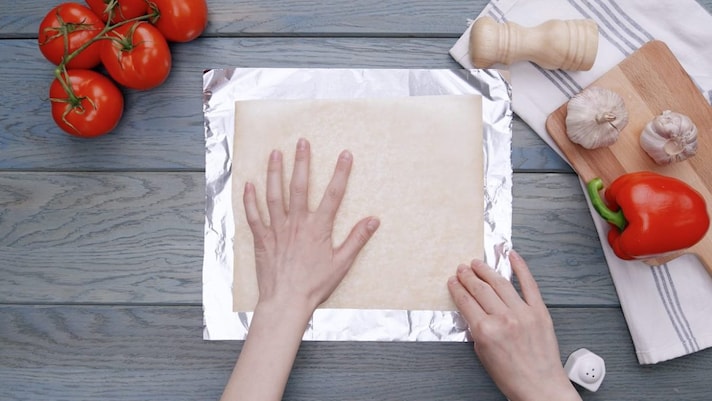
Place a sheet of baking paper on top of an aluminum sheet: the size should be approximately that of an A4 sheet. This way you will completely wrap the chicken legs, ensuring the internal humidity necessary to keep the meat soft.
Place a sheet of baking paper on top of an aluminum sheet: the size should be approximately that of an A4 sheet. This way you will completely wrap the chicken legs, ensuring the internal humidity necessary to keep the meat soft.

Arrange a few spoonfuls of vegetables and place the chicken thigh in the center of them, adding the butter just before closing the parcel.
Arrange a few spoonfuls of vegetables and place the chicken thigh in the center of them, adding the butter just before closing the parcel.

Seal the baking paper well to create a completely closed parcel: be careful not to leave any openings, otherwise the meat will dry out with long cooking.
Seal the baking paper well to create a completely closed parcel: be careful not to leave any openings, otherwise the meat will dry out with long cooking.
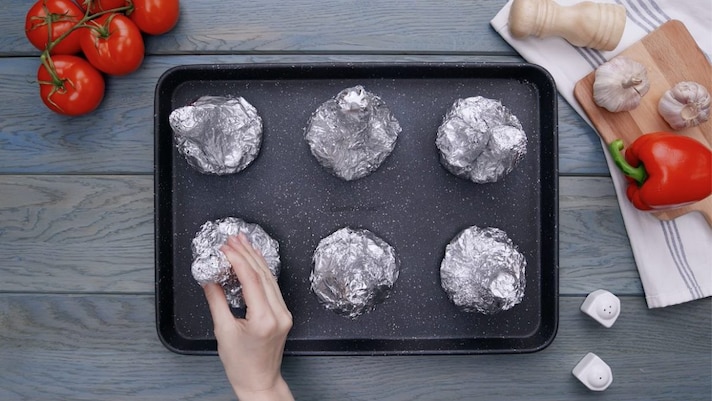
Place the chicken legs on the baking tray and bake at 356°F (180°C) for 40 minutes.
Place the chicken legs on the baking tray and bake at 356°F (180°C) for 40 minutes.
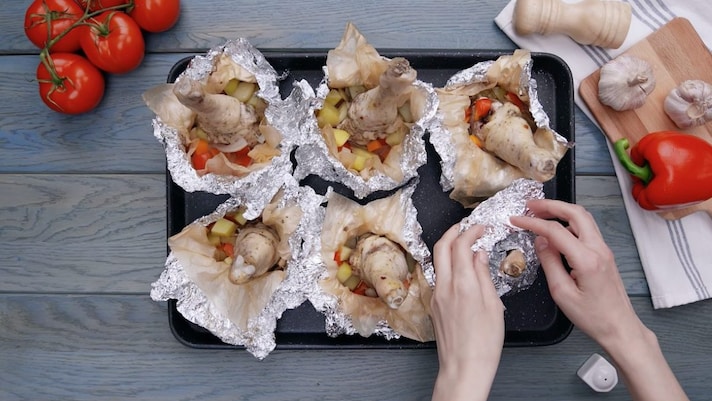
Once the cooking time has elapsed, take the chicken legs out of the oven, open the foil and leave to cook for another 20 minutes with the foil open.
Once the cooking time has elapsed, take the chicken legs out of the oven, open the foil and leave to cook for another 20 minutes with the foil open.
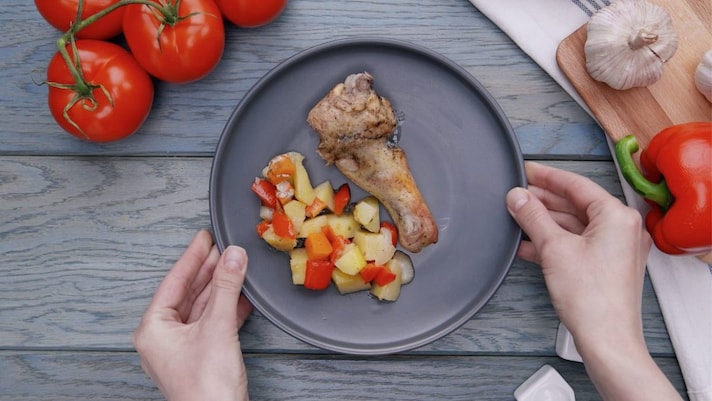
When the crispy and colorful crust has formed, take the chicken legs and vegetables out of the oven.
When the crispy and colorful crust has formed, take the chicken legs and vegetables out of the oven.
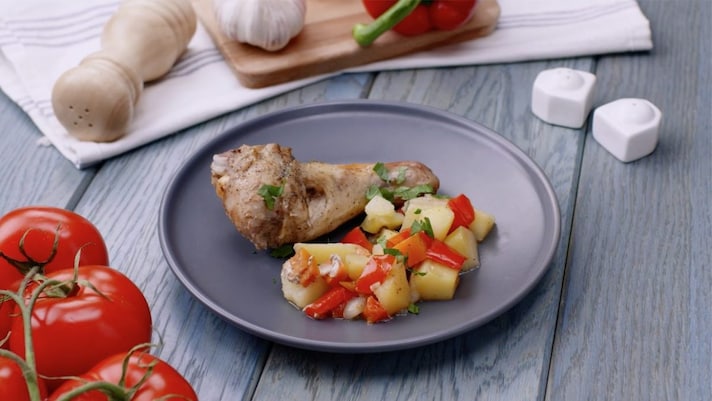
Place the chicken legs with vegetables and garnish with a sprinkling of chopped parsley, then serve piping hot. Enjoy!
Place the chicken legs with vegetables and garnish with a sprinkling of chopped parsley, then serve piping hot. Enjoy!
;Resize,width=767;)

;Resize,width=712;)
;Resize,width=712;)
