Beautiful Christmas Present-Shaped Cookies

Christmas Present-Shaped Cookies are quick and delicious biscuits, ideal to put in a tin and give to guests on Christmas day, or to eat during the holidays for a special snack in the company of friends. These are fragrant two-tone pastries, prepared with a cocoa and vanilla shortcrust pastry that, for a perfect result, will only require a little precision and a pinch of manual skill.
To bring them to the table, once you have made the shortcrust pastry according to the classic recipe, you just need to divide the smooth and homogeneous dough into two equal parts, add the bitter cocoa powder to one half and then leave the dough to rest in the fridge, wrapped in a sheet of cling film, for at least 2 hours. Once the time has passed, you will need to equip yourself with a very sharp knife and a ruler, roll out the white and dark shortcrust pastry, respectively 1 cm and 1/2 cm thick, and then obtain many strips of different sizes: the vanilla ones are wider and the chocolate ones are thinner.
At this point you will have to make two multicolored rectangles by joining together, with a little egg white, two white and one black loaf, then space them out with a rectangle of cocoa shortcrust pastry of the same size and finally cut the resulting parallelepiped into regular slices. Once you have arranged the "packets" on a baking tray with baking paper, all you have to do is form decorative bows with the leftover pastry scraps and bake everything at 360°F/180°C for 12-15 minutes: the result will be refined and scenic biscuits, to be served at the end of a meal with a glass of fortified wine or dunked in a cup of coffee with milk for breakfast.
What Are Present Cookies?
The Present-shaped Cookies are festive, two-tone cookies made with vanilla and cocoa shortcrust pastry, perfect for gifting. The recipe involves preparing the dough, chilling it, and shaping it into rectangles before cutting into thin slices. The cookies are then decorated with small dough shapes to resemble gift packages. After baking, they make a charming and delicious gift or addition to holiday parties. The recipe allows for variations, including gluten-free and lighter options, while adding flavors like orange zest or rum for a personalized touch.
Pro Tips for The Best Present Cookies
- Make sure to refrigerate the dough for at least 30 minutes. This helps it firm up, making it easier to roll out and cut into shapes without sticking.
- Use a cold rolling pin and parchment paper to prevent the dough from sticking while rolling. You can even dust your work surface with a little flour if needed.
- If the dough softens too much while you're working with it, divide it into smaller portions and chill again for 10–15 minutes before continuing.
- Try to roll the dough to a consistent thickness of about 1/4 inch (6mm) to ensure even baking and a uniform texture.
- While the cookies are traditionally shaped like gift packages, you can use cookie cutters to create other festive shapes like stars or hearts for a personalized touch.
- Keep a close eye on the cookies as they bake. They should be golden brown around the edges but still soft in the center. Overbaking can lead to dry cookies.
- Let the cookies cool on a wire rack before storing them in an airtight container to maintain their crispness and freshness.
Can I Add Any Flavorings to The Cookies?
Consider incorporating citrus zest, like orange or lemon, for a fresh twist, or spices such as cinnamon, nutmeg, or ginger for a warm, seasonal touch. Adding vanilla or almond extract can provide a deeper aroma, while chopped nuts like walnuts or hazelnuts offer a satisfying crunch. For a richer treat, you can also mix in chocolate chips or chunks. Just be sure to adjust the proportions carefully to maintain the dough’s consistency.
Can I Decorate Them With Some Type of Frosting?
Of course you can! Royal icing works best as it hardens when dry, making the cookies more durable for gifting or display. You can use colored icing to highlight the "gift ribbon" details or create intricate designs like snowflakes or polka dots. Ensure the cookies are fully cooled before applying the icing for the best results.
Can I Make These Ahead?
Sure! You can prepare the dough and store it in the fridge for up to 2-3 days. After baking, the cookies can also be kept in an airtight container for up to a week. This makes them a great option for holiday preparation or last-minute gifting!
Do They Freeze Well?
They do! After baking, let the cookies cool completely, then store them in an airtight container or freezer bag. They can be frozen for up to 3 months. When you're ready to enjoy them, simply thaw at room temperature for a few hours.
How to Store Present Cookies
If you have any left over, you can store them at room temperature, tightly closed in a tin, for up to 1 week.
Ingredients
How to Make Present Cookies
;Resize,width=712;)
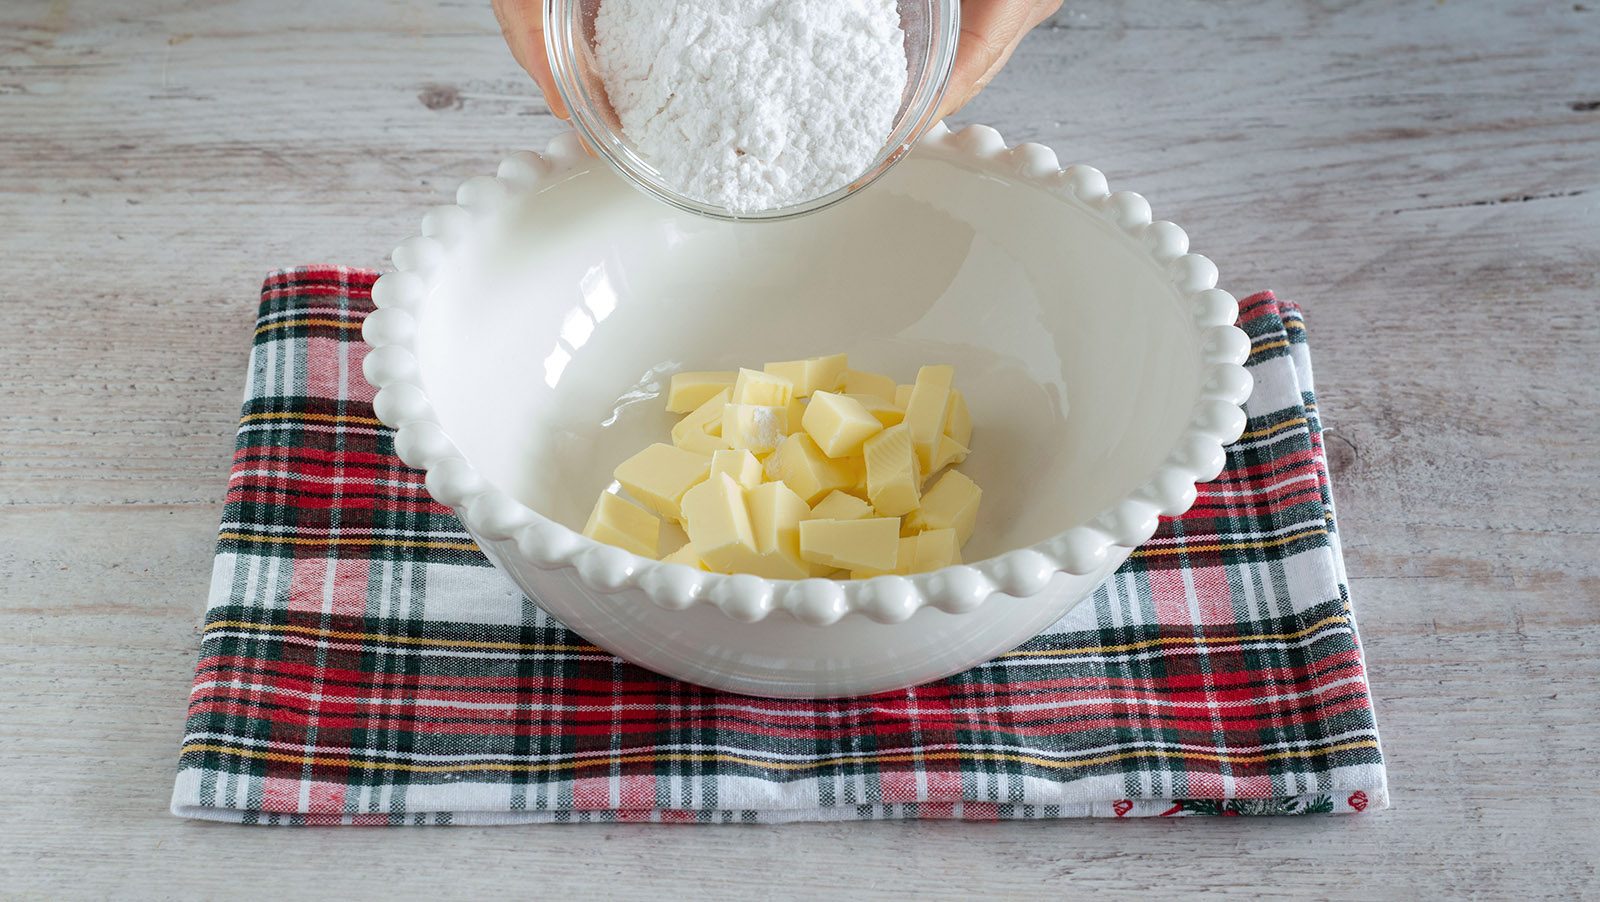
Prepare the vanilla shortcrust pastry. Cut the soft butter into cubes and collect it in a bowl with the powdered sugar.
Prepare the vanilla shortcrust pastry. Cut the soft butter into cubes and collect it in a bowl with the powdered sugar.
;Resize,width=712;)
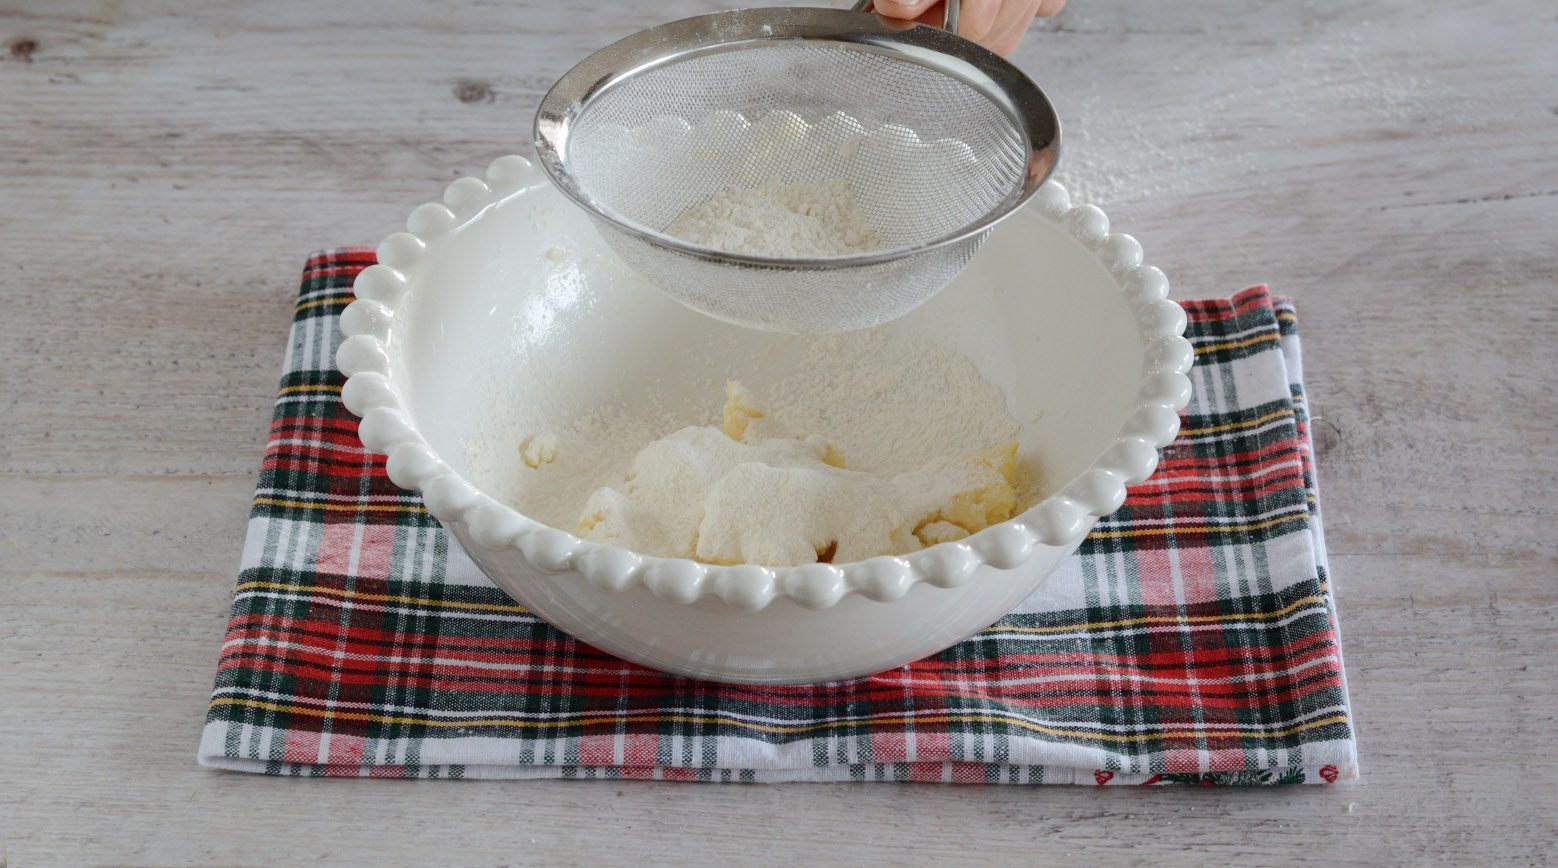
Add the sifted flour.
Add the sifted flour.
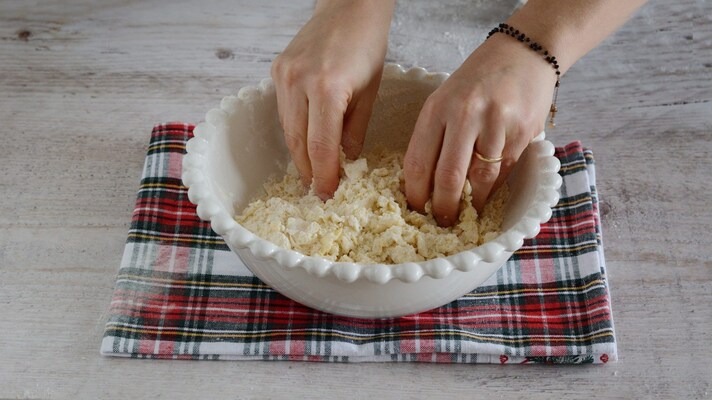
Work the ingredients quickly until you obtain a sandy mixture.
Work the ingredients quickly until you obtain a sandy mixture.
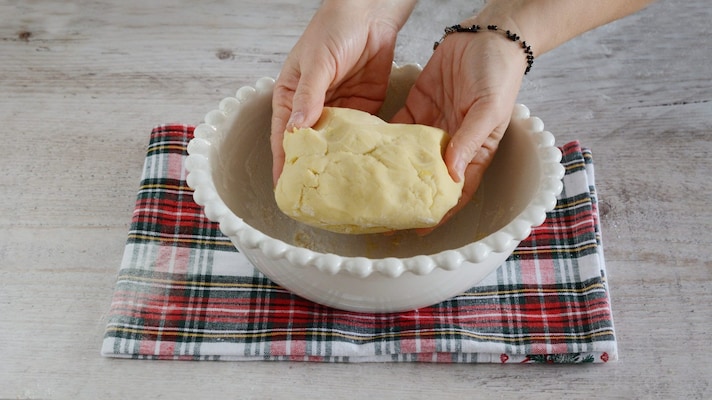
Add the egg, a pinch of salt and the vanilla extract, and continue kneading: at the end you should obtain a smooth and homogeneous dough.
Add the egg, a pinch of salt and the vanilla extract, and continue kneading: at the end you should obtain a smooth and homogeneous dough.
;Resize,width=712;)
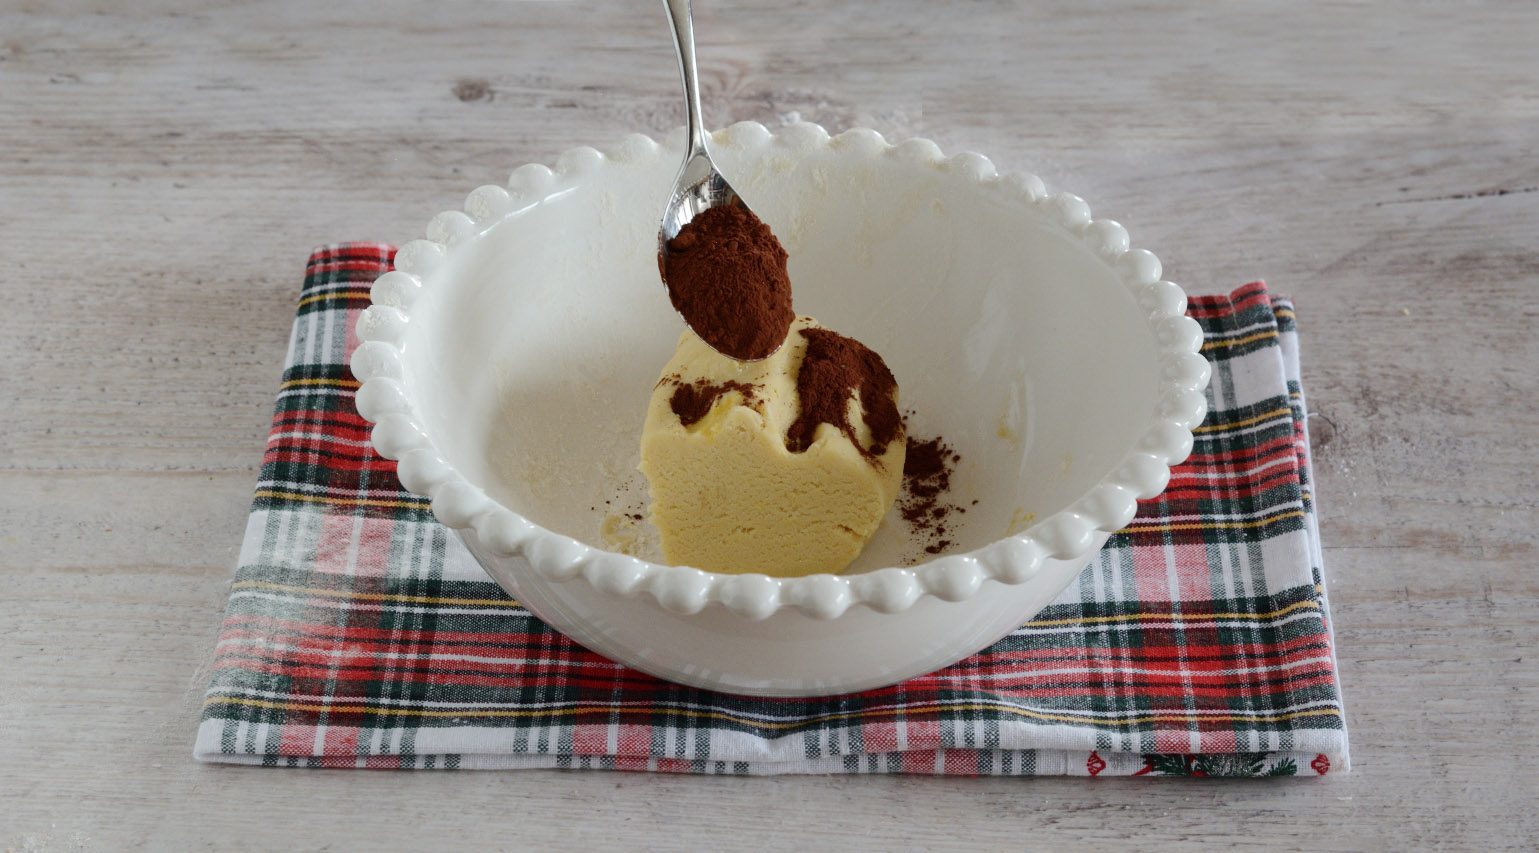
Divide the pastry in half and place half a loaf in a bowl with the bitter cocoa powder.
Divide the pastry in half and place half a loaf in a bowl with the bitter cocoa powder.
;Resize,width=712;)
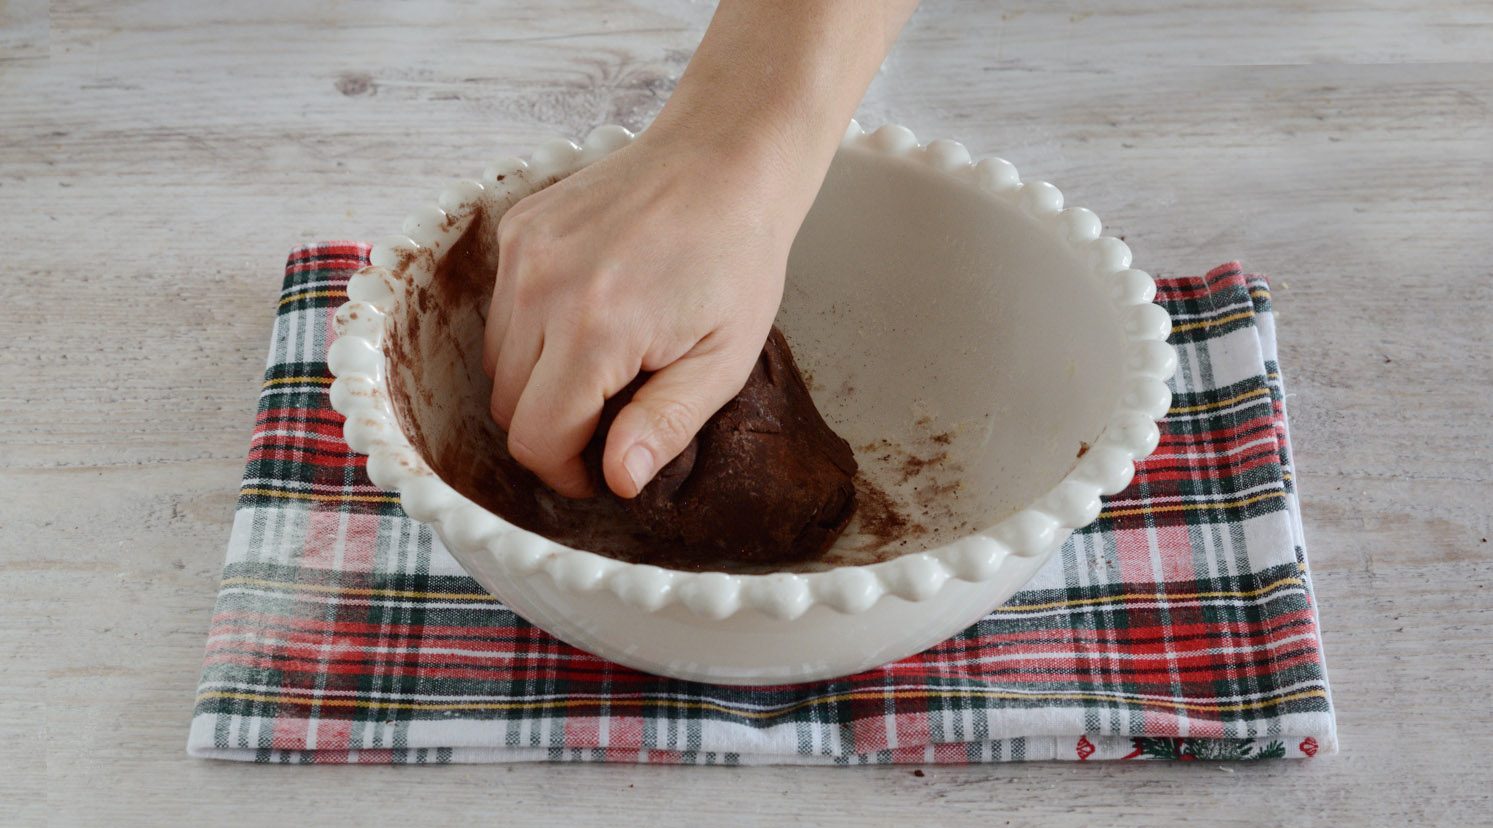
Work the dough for a few more moments to incorporate the cocoa.
Work the dough for a few more moments to incorporate the cocoa.
;Resize,width=712;)
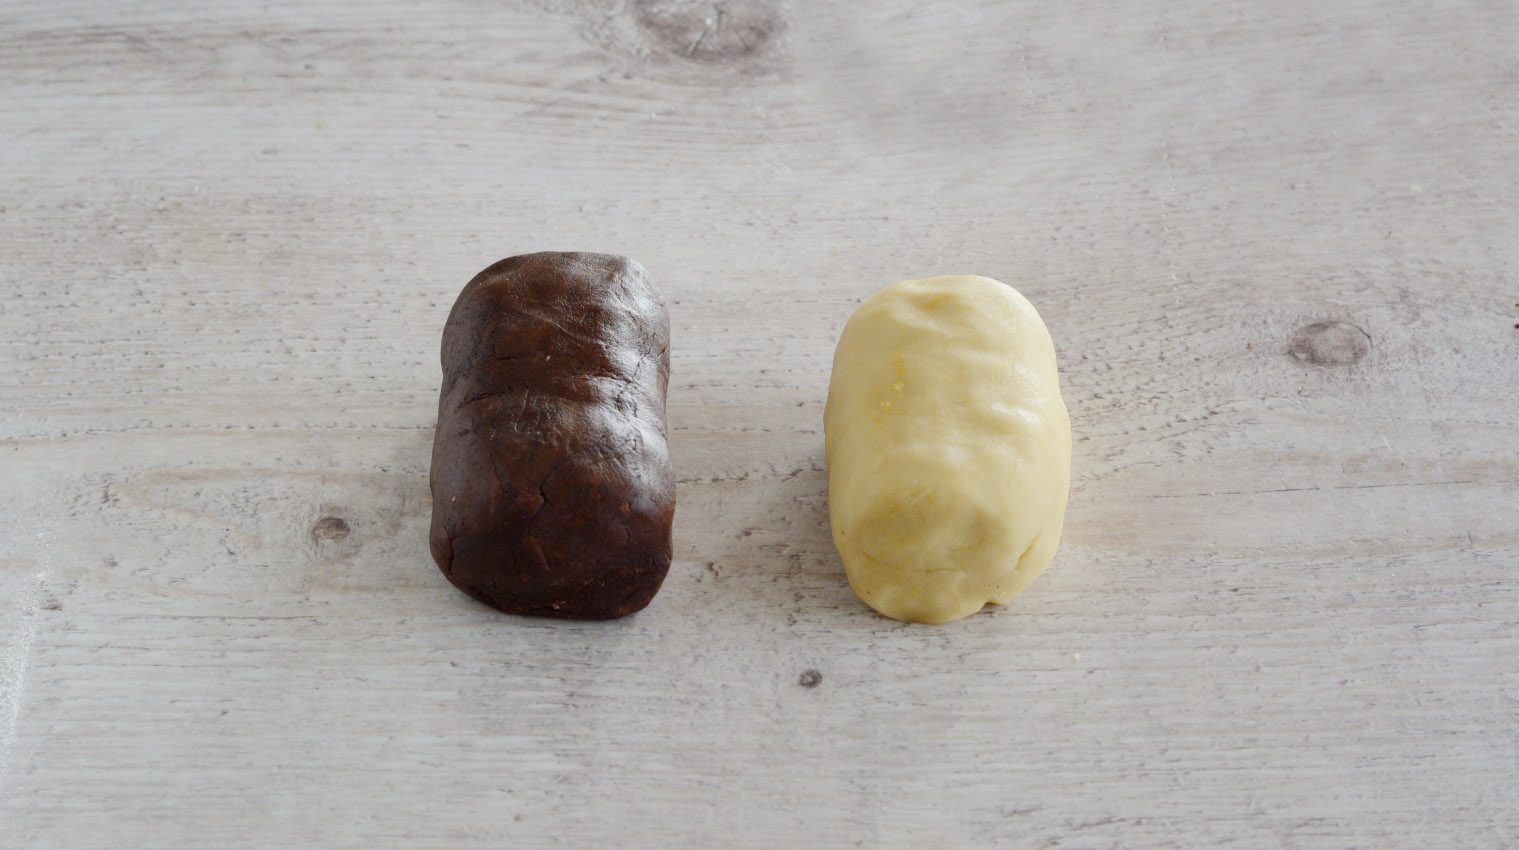
At this point, transfer the vanilla and chocolate shortcrust pastries onto the work surface, cover with a sheet of cling film and leave to rest in the fridge for 2 hours.
At this point, transfer the vanilla and chocolate shortcrust pastries onto the work surface, cover with a sheet of cling film and leave to rest in the fridge for 2 hours.
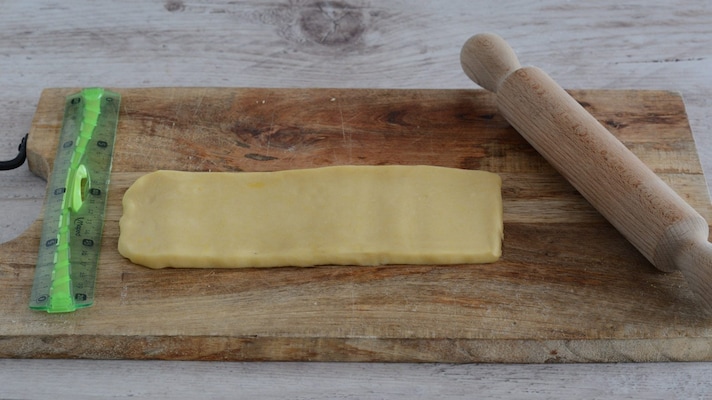
Once the time has passed, using a rolling pin and a reuler, form a rectangle with the white pastry of 1cm thick.
Once the time has passed, using a rolling pin and a reuler, form a rectangle with the white pastry of 1cm thick.
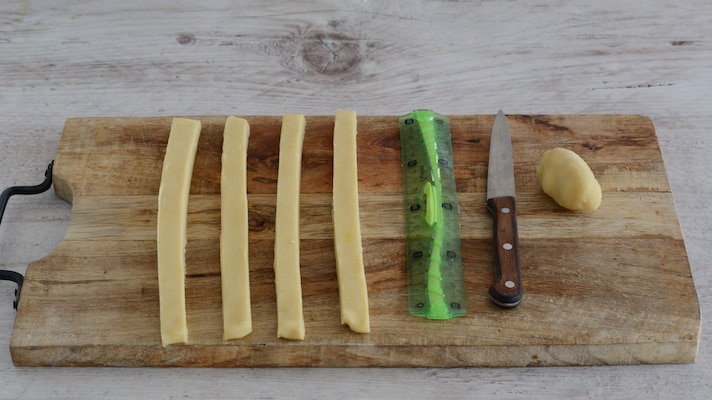
Cut four strips 1.5cm wide.
Cut four strips 1.5cm wide.
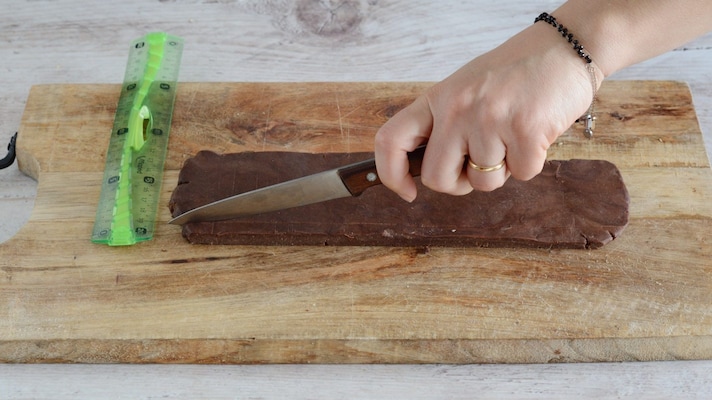
Also, take the chocolate shortcrust pastry out of the fridge, roll out the dough to 1/2 cm thick and cut out 3 strips.
Also, take the chocolate shortcrust pastry out of the fridge, roll out the dough to 1/2 cm thick and cut out 3 strips.
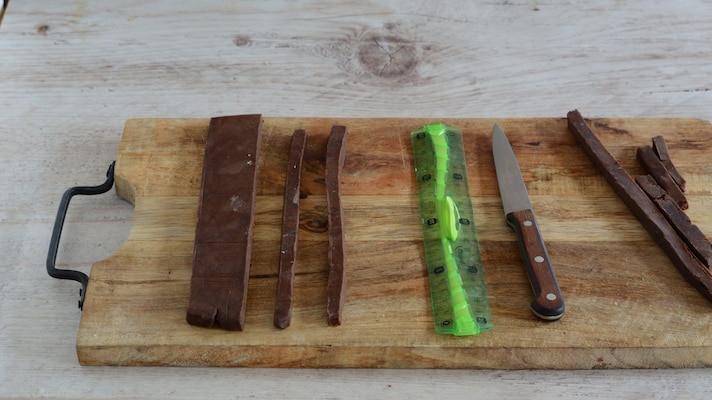
At the end you will have obtained a rectangle of about 3.5cm wide and 2 strips 1cm wide.
At the end you will have obtained a rectangle of about 3.5cm wide and 2 strips 1cm wide.
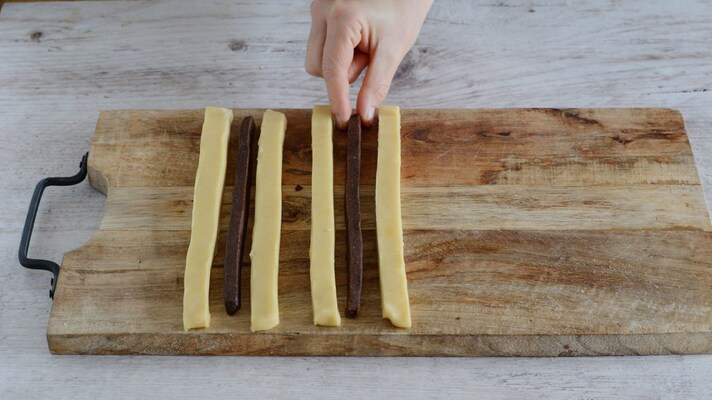
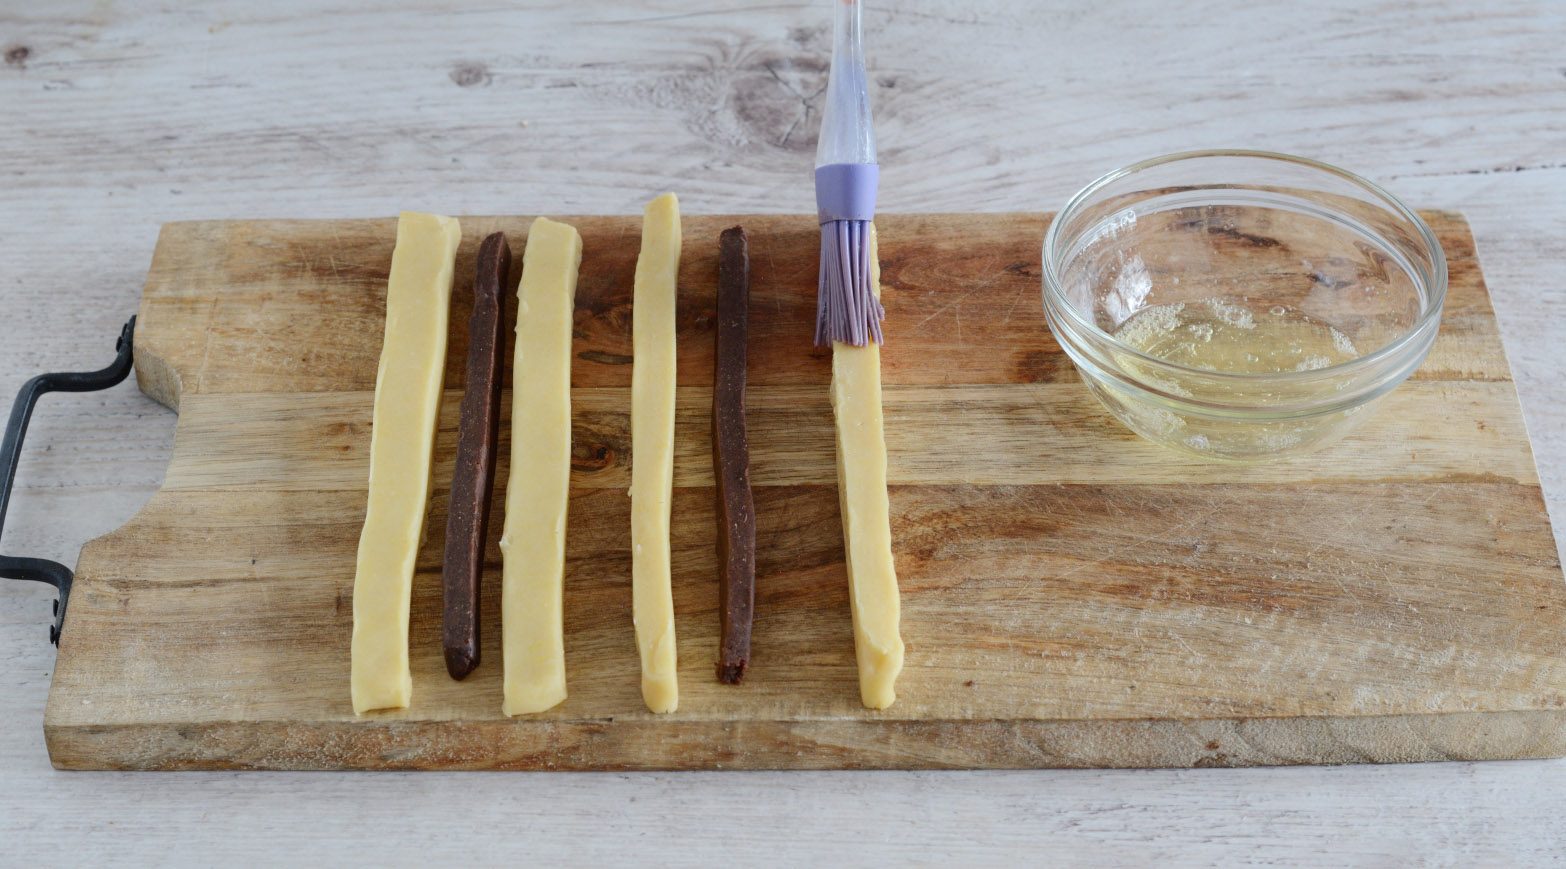
Place the 1cm wide chocolate strings in the center of the white rectangles previously cut.
Place the 1cm wide chocolate strings in the center of the white rectangles previously cut.
;Resize,width=712;)
Brush the pastry with egg white.
Brush the pastry with egg white.
;Resize,width=712;)
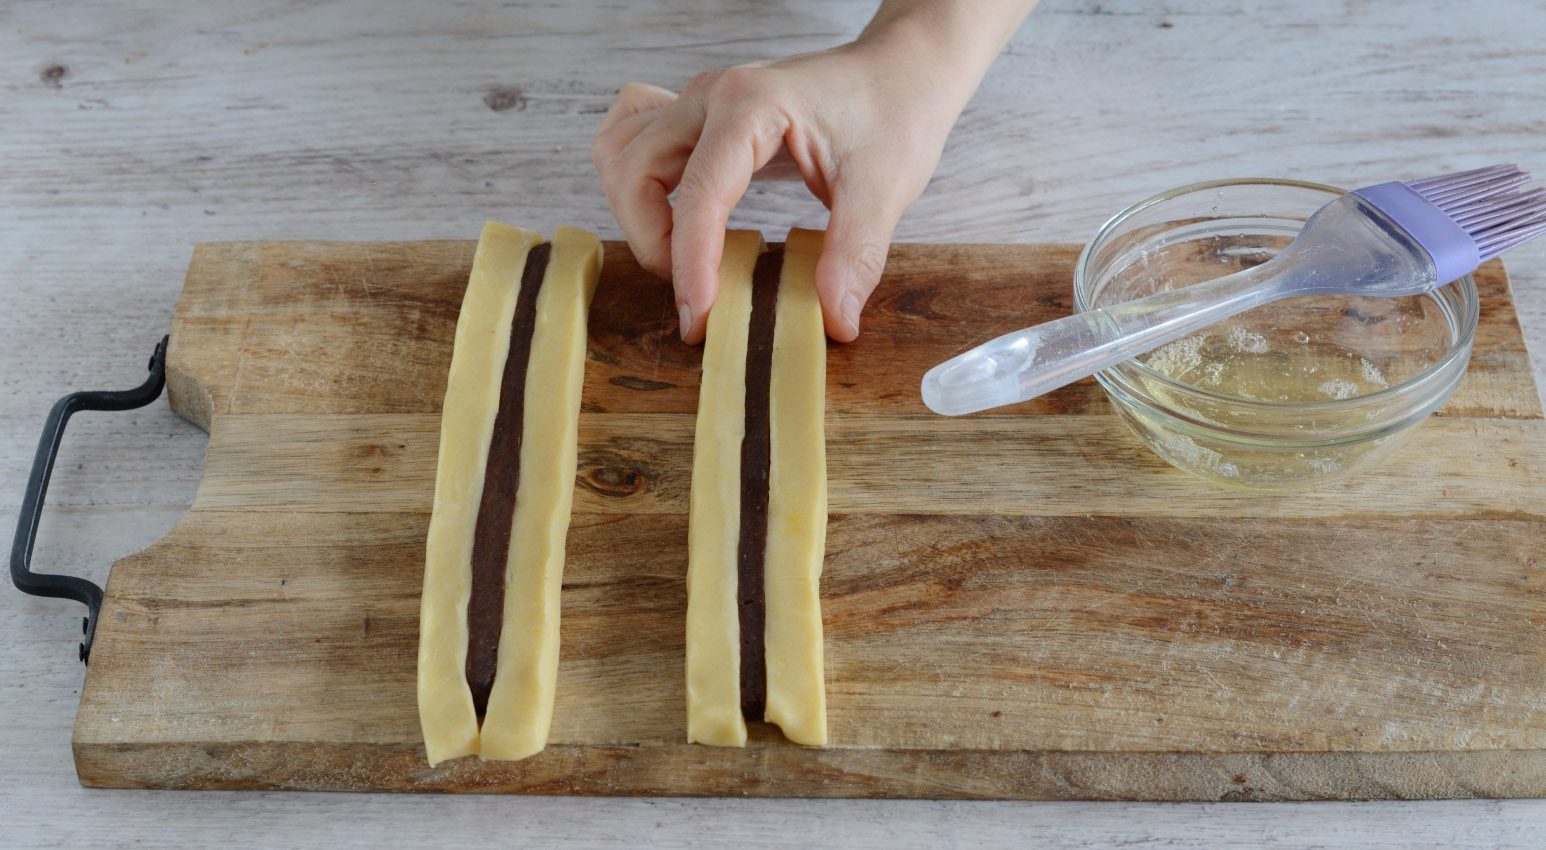
Using a light pressure from your fingers, make the chocolate shortcrust pastry adhere to the two cylinders of dough, so as to create two multi-colored rectangles.
Using a light pressure from your fingers, make the chocolate shortcrust pastry adhere to the two cylinders of dough, so as to create two multi-colored rectangles.
;Resize,width=712;)
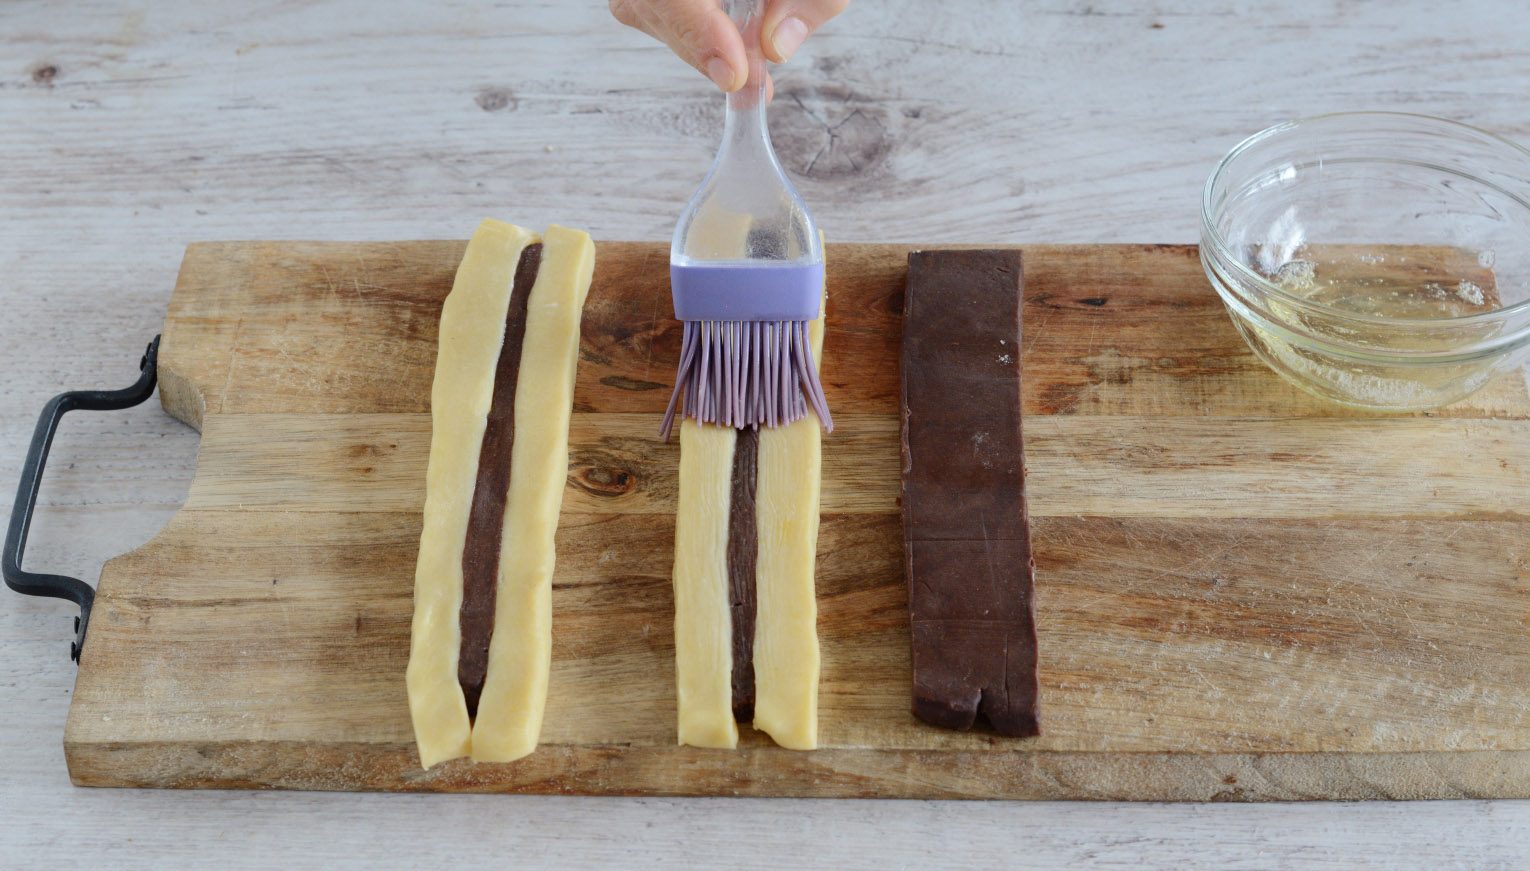
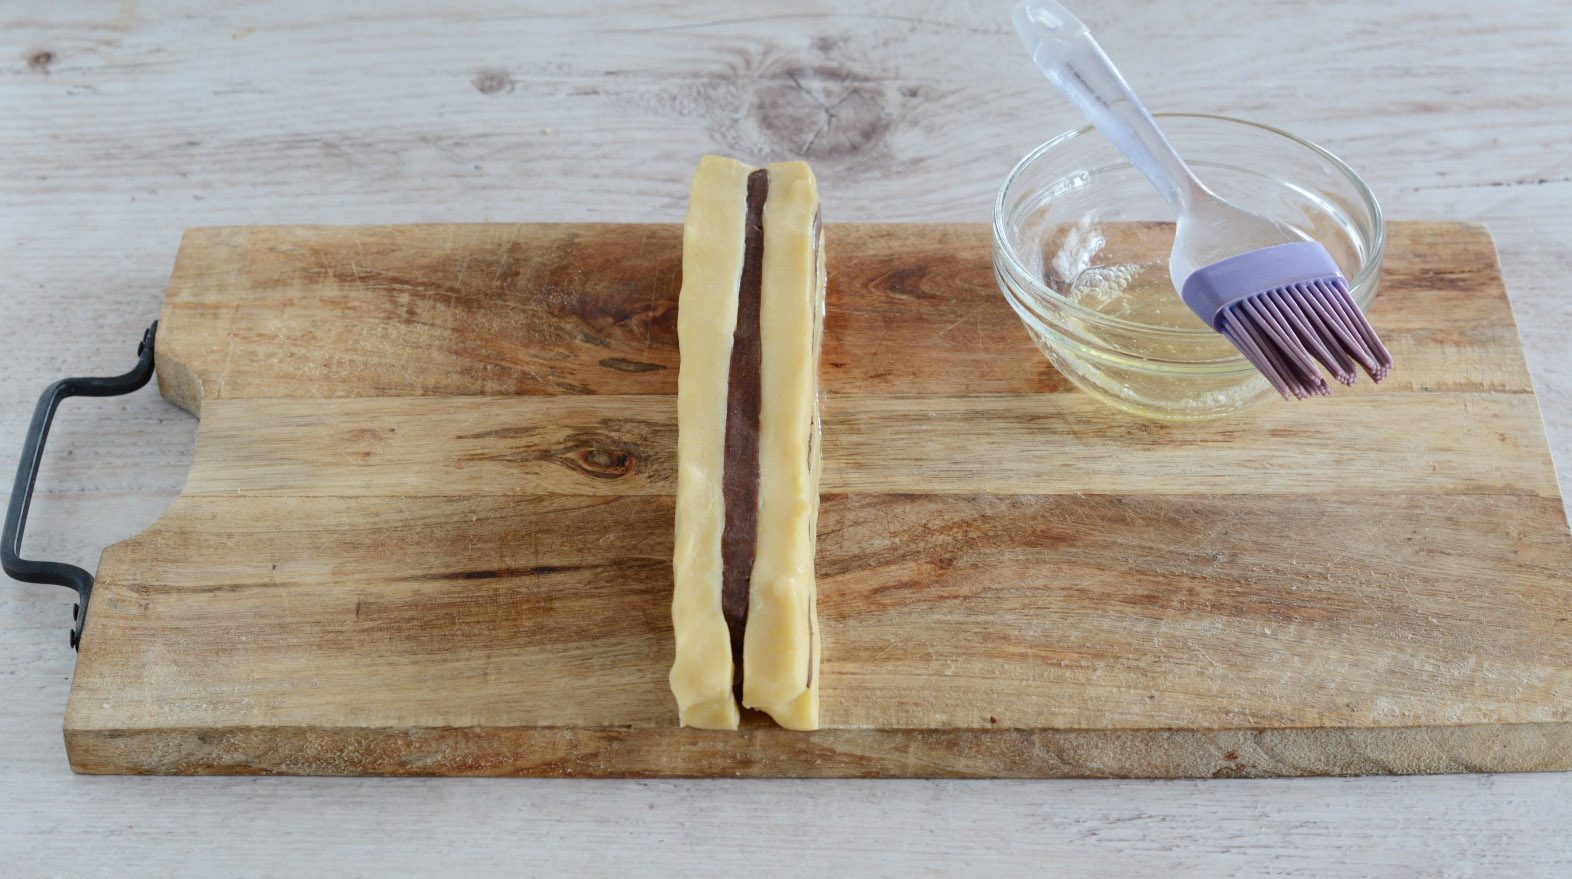
Brush the surface of a multicolored rectangle with egg white.
Brush the surface of a multicolored rectangle with egg white.
;Resize,width=712;)
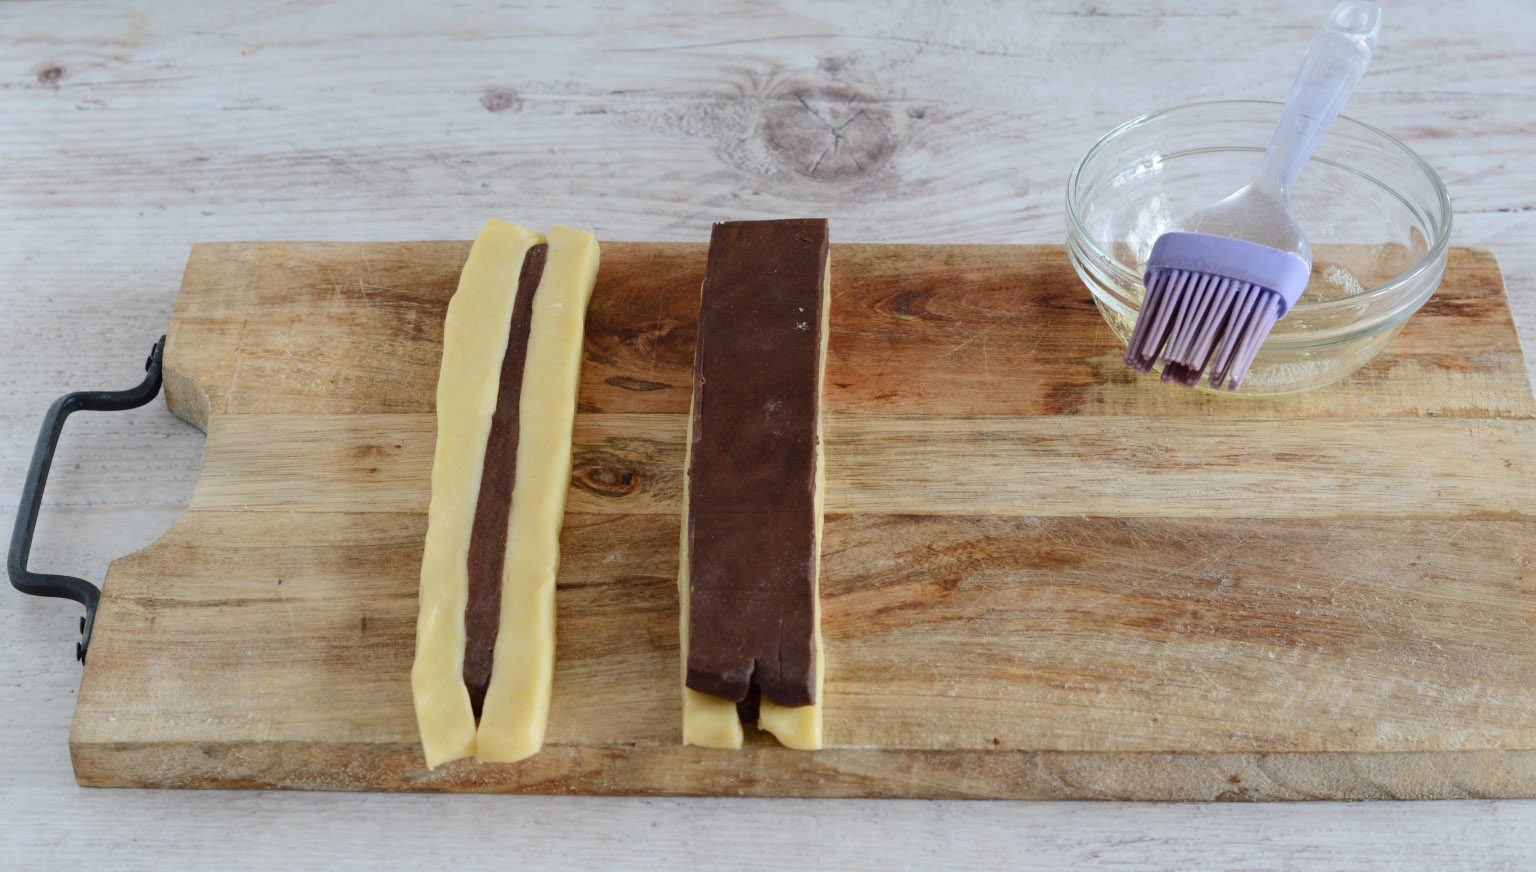
Place the remaining widest chocolate strip on top.
Place the remaining widest chocolate strip on top.
;Resize,width=712;)
Overlap the last pastry rectangle, always making it stick well with a little egg white, wrap everything in cling film and leave to rest in the freezer for half an hour.
Overlap the last pastry rectangle, always making it stick well with a little egg white, wrap everything in cling film and leave to rest in the freezer for half an hour.
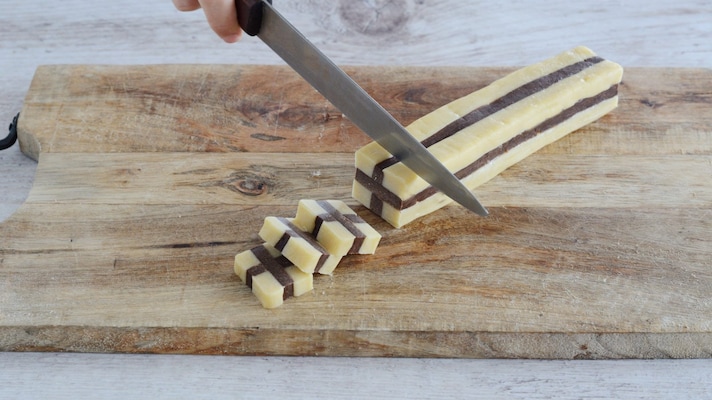
Once the resting time has passed, create the little present shapes by cutting out many 1/2 cm thick slices with a smooth bladed knife.
Once the resting time has passed, create the little present shapes by cutting out many 1/2 cm thick slices with a smooth bladed knife.
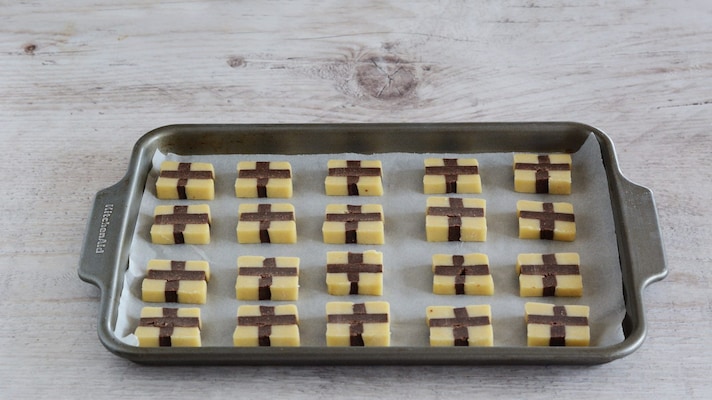
As they are ready, arrange the biscuits on a baking tray lined with baking paper, and put them in the fridge for another 30 minutes.
As they are ready, arrange the biscuits on a baking tray lined with baking paper, and put them in the fridge for another 30 minutes.
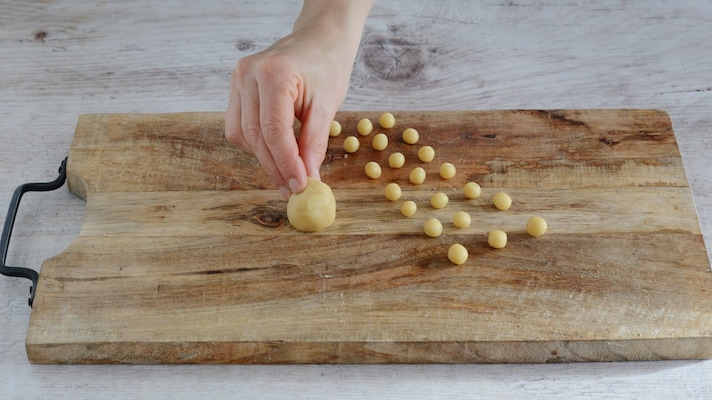
Meanwhile, form lots of light balls with the vanilla shortcrust pastry scraps.
Meanwhile, form lots of light balls with the vanilla shortcrust pastry scraps.
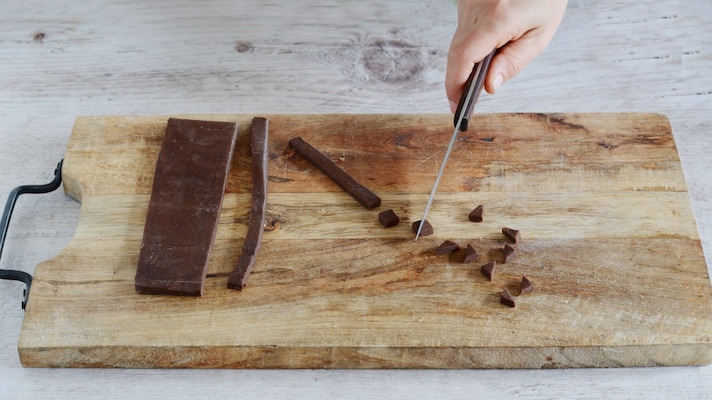
From the leftover chocolate pastry, cut squares of about 1cm on each side, and cut them diagonally.
From the leftover chocolate pastry, cut squares of about 1cm on each side, and cut them diagonally.
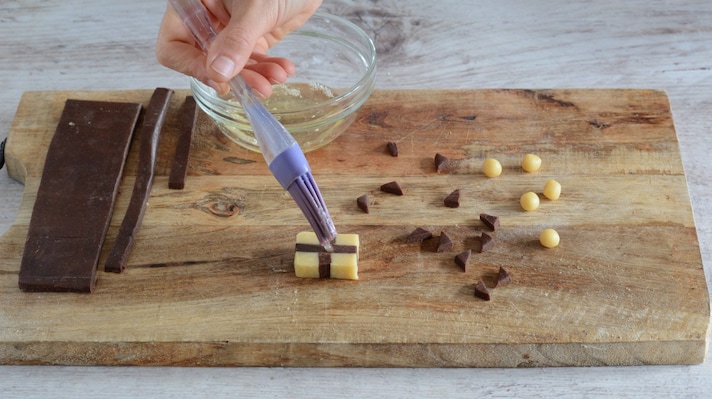
Brush the center of the biscuits with a drop of egg white.
Brush the center of the biscuits with a drop of egg white.
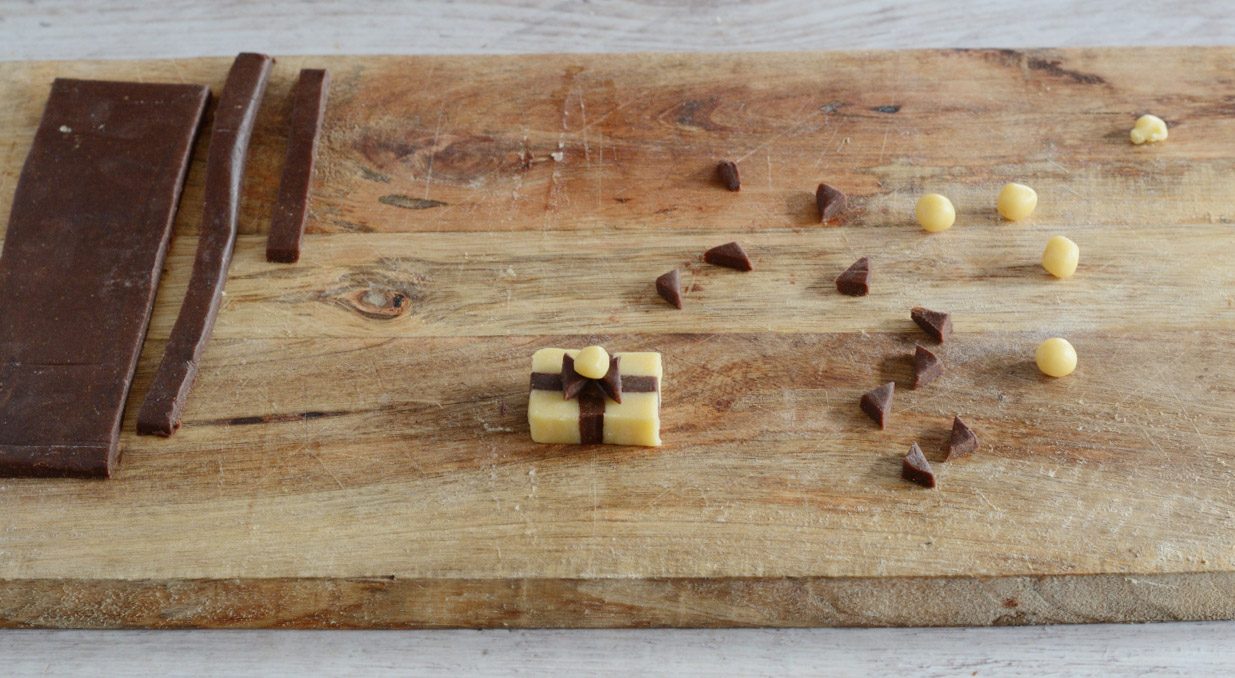;Resize,width=712;)
Make the bow with the cocoa triangles and the vanilla balls.
Make the bow with the cocoa triangles and the vanilla balls.
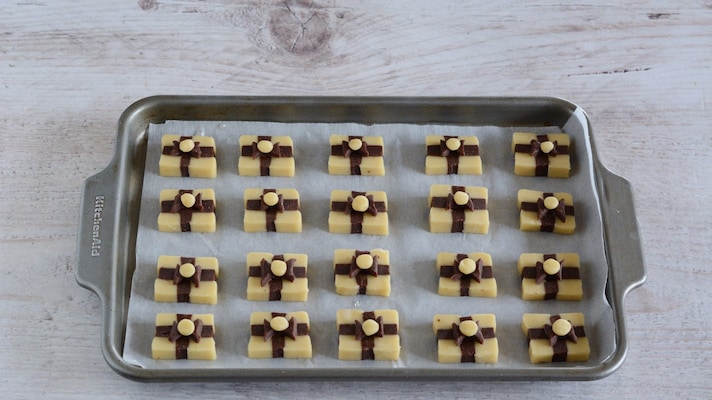
Put the pan with the biscuits back in the fridge for half an hour, then cook them in a preheated oven at 360°F/180°C for 12-15 minutes.
Put the pan with the biscuits back in the fridge for half an hour, then cook them in a preheated oven at 360°F/180°C for 12-15 minutes.
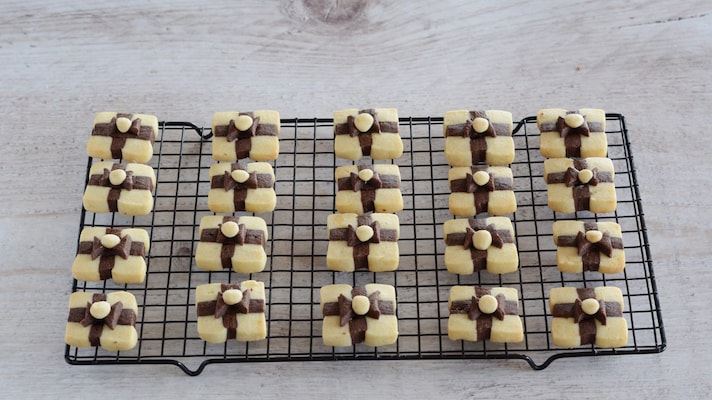
Once cooked, take the biscuits out of the oven and leave them to cool completely on a wire rack.
Once cooked, take the biscuits out of the oven and leave them to cool completely on a wire rack.
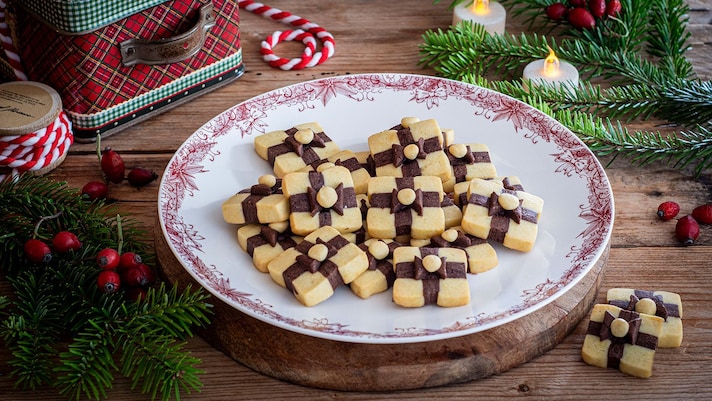
Enjoy!
Enjoy!
;Resize,width=767;)
;Resize,width=712;)

;Resize,width=712;)
