
Baked Cheesy Zucchini and Onion Omelette

This Baked Zucchini and Onion Omelette is a quick main dish with a stringy heart, a richer variant of the zucchini omelette, enriched with a tasty cheesy filling. It's also perfect to eat for a very hearty breakfast, or to present during a Sunday brunch with friends. To make it, we cut the zucchini and onions into slices, before baking them in the oven; the cooked vegetables will then be mixed with beaten eggs, breadcrumbs and parmesan . The omelette will then be stuffed with slices of cheese and baked in the oven for about twenty minutes . Once ready, serve it for lunch or dinner, accompanied with a fresh salad or with the side dish you prefer.
What is Baked Zucchini and Onion Omelette?
The zucchini omelette is a delightful variation of the traditional omelette, a dish with roots tracing back to ancient Persia. Omelettes spread to Europe, with the French popularizing the classic folded version we know today. Baked omelettes, like the frittata in Italy and the tortilla in Spain, offer a heartier, more versatile approach to the dish. This baked zucchini omelette combines Italian influences, particularly the use of Parmesan and breadcrumbs, with a modern twist of incorporating seasonal vegetables like zucchini. Its origins reflect a fusion of culinary traditions aimed at creating a nutritious, flavorful meal that's easy to prepare and perfect for any time of day.
Tips for The Best Baked Zucchini and Onion Omelette
- Cut the zucchini and onion into uniform pieces to ensure they cook evenly. Consistent slicing helps in achieving a uniform texture throughout the omelette.
- Make sure your oven is fully preheated to 180°C/360°F before baking. This ensures the vegetables start cooking immediately and evenly.
- Lining the baking tray with parchment paper prevents sticking and makes for easy cleanup. It also helps in even cooking.
- Keep an eye on the omelette during the second bake. Depending on your oven, it might need a little less or more time than specified. Look for a golden-brown top and a firm, set center.
- Let the omelette rest for a few minutes after baking before slicing. This helps it set further and makes slicing easier, ensuring clean, neat pieces.
Do I Have to Dry The Zucchini Before Baking Them?
No, the zucchini do not need to be dried before baking. However, if you prefer a firmer texture and to avoid excess moisture, you can pat them dry with a paper towel after cutting. This step helps to reduce the water content and achieve a better consistency in the baked omelette.
How Do I Keep The Veggies From Getting Soggy?
To keep the veggies from getting soggy, make sure to cut them into uniform pieces and pat them dry with a paper towel after cutting. Additionally, avoid overcrowding the baking tray so that the vegetables can roast evenly, allowing moisture to evaporate properly. Preheating the oven ensures they start cooking immediately, reducing the risk of sogginess.
Do I Have to Cook The Vegetables Before Putting Them in the Omelette?
Yes! Cooking the vegetables before adding them to the omelette ensures they are tender and flavorful, as raw vegetables can release excess moisture and result in a watery dish. Pre-cooking also helps to concentrate their flavors and ensures even cooking within the omelette.
What Type of Cheese is Best for This Omelette?
Feel free to experiment with different types of cheese for varied flavors. A mix of mozzarella and cheddar, for example, can add a deliciously gooey and sharp contrast. For a tangier or creamier filling, you can also add goat cheese or feta cheese.
What Else Can I Add To This Omelette?
To enrich this omelette, you can add ingredients like diced bell peppers, spinach, mushrooms, or sun-dried tomatoes for extra flavor and nutrition. Adding herbs like basil, thyme, or parsley can enhance the taste. For added protein, consider including cooked bacon, ham, or sausage.
Can I Make This in an Air Fryer Instead?
Sure! Preheat the air fryer to 180°C/360°F and cook the seasoned zucchini and onion for about 10-12 minutes. After combining with other ingredients, layer the mixture in an air fryer-safe dish and cook for an additional 10-12 minutes or until the omelette is set and golden brown. Adjust times based on your air fryer model.
Can I Make This Omelette Ahead?
Absolutely! Prepare and bake the omelette as directed, then let it cool completely. Store it in an airtight container in the refrigerator for up to 2-3 days. Reheat individual slices in the microwave or oven before serving to enjoy a quick, convenient meal.
Can I Freeze This Omelette?
Of course! Once cooled, cut it into portions and wrap each piece tightly in plastic wrap or aluminum foil. Place the wrapped pieces in a freezer-safe bag or container and freeze for up to 2 months. Thaw in the refrigerator overnight and reheat in the oven or microwave before serving.
How to Store Zucchini and Onion Baked Omelette
If you have any leftovers, you can store them in the fridge for 2-3 days: reheat it for a few minutes, so it will be stringy again.
Ingredients
How to Make Zucchini and Onion Baked Omelette
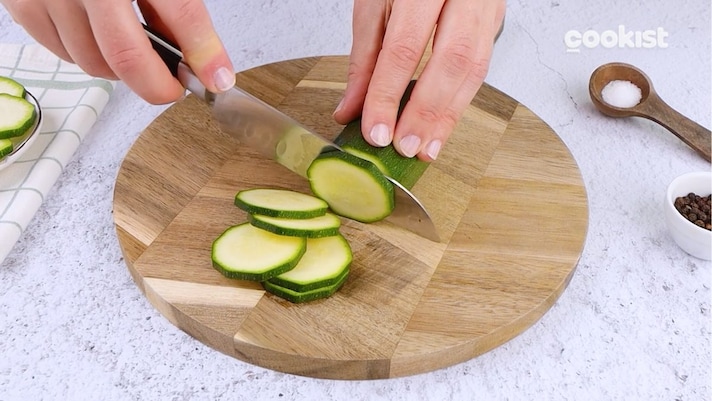
Cut the zucchini into slices.
Cut the zucchini into slices.
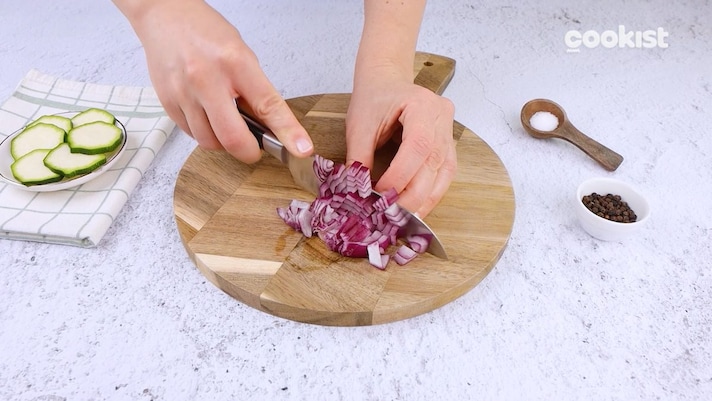
Then cut the onion into even diced cubes.
Then cut the onion into even diced cubes.
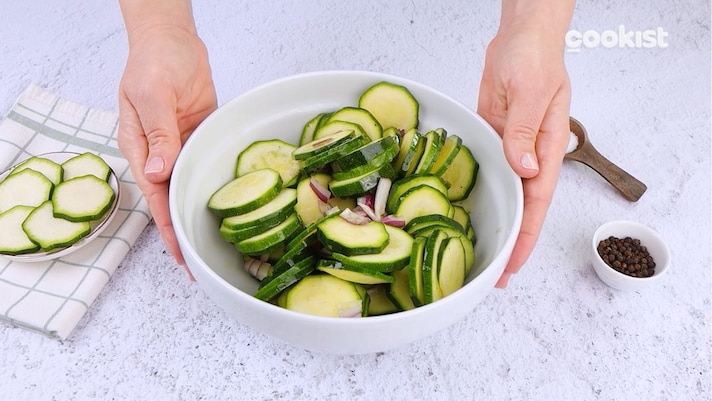
Transfer them to a bowl and season generously with salt, pepper and olive oil. Mix to combine and coat them with the seasoning.
Transfer them to a bowl and season generously with salt, pepper and olive oil. Mix to combine and coat them with the seasoning.
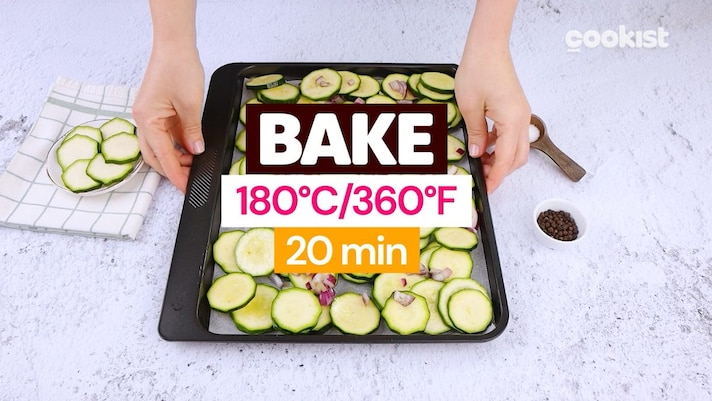
Pour the zucchini and onion into a baking tray lined with parchment paper and transfer to the oven. Bake them at 360°F (180°C) for about 20 minutes.
Pour the zucchini and onion into a baking tray lined with parchment paper and transfer to the oven. Bake them at 360°F (180°C) for about 20 minutes.
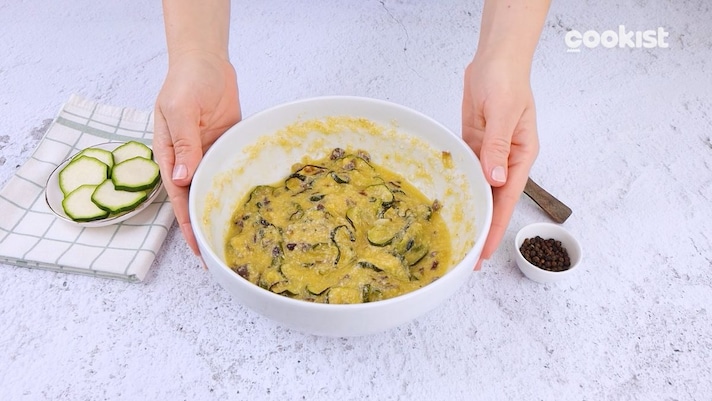
Once baked, transfer the zucchini and onion into a bowl and mix them with the eggs, the parmesan and the breadcrumbs to combine them.
Once baked, transfer the zucchini and onion into a bowl and mix them with the eggs, the parmesan and the breadcrumbs to combine them.
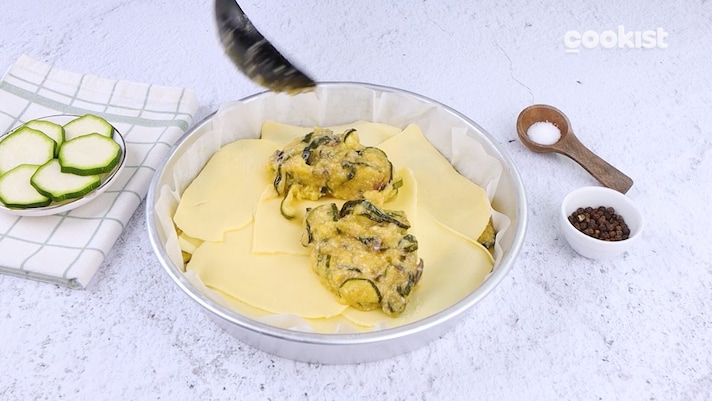
Pour half of the mixture into a baking dish covered with parchment paper and level it with a spatula. Arrange the cheese slices on top, then cover them with the remaining mixture. Transfer to the oven and bake at 360°F (180°C) for an additional 20 minutes.
Pour half of the mixture into a baking dish covered with parchment paper and level it with a spatula. Arrange the cheese slices on top, then cover them with the remaining mixture. Transfer to the oven and bake at 360°F (180°C) for an additional 20 minutes.

Let the omelette cool slightly before cutting into slices. Enjoy!
Let the omelette cool slightly before cutting into slices. Enjoy!

;Resize,width=712;)

;Resize,width=767;)
