
How to Make Ice Cube Tray Chocolates: The Ingenious No-Bake Method For Homemade Chocolate Treats!
Make delicious, budget-friendly chocolates using an ice cube tray! This simple method, born from a need for easy homemade treats, involves pouring melted chocolate into the tray, adding fillings like nuts and dried fruits, and covering with more chocolate. Refrigerate for three hours. Store in an airtight container in the fridge for up to two weeks.

Chocolates are often an expensive indulgence, especially when you crave gourmet creations or need a fancy treat for a party or guests. But did you know you don't need to be a maître chocolatier or master the art of tempering chocolate to create your own decadent delights? There’s an ingenious and incredibly easy method involving something as simple as an ice cube tray. Yes, you read that right—an ice cube tray can be your ticket to homemade gourmet chocolates.
Who Invented This Ice Cube Tray Method?
The ice cube tray chocolate method is a stroke of culinary genius, born from the need for a simple yet effective way to make chocolates at home. This technique has been a game-changer for home cooks, offering a straightforward process to create beautifully molded chocolates without any special equipment. The idea likely sprang from a moment of inspiration in someone’s kitchen, combining the functionality of ice cube trays with the allure of chocolate. Since then, it has become a beloved hack for chocolate lovers worldwide, allowing anyone to whip up a batch of delightful treats with minimal fuss.
How to Make Ice Cube Tray Chocolates
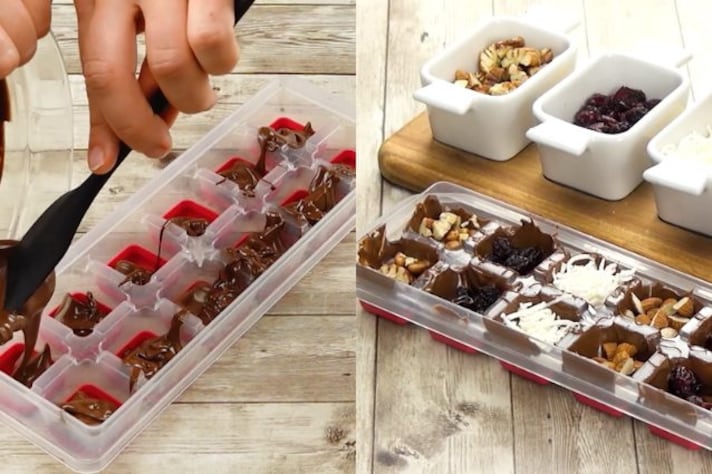
Creating these chocolates is a breeze, and it all starts with your choice of ingredients. Melted chocolate is your base, and you can use any type that tickles your fancy—dark, milk, or white. Begin by pouring the melted chocolate into an ice cube tray, making sure to cover the bottoms well. Let this first layer set for about ten minutes. This initial step ensures a solid base for your fillings.
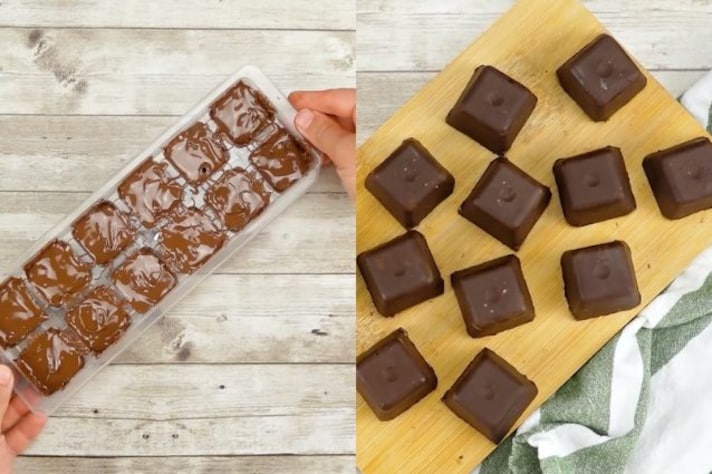
Next, it’s time to get creative with the insides. Add a mix of walnuts, almonds, grated coconut, dried cranberries, raisins, and a drizzle of caramel to each compartment. These ingredients add a delightful crunch and burst of flavor to your chocolates. Once your fillings are in place, cover them with more melted chocolate, ensuring the tray is filled to the top. The final step is to refrigerate the tray for about three hours. This allows the chocolates to set and makes them easy to pop out when ready to serve.
What Are the Best Types of Chocolate For This Hack?
High-quality dark chocolate is a fantastic choice for those who love a rich, intense flavor. If you prefer something sweeter and creamier, milk chocolate is your go-to. White chocolate, while technically not chocolate since it lacks cocoa solids, can offer a lovely vanilla flavor and creamy texture. For a twist, consider using flavored chocolates or adding a dash of sea salt to your dark chocolate for a sophisticated touch.
The fillings can also be varied to suit your taste. Think beyond nuts and dried fruits; you can use marshmallows, toffee bits, or even small cookies. For a more decadent experience, try adding a layer of peanut butter or Nutella. The combinations are endless, and experimenting with different ingredients can yield delightful surprises.
How Long Do These Delicacies Last For?
These chocolates should be stored in an airtight container in the refrigerator, where they can keep for up to two weeks. If you prefer your chocolate at room temperature, allow them to sit out for a few minutes before serving. This also helps in enhancing their flavor and texture. However, don’t leave them out for too long, especially in warmer climates, as they can melt or develop a bloom—a whitish coating caused by changes in the fat or sugar content.


;Resize,width=767;)
